Install PECL Extensions in OpenVZ Debian Appliances: Difference between revisions
Jump to navigation
Jump to search
(→Verify) |
(archive) |
||
| (3 intermediate revisions by 2 users not shown) | |||
| Line 1: | Line 1: | ||
{{Note|Article about the old stable Proxmox VE 3.x releases}} | |||
==Installing PECL extensions in Debian== | ==Installing PECL extensions in Debian== | ||
| Line 25: | Line 27: | ||
===Clean up=== | ===Clean up=== | ||
apt-get remove php5-dev | apt-get remove php5-dev | ||
apt-get | apt-get autoremove | ||
===Verify=== | ===Verify=== | ||
| Line 33: | Line 35: | ||
== References == | == References == | ||
* [http://php.net/manual/en/install.pecl.php PECL Manual] | * [http://php.net/manual/en/install.pecl.php PECL Manual] | ||
* [http://pear.php.net/manual/en/guide.users.commandline.installing.php PEAR Manual] | |||
* [http://forum.proxmox.com/threads/12623-pear-install-thru-dab Offline PEAR Install - Forum Post] | * [http://forum.proxmox.com/threads/12623-pear-install-thru-dab Offline PEAR Install - Forum Post] | ||
* [http:// | * [http://forum.proxmox.com/threads/pear-upgrade-in-dab-jessie.28226/#post-142148 PEAR upgrade in DAB Jessie] | ||
[[Category: | [[Category:Archive]] | ||
Latest revision as of 15:30, 18 July 2019
| Note: Article about the old stable Proxmox VE 3.x releases |
Installing PECL extensions in Debian
The Debian OpenVZ Templates for standard applications do not have the development libraries installed mainly for security and secondary for distribution file size reasons.
Install Pre-requisites
apt-get install make
apt-get install php5-dev
apt-get install php-pear
phpize will get installed
PECL Syntax
Syntax for PECL Extension Installs
pecl install extname-ver
PECL Extension Install Example
pecl install uploadprogress-1.0.1
Will return:
update-alternatives: using /usr/bin/php-config5 to provide /usr/bin/php-config (php-config) in auto mode.
update-alternatives: using /usr/bin/phpize5 to provide /usr/bin/phpize (phpize) in auto mode.
Enable the PECL Extension in PHP5
Create the file /etc/php5/conf.d/uploadprogress.ini using
nano /etc/php5/conf.d/uploadprogress.ini
with the following contents
; configuration for php Upload Progress module
extension=uploadprogress.so
Activate the Extension
/etc/init.d/apache2 restart
Clean up
apt-get remove php5-dev
apt-get autoremove
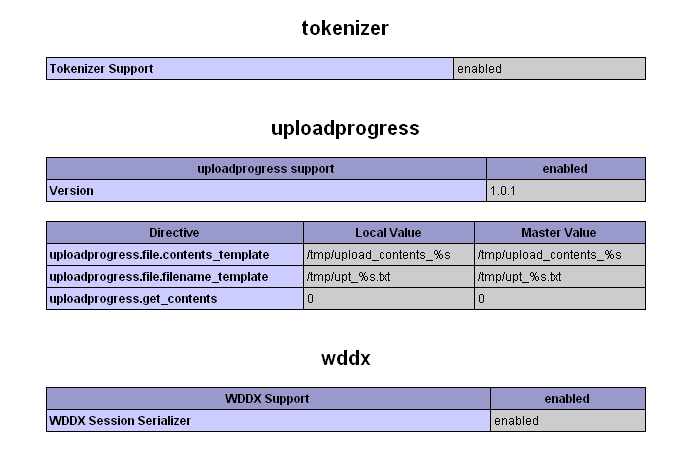
Verify
Create a phpinfo.php file in the webroot with the following contents:
<? echo phpinfo(); ?>
and browse it. You should get the following as a part of the the browser output:
