High Availability Cluster 4.x: Difference between revisions
(→HA Simulator: there is no need to run on PVE) |
|||
| Line 75: | Line 75: | ||
By using the HA simulator, you can test and learn the functionality of the Proxmox VE HA solutions. | By using the HA simulator, you can test and learn the functionality of the Proxmox VE HA solutions. | ||
With the simulator you are able to see and test like a real 3 node cluster with 6 VM's would behave. | |||
There is no need to setup or configuration a real cluster, it runs out of the box on the current code base. | |||
Install with apt: | Install with apt: | ||
apt-get install pve-ha-simulator | apt-get install pve-ha-simulator | ||
To start the simulator you must have a X11 redirection to your current system. | |||
If you are on a Linux machine you can use | |||
ssh root@<IPofPVE4> -Y | |||
Then it is necessary to create a working directory. | |||
mkdir working | |||
To start the simulator typ | |||
pve-ha-simulator working/ | |||
=Video Tutorials= | =Video Tutorials= | ||
Revision as of 10:44, 22 June 2015
Introduction
BETA NOT FOR PRODUCTION
Proxmox VE High Availability Cluster (Proxmox VE HA Cluster) enables the definition of high available virtual machines. In simple words, if a virtual machine (VM) is configured as HA and the physical host fails, the VM is automatically restarted on one of the remaining Proxmox VE Cluster nodes.
The Proxmox VE HA Cluster is based on the Proxmox VE HA Manager (pve-ha-manager) - using watchdog fencing. Major benefit of Linux softdog or hardware watchdog is zero configuration - it just works out of the box.
In order to learn more about functionality of the new Proxmox VE HA manager, install the HA simulator.
Update to the latest version
Before you start, make sure you have installed the latest packages, just run the following on all nodes:
apt-get update && apt-get dist-upgrade
System requirements
If you run HA, high end server hardware with no single point of failure is required. This includes redundant disks, redundant power supply, UPS systems, and network bonding.
- Proxmox VE 4.0 comes with Self-Fencing with hardware watchdog or Software watchdog.
- Fully configured Proxmox_VE_4.x_Cluster (version 4.0 and later), with at least 3 nodes (maximum supported configuration: currently 32 nodes per cluster).
- Shared storage (SAN, NAS/NFS, Ceph, DRBD9, ... for virtual disk images)
- Reliable, redundant network, suitable configured
- An extra network for cluster communication, one network for VM traffic and one network for storage traffic.
It's essential that you use redundant network connections for the cluster communication (bonding). If not, a simple switch reboot (or power loss on the switch) can fence all cluster nodes if it takes longer than 60 sec.
HA Configuration
Adding and managing VM´s or containers for HA can be done via GUI or CLI.
Fencing
Proxmox VE Cluster 4.0 or greater comes with watchdog fencing. This works out of the box, no configuration is required.
How Watchdog fencing works:
If the node has connection with the cluster and has quorum, the watchdog will be reset. If quorum is lost, the node is not able to reset the watchdog. This will trigger a reboot after 60 seconds.
If your hardware has a hardware watchdog, this one will be automatically detected and used. Otherwise, ha-manager just uses the Linux softdog. Therefore testing Proxmox VE HA inside a virtual environment is possible.
Enable a VM/CT for HA
On the CLI, you can use ha-manger to achieve this task.
IMPORTANT:
If you enable HA it's not possible to turnoff the VM inside the VM. Also, if it is disabled the VM will be stopped.
If you add a VM/CT, its instantly 'ha-managed'.
ha-manager add vm:100
To add a VM/CT on GUI.
Disable a VM/CT for HA
If you want to disable a ha-managed VM/CT (e.g. for shutdown) via CLI:
ha-manager disable vm:100
If you want to re-enable a ha-managed VM/CT:
ha-manager enable vm:100
HA Cluster Maintenance (node reboots)
If you need to reboot a node, e.g. because of a kernel update, you need to migrate all VM/CT to another node or disable them. By disabling them, all resources are stopped. All VM guests will get an ACPI shutdown request (if this won't work due to VM internal settings, they'll just get a 'stop').
The command will take some time for execution, monitor the "tasks" and the VM´s and CT´s on the GUI. As soon as the VM/CT are either stopped or migrated, you can reboot your node. As soon as the node is up again, continue with the next node and so on.
HA Simulator
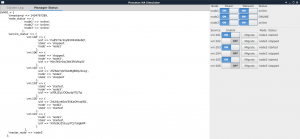
By using the HA simulator, you can test and learn the functionality of the Proxmox VE HA solutions.
With the simulator you are able to see and test like a real 3 node cluster with 6 VM's would behave.
There is no need to setup or configuration a real cluster, it runs out of the box on the current code base.
Install with apt:
apt-get install pve-ha-simulator
To start the simulator you must have a X11 redirection to your current system.
If you are on a Linux machine you can use
ssh root@<IPofPVE4> -Y
Then it is necessary to create a working directory.
mkdir working
To start the simulator typ
pve-ha-simulator working/
Video Tutorials
Testing
Before going into production it is highly recommended to do as many tests as possible. Then, do some more.
Useful command line tools
Here is a list of useful CLI tools:
- ha-manger - to manage the ha stack of the cluster
- pvecm - to manage the cluster-manager
- corosync* - to manipulate the corosync

