OpenVZ Console
Introduction
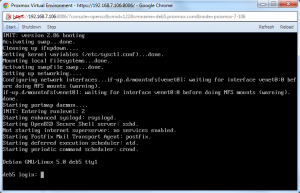
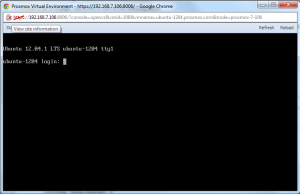
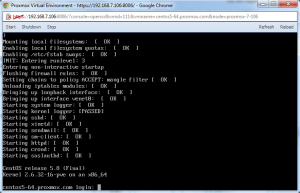
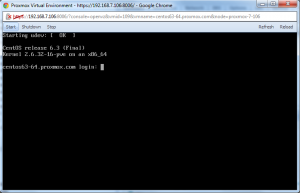
Beginning with Proxmox VE 2.2, we introduced a new console view (with login capability). Especially for beginners it is not that easy to understand and manage containers but with the new console this is big step forward. OpenVZ and KVM console now look quite similar.
But as most OpenVZ templates have disabled terminals, you need to enable it first. This article describes the changes needed for an already running OpenVZ container.
Note:
All Debian templates created with latest Debian Appliance Builder have already got this set of changes, just download them via GUI to your Proxmox VE storage (Debian 6 and 7 templates are up2date, 32 and 64 bit)
Debian
This method works for Debian 5/6/7, you can do this on the host without entering CT (but the CT must be running). Just log in to the Proxmox VE host and:
edit all inittabs under /var/lib/vz/root/ :
 nano /var/lib/vz/root/*/etc/inittab

 # add this
 1:2345:respawn:/sbin/getty 38400 tty1
Debian Lenny 5.0
Login via SSH (or use the VNC "Shell") to your Proxmox VE host and 'vzctl enter CTID' the container:
List all running container:
proxmox-ve:~# vzlist
     CTID      NPROC STATUS    IP_ADDR         HOSTNAME
      108         23 running   192.168.9.20    ubuntu-1204.proxmox.com
      109         18 running   192.168.9.21    centos63-64.proxmox.com
      111         15 running   192.168.9.23    centos5-64.proxmox.com
      114         14 running   192.168.9.30    deb6-32.proxmox.com
      115         15 running   192.168.9.31    deb7-32.proxmox.com
      122         14 running   192.168.9.36    deb5.proxmox.com
Enter the container:
proxmox-ve:~# vzctl enter 122
root@debian:/# nano /etc/inittab
On the bottom of /etc/inittab just add the following line:
1:2345:respawn:/sbin/getty 38400 tty1
Save the changes and shutdown/start the container via Console.
Debian Squeeze 6.0
Same as Debian Lenny 5.0
Sample /etc/inittab files
Debian Wheezy 7.0
Same as Debian Lenny 5.0
Ubuntu
Ubuntu 14.04 and Ubuntu 14.10
Login via SSH (or use the VNC "Shell") to your Proxmox VE host and 'vzctl enter CTID' the container:
List all running container:
proxmox-ve:~# vzlist
     CTID      NPROC STATUS    IP_ADDR         HOSTNAME
      108         23 running   192.168.9.20    ubuntu-1404.proxmox.com
      109         18 running   192.168.9.21    centos63-64.proxmox.com
      111         15 running   192.168.9.23    centos5-64.proxmox.com
      114         14 running   192.168.9.30    deb6-32.proxmox.com
      115         15 running   192.168.9.31    deb7-32.proxmox.com
      122         14 running   192.168.9.36    deb5.proxmox.com
Enter the container:
proxmox-ve:~# vzctl enter 108
root@ubuntu-1404:/# nano /etc/init/tty1.conf
Change/Create the file that it looks exactly like this:
# tty1 - getty
#
# This service maintains a getty on tty1 from the point the system is
# started until it is shut down again.

start on stopped rc RUNLEVEL=[2345]

stop on runlevel [!2345]

respawn
exec /sbin/getty -8 38400 tty1
Save the changes and shutdown/start the container via Console.
Ubuntu 10.04 and 12.04
Same as Ubuntu 14.04
Centos
Centos 5
Login via SSH (or use the VNC "Shell") to your Proxmox VE host and 'vzctl enter CTID' the container:
List all running container:
proxmox-ve:~# vzlist
     CTID      NPROC STATUS    IP_ADDR         HOSTNAME
      108         23 running   192.168.9.20    ubuntu-1204.proxmox.com
      109         18 running   192.168.9.21    centos63-64.proxmox.com
      111         15 running   192.168.9.23    centos5-64.proxmox.com
      114         14 running   192.168.9.30    deb6-32.proxmox.com
      115         15 running   192.168.9.31    deb7-32.proxmox.com
      122         14 running   192.168.9.36    deb5.proxmox.com
Enter the container:
proxmox-ve:~# vzctl enter 111
root@centos5-64:/# nano /etc/inittab
On the bottom of /etc/inittab just add the following line:
1:2345:respawn:/sbin/agetty tty1 38400 linux
Save the changes and shutdown/start the container via Console.
Centos 6
Login via SSH (or use the VNC "Shell") to your Proxmox VE host and 'vzctl enter CTID' the container:
List all running container:
proxmox-ve:~# vzlist
     CTID      NPROC STATUS    IP_ADDR         HOSTNAME
      108         23 running   192.168.9.20    ubuntu-1204.proxmox.com
      109         18 running   192.168.9.21    centos63-64.proxmox.com
      111         15 running   192.168.9.23    centos5-64.proxmox.com
      114         14 running   192.168.9.30    deb6-32.proxmox.com
      115         15 running   192.168.9.31    deb7-32.proxmox.com
      122         14 running   192.168.9.36    deb5.proxmox.com
Enter the container:
proxmox-ve:~# vzctl enter 109
root@centos63-64:/# nano /etc/init/tty.conf
Change/Create the file that it looks exactly like this:
# This service maintains a getty on tty1 from the point the system is
# started until it is shut down again.

start on stopped rc RUNLEVEL=[2345]

stop on runlevel [!2345]

respawn
exec /sbin/agetty -8 tty1 38400
Either run "start tty" without rebooting the container, or save the changes and shutdown/start the container via Console.
Troubleshooting
If you still want to use the previous method (vzctl enter CTID) you can open the host "Shell" and just type 'vzctl enter CTID" to manage your containers.
Java browser plugin
The console is using a Java applet, therefore you need latest Oracle (Sun) Java browser plugin installed and enabled in your browser (Google Chrome and Firefox preferred). If you are on Windows desktop, just go to java.com, if you run a Linux desktop you need to make sure that you run Oracle (Sun) Java plugin instead of the default openjdk. For Debian/Ubuntu based desktops, see Java_Console_(Ubuntu)
Modifying your templates
If you don't want to commit the changes above for every single CT you create, you can simply update the templates accordingly. For this, simply place the file you want to insert into your template (like etc/inittab for debian containers) into your template folder and update the template. The following is specific to CentOS 6, just replace filename/path and contents with the appropriate contents found above.
cd [TEMPLATE LOCATION] #Modify this

mkdir -p etc/init

cat <<EOF >etc/init/tty.conf
# This service maintains a getty on tty1 from the point the system is
# started until it is shut down again.

start on stopped rc RUNLEVEL=[2345]

stop on runlevel [!2345]

respawn
exec /sbin/agetty -8 tty1 38400
EOF

gunzip centos-6-standard_6.3-1_amd64.tar.gz
tar -rf centos-6-standard_6.3-1_amd64.tar etc
gzip centos-6-standard_6.3-1_amd64.tar

rm etc/init/tty.conf
rmdir -p etc/init


