Backup and Restore
Introduction
Backup is one of the most important integrated features of Proxmox VE. Backups can be created during run-time without downtime - Live backups.
Starting with V2.3, a new KVM live backup technology is introduced to Proxmox VE. The old backup system for KVM guests was using LVM snapshots which was working great in most situations. But it was not working if you store VM images on NFS, iSCSI LUN, Ceph RBD or Sheepdog. The new KVM live backup is targeted to work for all storage types and eliminates the need for special LVM configurations with enough snapshot space by avoiding the use of temporary storage. It is also very fast and effective because the new backup format is optimized for storing VM backups (sparse files, out of order data, minimized IO). A more technical description can be found here.
Proxmox VE backups are always full backups - containing all VM/CT configurations and all data.
Backup Storage
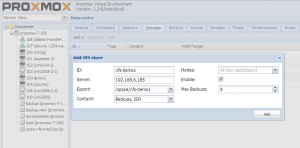
Before a backup can run, a backup storage must be defined. See also Storage Model.
In most situations, using a NFS server is the good way to store backups. Save those backups later to a tape drive, for off-site archive.
The "Max Backups" settings defines the maximum allowed backups of each VM/CT. That means, a scheduled job will store the defined number of backup of each VM/CT. If the limit is reached, the oldest backup is removed automatically.
Backup
There are 3 backup modes available:
- stop (KVM): Shutdown the VM to get a consistent state, Then start KVM live backup and restart the VM (short downtime).
- stop (OpenVZ and LXC): Stop the VM/CT during backup (very long downtime)
- suspend (KVM): same behaviour as 'snapshot' mode.
- suspend (OpenVZ and LXC): Use suspend/resume and multiple rsync passes. You can backup with minimal downtime without using LVM.
- snapshot (KVM): Use KVM live backup (no downtime, online)
- snapshot (OpenVZ): Use LVM2 snapshots (no downtime, online)
- snapshot (LXC): Use storage snapshots, as long as the storage support this, for example ZFS or Ceph (no downtime, online)
N.B. when LVM2 snapshot, the destination of the backup must be outside the LVM volume that contains the VM you are backing up (i.e. if your VM is in /pve/data that is mounted as /var/lib/vz, you can't save the backup in /var/lib/vz/dump).
Backup Now
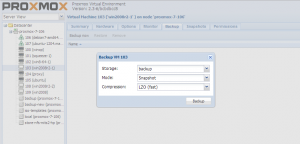
Backups can be triggered manually, just by selecting the VM/CT, the backup mode and the backup target.
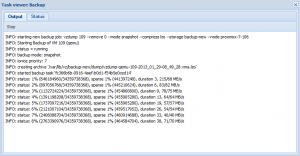
Each backup job will run as a background task, displaying the progress in % and bytes, the % of sparse regions, the overall duration and the backup read and write speed in MB/s - detailed info for KVM backup jobs only.
Example KVM Backup Log:
INFO: starting new backup job: vzdump 109 --remove 0 --mode snapshot --compress lzo --storage backup-new --node proxmox-7-106
INFO: Starting Backup of VM 109 (qemu)
INFO: status = running
INFO: backup mode: snapshot
INFO: ionice priority: 7
INFO: creating archive '/var/lib/vz/backup-new/dump/vzdump-qemu-109-2013_01_29-08_49_28.vma.lzo'
INFO: started backup task 'fc366b6b-0916-4aef-b0d1-f54b5e0ced14'
INFO: status: 1% (646184960/34359738368), sparse 1% (441397248), duration 3, 215/68 MB/s
INFO: status: 2% (897056768/34359738368), sparse 1% (445210624), duration 6, 83/82 MB/s
...
INFO: status: 88% (30430658560/34359738368), sparse 63% (21809438720), duration 145, 702/0 MB/s
INFO: status: 95% (32870039552/34359738368), sparse 70% (24248819712), duration 148, 813/0 MB/s
INFO: status: 100% (34359738368/34359738368), sparse 74% (25738514432), duration 151, 496/0 MB/s
INFO: transferred 34359 MB in 151 seconds (227 MB/s)
INFO: archive file size: 3.75GB
INFO: Finished Backup of VM 109 (00:02:32)
INFO: Backup job finished successfully
TASK OK
Example CT Backup Log:
INFO: starting new backup job: vzdump 106 --remove 0 --mode snapshot --compress lzo --storage backup --node proxmox-7-106
INFO: Starting Backup of VM 106 (openvz)
INFO: CTID 106 exist mounted running
INFO: status = running
INFO: backup mode: snapshot
INFO: ionice priority: 7
INFO: creating lvm snapshot of /dev/mapper/pve-data ('/dev/pve/vzsnap-proxmox-7-106-0')
INFO: Logical volume "vzsnap-proxmox-7-106-0" created
INFO: creating archive '/backup/dump/vzdump-openvz-106-2013_01_29-09_22_37.tar.lzo'
INFO: Total bytes written: 529295360 (505MiB, 17MiB/s)
INFO: archive file size: 279MB
INFO: Finished Backup of VM 106 (00:00:33)
INFO: Backup job finished successfully
TASK OK
Scheduled Backup
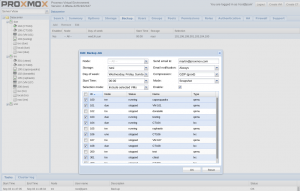
Backup jobs can be scheduled so that they are executed automatically on specific days and times, for selectable nodes and VMs/CTs.
This is quite configurable and can be done in the Datacenter -> Backup tab.
The job then will try do backup all selected VMs on the specified date and time, if a single backup fails this one will be skipped, the error logged and then the job continues with the remaining services.
Restore
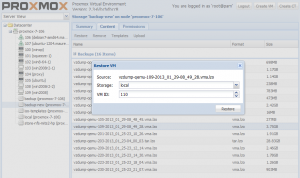
Backups can be restored on any node via GUI. You can restore to the original VMID, which means the currently running VM/CT will be deleted and replaced by the restore - or you can restore to a new VMID and a new storage location.
Each restore job will run as a background task, displaying the progress in % and bytes and the overall duration - detailed info for KVM restore job only.
Example KVM restore job log:
restore vma archive: lzop -d -c /var/lib/vz/backup-new/dump/vzdump-qemu-109-2013_01_29-08_49_28.vma.lzo|vma extract -v -r /var/tmp/vzdumptmp324484.fifo - /var/tmp/vzdumptmp324484
CFG: size: 469 name: qemu-server.conf
DEV: dev_id=1 size: 34359738368 devname: drive-virtio0
CTIME: Tue Jan 29 08:49:29 2013
Formatting '/var/lib/vz/images/110/vm-110-disk-1.qcow2', fmt=qcow2 size=34359738368 encryption=off cluster_size=65536 preallocation='metadata' lazy_refcounts=off
new volume ID is 'local:110/vm-110-disk-1.qcow2'
map 'drive-virtio0' to '/var/lib/vz/images/110/vm-110-disk-1.qcow2' (write zeros = 0)
progress 1% (read 343605248 bytes, duration 1 sec)
progress 2% (read 687210496 bytes, duration 2 sec)
progress 3% (read 1030815744 bytes, duration 4 sec)
...
progress 98% (read 33672593408 bytes, duration 87 sec)
progress 99% (read 34016198656 bytes, duration 87 sec)
progress 100% (read 34359738368 bytes, duration 87 sec)
TASK OK
Example CT Restore Task Log:
extracting archive '/backup/dump/vzdump-openvz-106-2013_01_29-09_22_37.tar.lzo'
Total bytes read: 529295360 (505MiB, 151MiB/s)
restore configuration to '/etc/pve/nodes/proxmox-7-106/openvz/111.conf'
TASK OK
vzdump.conf
If you need custom settings for vzdump, you can set this via /etc/vzdump.conf. For details, see:
man vzdump
CLI
Backup
For KVM VM and OpenVZ/LXC CT:
man vzdump
Restore
For KVM VM:
man qmrestore
For OpenVZ CT:
man vzrestore
For LXC CT:
pct help restore
