Difference between revisions of "Qemu/KVM Virtual Machines"
(fix duplicate import) |
|||
| (7 intermediate revisions by the same user not shown) | |||
| Line 13: | Line 13: | ||
an iso image as a parameter to Qemu, and the OS running in the emulated computer | an iso image as a parameter to Qemu, and the OS running in the emulated computer | ||
will see a real CDROM inserted in a CD drive. | will see a real CDROM inserted in a CD drive. | ||
| − | Qemu can | + | Qemu can emulate a great variety of hardware from ARM to Sparc, but Proxmox VE is |
only concerned with 32 and 64 bits PC clone emulation, since it represents the | only concerned with 32 and 64 bits PC clone emulation, since it represents the | ||
overwhelming majority of server hardware. The emulation of PC clones is also one | overwhelming majority of server hardware. The emulation of PC clones is also one | ||
| Line 22: | Line 22: | ||
It means that Qemu is running with the support of the virtualization processor | It means that Qemu is running with the support of the virtualization processor | ||
extensions, via the Linux kvm module. In the context of Proxmox VE Qemu and | extensions, via the Linux kvm module. In the context of Proxmox VE Qemu and | ||
| − | KVM can be | + | KVM can be used interchangeably as Qemu in Proxmox VE will always try to load the kvm |
module. | module. | ||
Qemu inside Proxmox VE runs as a root process, since this is required to access block | Qemu inside Proxmox VE runs as a root process, since this is required to access block | ||
| Line 42: | Line 42: | ||
paravirtualized virtio devices, which includes a paravirtualized generic disk | paravirtualized virtio devices, which includes a paravirtualized generic disk | ||
controller, a paravirtualized network card, a paravirtualized serial port, | controller, a paravirtualized network card, a paravirtualized serial port, | ||
| − | a paravirtualized SCSI controller, etc | + | a paravirtualized SCSI controller, etc … |
It is highly recommended to use the virtio devices whenever you can, as they | It is highly recommended to use the virtio devices whenever you can, as they | ||
provide a big performance improvement. Using the virtio generic disk controller | provide a big performance improvement. Using the virtio generic disk controller | ||
| Line 50: | Line 50: | ||
measured with iperf(1). [See this benchmark on the KVM wiki | measured with iperf(1). [See this benchmark on the KVM wiki | ||
http://www.linux-kvm.org/page/Using_VirtIO_NIC] | http://www.linux-kvm.org/page/Using_VirtIO_NIC] | ||
| − | Virtual Machines | + | Virtual Machines Settings |
Generally speaking Proxmox VE tries to choose sane defaults for virtual machines | Generally speaking Proxmox VE tries to choose sane defaults for virtual machines | ||
(VM). Make sure you understand the meaning of the settings you change, as it | (VM). Make sure you understand the meaning of the settings you change, as it | ||
| Line 69: | Line 69: | ||
the IDE controller, has a design which goes back to the 1984 PC/AT disk | the IDE controller, has a design which goes back to the 1984 PC/AT disk | ||
controller. Even if this controller has been superseded by more more designs, | controller. Even if this controller has been superseded by more more designs, | ||
| − | each and every OS you can think has support for it, making it a great choice | + | each and every OS you can think of has support for it, making it a great choice |
if you want to run an OS released before 2003. You can connect up to 4 devices | if you want to run an OS released before 2003. You can connect up to 4 devices | ||
on this controller. | on this controller. | ||
| Line 78: | Line 78: | ||
hardware, and can connect up to 14 storage devices. Proxmox VE emulates by default a | hardware, and can connect up to 14 storage devices. Proxmox VE emulates by default a | ||
LSI 53C895A controller. | LSI 53C895A controller. | ||
| − | A SCSI controller of type | + | A SCSI controller of type VirtIO SCSI is the recommended setting if you aim for |
performance and is automatically selected for newly created Linux VMs since | performance and is automatically selected for newly created Linux VMs since | ||
Proxmox VE 4.3. Linux distributions have support for this controller since 2012, and | Proxmox VE 4.3. Linux distributions have support for this controller since 2012, and | ||
FreeBSD since 2014. For Windows OSes, you need to provide an extra iso | FreeBSD since 2014. For Windows OSes, you need to provide an extra iso | ||
containing the drivers during the installation. | containing the drivers during the installation. | ||
| + | If you aim at maximum performance, you can select a SCSI controller of type | ||
| + | VirtIO SCSI single which will allow you to select the IO Thread option. | ||
| + | When selecting VirtIO SCSI single Qemu will create a new controller for | ||
| + | each disk, instead of adding all disks to the same controller. | ||
The Virtio controller, also called virtio-blk to distinguish from | The Virtio controller, also called virtio-blk to distinguish from | ||
| − | the | + | the VirtIO SCSI controller, is an older type of paravirtualized controller |
which has been superseded in features by the Virtio SCSI Controller. | which has been superseded in features by the Virtio SCSI Controller. | ||
On each controller you attach a number of emulated hard disks, which are backed | On each controller you attach a number of emulated hard disks, which are backed | ||
| Line 109: | Line 113: | ||
If you want the Proxmox VE backup manager to skip a disk when doing a backup of a VM, | If you want the Proxmox VE backup manager to skip a disk when doing a backup of a VM, | ||
you can set the No backup option on that disk. | you can set the No backup option on that disk. | ||
| + | If you want the Proxmox VE storage replication mechanism to skip a disk when starting | ||
| + | a replication job, you can set the Skip replication option on that disk. | ||
| + | As of Proxmox VE 5.0, replication requires the disk images to be on a storage of type | ||
| + | zfspool, so adding a disk image to other storages when the VM has replication | ||
| + | configured requires to skip replication for this disk image. | ||
If your storage supports thin provisioning (see the storage chapter in the | If your storage supports thin provisioning (see the storage chapter in the | ||
Proxmox VE guide), and your VM has a SCSI controller you can activate the Discard | Proxmox VE guide), and your VM has a SCSI controller you can activate the Discard | ||
| Line 115: | Line 124: | ||
emulated SCSI controller will relay this information to the storage, which will | emulated SCSI controller will relay this information to the storage, which will | ||
then shrink the disk image accordingly. | then shrink the disk image accordingly. | ||
| − | IO | + | IO Thread |
| − | or with the SCSI controller, when the emulated controller type is VirtIO SCSI. | + | The option IO Thread can only be used when using a disk with the |
| − | With this enabled, Qemu | + | VirtIO controller, or with the SCSI controller, when the emulated controller |
| − | so it | + | type is VirtIO SCSI single. |
| + | With this enabled, Qemu creates one I/O thread per storage controller, | ||
| + | instead of a single thread for all I/O, so it increases performance when | ||
| + | multiple disks are used and each disk has its own storage controller. | ||
Note that backups do not currently work with IO Thread enabled. | Note that backups do not currently work with IO Thread enabled. | ||
CPU | CPU | ||
| Line 132: | Line 144: | ||
Multithreaded applications will of course benefit from a large number of | Multithreaded applications will of course benefit from a large number of | ||
virtual cpus, as for each virtual cpu you add, Qemu will create a new thread of | virtual cpus, as for each virtual cpu you add, Qemu will create a new thread of | ||
| − | execution on the host system. If | + | execution on the host system. If you’re not sure about the workload of your VM, |
it is usually a safe bet to set the number of Total cores to 2. | it is usually a safe bet to set the number of Total cores to 2. | ||
It is perfectly safe to set the overall number of total cores in all | It is perfectly safe to set the overall number of total cores in all | ||
| Line 144: | Line 156: | ||
Qemu can emulate a number different of CPU types from 486 to the latest Xeon | Qemu can emulate a number different of CPU types from 486 to the latest Xeon | ||
processors. Each new processor generation adds new features, like hardware | processors. Each new processor generation adds new features, like hardware | ||
| − | assisted 3d rendering, random number generation, memory protection, etc | + | assisted 3d rendering, random number generation, memory protection, etc … |
Usually you should select for your VM a processor type which closely matches the | Usually you should select for your VM a processor type which closely matches the | ||
CPU of the host system, as it means that the host CPU features (also called CPU | CPU of the host system, as it means that the host CPU features (also called CPU | ||
| Line 156: | Line 168: | ||
kvm64 is a Pentium 4 look a like CPU type, which has a reduced CPU flags set, | kvm64 is a Pentium 4 look a like CPU type, which has a reduced CPU flags set, | ||
but is guaranteed to work everywhere. | but is guaranteed to work everywhere. | ||
| − | + | In short, if you care about live migration and moving VMs between nodes, leave | |
the kvm64 default. If you donât care about live migration, set the CPU type to | the kvm64 default. If you donât care about live migration, set the CPU type to | ||
host, as in theory this will give your guests maximum performance. | host, as in theory this will give your guests maximum performance. | ||
| Line 174: | Line 186: | ||
Proxmox VE to dynamically allocate memory based on the current RAM usage of the | Proxmox VE to dynamically allocate memory based on the current RAM usage of the | ||
host. | host. | ||
| + | Fixed Memory Allocation | ||
When choosing a fixed size memory Proxmox VE will simply allocate what you | When choosing a fixed size memory Proxmox VE will simply allocate what you | ||
specify to your VM. | specify to your VM. | ||
| + | Even when using a fixed memory size, the ballooning device gets added to the | ||
| + | VM, because it delivers useful information such as how much memory the guest | ||
| + | really uses. | ||
| + | In general, you should leave ballooning enabled, but if you want to disable | ||
| + | it (e.g. for debugging purposes), simply uncheck | ||
| + | Ballooning or set | ||
| + | balloon: 0 | ||
| + | in the configuration. | ||
| + | Automatic Memory Allocation | ||
When choosing to automatically allocate memory, Proxmox VE will make sure that the | When choosing to automatically allocate memory, Proxmox VE will make sure that the | ||
minimum amount you specified is always available to the VM, and if RAM usage on | minimum amount you specified is always available to the VM, and if RAM usage on | ||
| Line 199: | Line 221: | ||
All Linux distributions released after 2010 have the balloon kernel driver | All Linux distributions released after 2010 have the balloon kernel driver | ||
included. For Windows OSes, the balloon driver needs to be added manually and can | included. For Windows OSes, the balloon driver needs to be added manually and can | ||
| − | incur a slowdown of the guest, so we | + | incur a slowdown of the guest, so we don’t recommend using it on critical |
systems. | systems. | ||
When allocating RAMs to your VMs, a good rule of thumb is always to leave 1GB | When allocating RAMs to your VMs, a good rule of thumb is always to leave 1GB | ||
| Line 228: | Line 250: | ||
You can also skip adding a network device when creating a VM by selecting No | You can also skip adding a network device when creating a VM by selecting No | ||
network device. | network device. | ||
| − | + | Multiqueue | |
| + | If you are using the VirtIO driver, you can optionally activate the | ||
Multiqueue option. This option allows the guest OS to process networking | Multiqueue option. This option allows the guest OS to process networking | ||
packets using multiple virtual CPUs, providing an increase in the total number | packets using multiple virtual CPUs, providing an increase in the total number | ||
| Line 240: | Line 263: | ||
the VM the number of multi-purpose channels on each VirtIO NIC with the ethtool | the VM the number of multi-purpose channels on each VirtIO NIC with the ethtool | ||
command: | command: | ||
| − | ethtool -L | + | ethtool -L ens1 combined X |
where X is the number of the number of vcpus of the VM. | where X is the number of the number of vcpus of the VM. | ||
You should note that setting the Multiqueue parameter to a value greater | You should note that setting the Multiqueue parameter to a value greater | ||
| Line 265: | Line 288: | ||
but the device is not present in the host, the VM can boot without problems. | but the device is not present in the host, the VM can boot without problems. | ||
As soon as the device/port ist available in the host, it gets passed through. | As soon as the device/port ist available in the host, it gets passed through. | ||
| − | Using this kind of USB passthrough | + | Using this kind of USB passthrough means that you cannot move |
a VM online to another host, since the hardware is only available | a VM online to another host, since the hardware is only available | ||
on the host the VM is currently residing. | on the host the VM is currently residing. | ||
| Line 284: | Line 307: | ||
This disk will be included in backups and snapshots, and there can only be one. | This disk will be included in backups and snapshots, and there can only be one. | ||
You can create such a disk with the following command: | You can create such a disk with the following command: | ||
| − | qm set | + | qm set <vmid> -efidisk0 <storage>:1,format=<format> |
| − | Where | + | Where <storage> is the storage where you want to have the disk, and |
| − | + | <format> is a format which the storage supports. Alternatively, you can | |
| − | create such a disk through the web interface with Add | + | create such a disk through the web interface with Add → EFI Disk in the |
hardware section of a VM. | hardware section of a VM. | ||
When using OVMF with a virtual display (without VGA passthrough), | When using OVMF with a virtual display (without VGA passthrough), | ||
| Line 293: | Line 316: | ||
with a press of the ESC button during boot), or you have to choose | with a press of the ESC button during boot), or you have to choose | ||
SPICE as the display type. | SPICE as the display type. | ||
| + | Automatic Start and Shutdown of Virtual Machines | ||
| + | After creating your VMs, you probably want them to start automatically | ||
| + | when the host system boots. For this you need to select the option Start at | ||
| + | boot from the Options Tab of your VM in the web interface, or set it with | ||
| + | the following command: | ||
| + | qm set <vmid> -onboot 1 | ||
| + | Start and Shutdown Order | ||
| + | In some case you want to be able to fine tune the boot order of your | ||
| + | VMs, for instance if one of your VM is providing firewalling or DHCP | ||
| + | to other guest systems. For this you can use the following | ||
| + | parameters: | ||
| + | Start/Shutdown order: Defines the start order priority. E.g. set it to 1 if | ||
| + | you want the VM to be the first to be started. (We use the reverse startup | ||
| + | order for shutdown, so a machine with a start order of 1 would be the last to | ||
| + | be shut down) | ||
| + | Startup delay: Defines the interval between this VM start and subsequent | ||
| + | VMs starts . E.g. set it to 240 if you want to wait 240 seconds before starting | ||
| + | other VMs. | ||
| + | Shutdown timeout: Defines the duration in seconds Proxmox VE should wait | ||
| + | for the VM to be offline after issuing a shutdown command. | ||
| + | By default this value is set to 60, which means that Proxmox VE will issue a | ||
| + | shutdown request, wait 60s for the machine to be offline, and if after 60s | ||
| + | the machine is still online will notify that the shutdown action failed. | ||
| + | VMs managed by the HA stack do not follow the start on boot and | ||
| + | boot order options currently. Those VMs will be skipped by the startup and | ||
| + | shutdown algorithm as the HA manager itself ensures that VMs get started and | ||
| + | stopped. | ||
| + | Please note that machines without a Start/Shutdown order parameter will always | ||
| + | start after those where the parameter is set, and this parameter only | ||
| + | makes sense between the machines running locally on a host, and not | ||
| + | cluster-wide. | ||
| + | Migration | ||
| + | If you have a cluster, you can migrate your VM to another host with | ||
| + | qm migrate <vmid> <target> | ||
| + | There are generally two mechanisms for this | ||
| + | Online Migration (aka Live Migration) | ||
| + | Offline Migration | ||
| + | Online Migration | ||
| + | When your VM is running and it has no local resources defined (such as disks | ||
| + | on local storage, passed through devices, etc.) you can initiate a live | ||
| + | migration with the -online flag. | ||
| + | How it works | ||
| + | This starts a Qemu Process on the target host with the incoming flag, which | ||
| + | means that the process starts and waits for the memory data and device states | ||
| + | from the source Virtual Machine (since all other resources, e.g. disks, | ||
| + | are shared, the memory content and device state are the only things left | ||
| + | to transmit). | ||
| + | Once this connection is established, the source begins to send the memory | ||
| + | content asynchronously to the target. If the memory on the source changes, | ||
| + | those sections are marked dirty and there will be another pass of sending data. | ||
| + | This happens until the amount of data to send is so small that it can | ||
| + | pause the VM on the source, send the remaining data to the target and start | ||
| + | the VM on the target in under a second. | ||
| + | Requirements | ||
| + | For Live Migration to work, there are some things required: | ||
| + | The VM has no local resources (e.g. passed through devices, local disks, etc.) | ||
| + | The hosts are in the same Proxmox VE cluster. | ||
| + | The hosts have a working (and reliable) network connection. | ||
| + | The target host must have the same or higher versions of the | ||
| + | Proxmox VE packages. (It might work the other way, but this is never guaranteed) | ||
| + | Offline Migration | ||
| + | If you have local resources, you can still offline migrate your VMs, | ||
| + | as long as all disk are on storages, which are defined on both hosts. | ||
| + | Then the migration will copy the disk over the network to the target host. | ||
| + | Copies and Clones | ||
| + | VM installation is usually done using an installation media (CD-ROM) | ||
| + | from the operation system vendor. Depending on the OS, this can be a | ||
| + | time consuming task one might want to avoid. | ||
| + | An easy way to deploy many VMs of the same type is to copy an existing | ||
| + | VM. We use the term clone for such copies, and distinguish between | ||
| + | linked and full clones. | ||
| + | Full Clone | ||
| + | The result of such copy is an independent VM. The | ||
| + | new VM does not share any storage resources with the original. | ||
| + | It is possible to select a Target Storage, so one can use this to | ||
| + | migrate a VM to a totally different storage. You can also change the | ||
| + | disk image Format if the storage driver supports several formats. | ||
| + | A full clone need to read and copy all VM image data. This is | ||
| + | usually much slower than creating a linked clone. | ||
| + | Some storage types allows to copy a specific Snapshot, which | ||
| + | defaults to the current VM data. This also means that the final copy | ||
| + | never includes any additional snapshots from the original VM. | ||
| + | Linked Clone | ||
| + | Modern storage drivers supports a way to generate fast linked | ||
| + | clones. Such a clone is a writable copy whose initial contents are the | ||
| + | same as the original data. Creating a linked clone is nearly | ||
| + | instantaneous, and initially consumes no additional space. | ||
| + | They are called linked because the new image still refers to the | ||
| + | original. Unmodified data blocks are read from the original image, but | ||
| + | modification are written (and afterwards read) from a new | ||
| + | location. This technique is called Copy-on-write. | ||
| + | This requires that the original volume is read-only. With Proxmox VE one | ||
| + | can convert any VM into a read-only Template). Such | ||
| + | templates can later be used to create linked clones efficiently. | ||
| + | You cannot delete the original template while linked clones | ||
| + | exists. | ||
| + | It is not possible to change the Target storage for linked clones, | ||
| + | because this is a storage internal feature. | ||
| + | The Target node option allows you to create the new VM on a | ||
| + | different node. The only restriction is that the VM is on shared | ||
| + | storage, and that storage is also available on the target node. | ||
| + | To avoid resource conflicts, all network interface MAC addresses gets | ||
| + | randomized, and we generate a new UUID for the VM BIOS (smbios1) | ||
| + | setting. | ||
| + | Virtual Machine Templates | ||
| + | One can convert a VM into a Template. Such templates are read-only, | ||
| + | and you can use them to create linked clones. | ||
| + | It is not possible to start templates, because this would modify | ||
| + | the disk images. If you want to change the template, create a linked | ||
| + | clone and modify that. | ||
| + | Importing Virtual Machines from foreign hypervisors | ||
| + | A VM export from a foreign hypervisor takes usually the form of one or more disk | ||
| + | images, with a configuration file describing the settings of the VM (RAM, | ||
| + | number of cores). | ||
| + | The disk images can be in the vmdk format, if the disks come from | ||
| + | VMware or VirtualBox, or qcow2 if the disks come from a KVM hypervisor. | ||
| + | The most popular configuration format for VM exports is the OVF standard, but in | ||
| + | practice interoperation is limited because many settings are not implemented in | ||
| + | the standard itself, and hypervisors export the supplementary information | ||
| + | in non-standard extensions. | ||
| + | Besides the problem of format, importing disk images from other hypervisors | ||
| + | may fail if the emulated hardware changes too much from one hypervisor to | ||
| + | another. Windows VMs are particularly concerned by this, as the OS is very | ||
| + | picky about any changes of hardware. This problem may be solved by | ||
| + | installing the MergeIDE.zip utility available from the Internet before exporting | ||
| + | and choosing a hard disk type of IDE before booting the imported Windows VM. | ||
| + | Finally there is the question of paravirtualized drivers, which improve the | ||
| + | speed of the emulated system and are specific to the hypervisor. | ||
| + | GNU/Linux and other free Unix OSes have all the necessary drivers installed by | ||
| + | default and you can switch to the paravirtualized drivers right after importing | ||
| + | the VM. For Windows VMs, you need to install the Windows paravirtualized | ||
| + | drivers by yourself. | ||
| + | GNU/Linux and other free Unix can usually be imported without hassle. Note | ||
| + | that we cannot guarantee a successful import/export of Windows WM in all | ||
| + | cases due to the problems above. | ||
| + | Step-by-step example of a Windows disk image import | ||
| + | Microsoft provides | ||
| + | Virtual Machines exports | ||
| + | in different formats for browser testing. We are going to use one of these to | ||
| + | demonstrate a VMDK import. | ||
| + | Download the export zip | ||
| + | After getting informed about the user agreement, choose the Microsoft Edge on | ||
| + | Windows 10 Virtual Machine for the VMware platform, and download the zip. | ||
| + | Extract the disk image from the zip | ||
| + | Using the unzip utility or any archiver of your choice, unpack the zip, | ||
| + | and copy via ssh/scp the vmdk file to your Proxmox VE host. | ||
| + | Create a new virtual machine and import the disk | ||
| + | Create a virtual machine with 2 cores, 2GB RAM, and one NIC on the default | ||
| + | vmbr0 bridge: | ||
| + | qm create 999 -net0 e1000,bridge=vmbr0 -name Win10 -memory 2048 -bootdisk sata0 | ||
| + | Import the disk image to the local-lvm storage: | ||
| + | qm importdisk 999 MSEdge "MSEdge - Win10_preview.vmdk" local-lvm | ||
| + | The disk will be marked as Unused in the VM 999 configuration. | ||
| + | After that you can go in the GUI, in the VM Hardware, Edit the unused disk | ||
| + | and set the Bus/Device to SATA/0. | ||
| + | The VM is ready to be started. | ||
Managing Virtual Machines with qm | Managing Virtual Machines with qm | ||
qm is the tool to manage Qemu/Kvm virtual machines on Proxmox VE. You can | qm is the tool to manage Qemu/Kvm virtual machines on Proxmox VE. You can | ||
| Line 300: | Line 479: | ||
create and delete virtual disks. | create and delete virtual disks. | ||
CLI Usage Examples | CLI Usage Examples | ||
| − | + | Using an iso file uploaded on the local storage, create a VM | |
| − | qm create 300 -ide0 4 -net0 e1000 -cdrom proxmox-mailgateway_2.1.iso | + | with a 4 GB IDE disk on the local-lvm storage |
| + | qm create 300 -ide0 local-lvm:4 -net0 e1000 -cdrom local:iso/proxmox-mailgateway_2.1.iso | ||
Start the new VM | Start the new VM | ||
qm start 300 | qm start 300 | ||
Send a shutdown request, then wait until the VM is stopped. | Send a shutdown request, then wait until the VM is stopped. | ||
| − | qm shutdown 300 && qm wait 300 | + | qm shutdown 300 && qm wait 300 |
Same as above, but only wait for 40 seconds. | Same as above, but only wait for 40 seconds. | ||
| − | qm shutdown 300 && qm wait 300 -timeout 40 | + | qm shutdown 300 && qm wait 300 -timeout 40 |
Configuration | Configuration | ||
| − | + | VM configuration files are stored inside the Proxmox cluster file | |
| − | + | system, and can be accessed at /etc/pve/qemu-server/<VMID>.conf. | |
| − | + | Like other files stored inside /etc/pve/, they get automatically | |
| − | system, and can be accessed at /etc/pve/qemu-server/ | + | replicated to all other cluster nodes. |
| + | VMIDs < 100 are reserved for internal purposes, and VMIDs need to be | ||
| + | unique cluster wide. | ||
| + | Example VM Configuration | ||
| + | cores: 1 | ||
| + | sockets: 1 | ||
| + | memory: 512 | ||
| + | name: webmail | ||
| + | ostype: l26 | ||
| + | bootdisk: virtio0 | ||
| + | net0: e1000=EE:D2:28:5F:B6:3E,bridge=vmbr0 | ||
| + | virtio0: local:vm-100-disk-1,size=32G | ||
| + | Those configuration files are simple text files, and you can edit them | ||
| + | using a normal text editor (vi, nano, …). This is sometimes | ||
| + | useful to do small corrections, but keep in mind that you need to | ||
| + | restart the VM to apply such changes. | ||
| + | For that reason, it is usually better to use the qm command to | ||
| + | generate and modify those files, or do the whole thing using the GUI. | ||
| + | Our toolkit is smart enough to instantaneously apply most changes to | ||
| + | running VM. This feature is called "hot plug", and there is no | ||
| + | need to restart the VM in that case. | ||
| + | File Format | ||
| + | VM configuration files use a simple colon separated key/value | ||
| + | format. Each line has the following format: | ||
| + | # this is a comment | ||
| + | OPTION: value | ||
| + | Blank lines in those files are ignored, and lines starting with a # | ||
| + | character are treated as comments and are also ignored. | ||
| + | Snapshots | ||
| + | When you create a snapshot, qm stores the configuration at snapshot | ||
| + | time into a separate snapshot section within the same configuration | ||
| + | file. For example, after creating a snapshot called “testsnapshot”, | ||
| + | your configuration file will look like this: | ||
| + | VM configuration with snapshot | ||
| + | memory: 512 | ||
| + | swap: 512 | ||
| + | parent: testsnaphot | ||
| + | ... | ||
| + | [testsnaphot] | ||
| + | memory: 512 | ||
| + | swap: 512 | ||
| + | snaptime: 1457170803 | ||
| + | ... | ||
| + | There are a few snapshot related properties like parent and | ||
| + | snaptime. The parent property is used to store the parent/child | ||
| + | relationship between snapshots. snaptime is the snapshot creation | ||
| + | time stamp (Unix epoch). | ||
Options | Options | ||
| − | acpi: boolean (default=1) | + | acpi: <boolean> (default = 1) |
Enable/disable ACPI. | Enable/disable ACPI. | ||
| − | agent: boolean (default=0) | + | agent: <boolean> (default = 0) |
Enable/disable Qemu GuestAgent. | Enable/disable Qemu GuestAgent. | ||
| − | args: string | + | args: <string> |
Arbitrary arguments passed to kvm, for example: | Arbitrary arguments passed to kvm, for example: | ||
args: -no-reboot -no-hpet | args: -no-reboot -no-hpet | ||
this option is for experts only. | this option is for experts only. | ||
| − | autostart: boolean (default=0) | + | autostart: <boolean> (default = 0) |
Automatic restart after crash (currently ignored). | Automatic restart after crash (currently ignored). | ||
| − | balloon: integer (0 - N) | + | balloon: <integer> (0 - N) |
Amount of target RAM for the VM in MB. Using zero disables the ballon driver. | Amount of target RAM for the VM in MB. Using zero disables the ballon driver. | ||
| − | bios: | + | bios: <ovmf | seabios> (default = seabios) |
Select BIOS implementation. | Select BIOS implementation. | ||
| − | boot: [acdn]{1,4} (default=cdn) | + | boot: [acdn]{1,4} (default = cdn) |
Boot on floppy (a), hard disk (c), CD-ROM (d), or network (n). | Boot on floppy (a), hard disk (c), CD-ROM (d), or network (n). | ||
bootdisk: (ide|sata|scsi|virtio)\d+ | bootdisk: (ide|sata|scsi|virtio)\d+ | ||
Enable booting from specified disk. | Enable booting from specified disk. | ||
| − | cdrom: volume | + | cdrom: <volume> |
This is an alias for option -ide2 | This is an alias for option -ide2 | ||
| − | cores: integer (1 - N) (default=1) | + | cores: <integer> (1 - N) (default = 1) |
The number of cores per socket. | The number of cores per socket. | ||
| − | cpu: [cputype=] | + | cpu: [cputype=]<enum> [,hidden=<1|0>] |
Emulated CPU type. | Emulated CPU type. | ||
| − | cputype= | + | cputype=<486 | Broadwell | Broadwell-noTSX | Conroe | Haswell | Haswell-noTSX | IvyBridge | Nehalem | Opteron_G1 | Opteron_G2 | Opteron_G3 | Opteron_G4 | Opteron_G5 | Penryn | SandyBridge | Skylake-Client | Westmere | athlon | core2duo | coreduo | host | kvm32 | kvm64 | pentium | pentium2 | pentium3 | phenom | qemu32 | qemu64> (default = kvm64) |
Emulated CPU type. | Emulated CPU type. | ||
| − | hidden=boolean (default=0) | + | hidden=<boolean> (default = 0) |
Do not identify as a KVM virtual machine. | Do not identify as a KVM virtual machine. | ||
| − | cpulimit: number (0 - 128) (default=0) | + | cpulimit: <number> (0 - 128) (default = 0) |
Limit of CPU usage. | Limit of CPU usage. | ||
If the computer has 2 CPUs, it has total of 2 CPU time. Value 0 indicates no CPU limit. | If the computer has 2 CPUs, it has total of 2 CPU time. Value 0 indicates no CPU limit. | ||
| − | cpuunits: integer (0 - 500000) (default= | + | cpuunits: <integer> (0 - 500000) (default = 1024) |
CPU weight for a VM. Argument is used in the kernel fair scheduler. The larger the number is, the more CPU time this VM gets. Number is relative to weights of all the other running VMs. | CPU weight for a VM. Argument is used in the kernel fair scheduler. The larger the number is, the more CPU time this VM gets. Number is relative to weights of all the other running VMs. | ||
You can disable fair-scheduler configuration by setting this to 0. | You can disable fair-scheduler configuration by setting this to 0. | ||
| − | description: string | + | description: <string> |
Description for the VM. Only used on the configuration web interface. This is saved as comment inside the configuration file. | Description for the VM. Only used on the configuration web interface. This is saved as comment inside the configuration file. | ||
| − | efidisk0: [file=] | + | efidisk0: [file=]<volume> [,format=<enum>] [,size=<DiskSize>] |
Configure a Disk for storing EFI vars | Configure a Disk for storing EFI vars | ||
| − | file= | + | file=<volume> |
| − | The | + | The drive’s backing volume. |
| − | format= | + | format=<cloop | cow | qcow | qcow2 | qed | raw | vmdk> |
| − | The | + | The drive’s backing file’s data format. |
| − | size= | + | size=<DiskSize> |
Disk size. This is purely informational and has no effect. | Disk size. This is purely informational and has no effect. | ||
| − | freeze: boolean | + | freeze: <boolean> |
Freeze CPU at startup (use c monitor command to start execution). | Freeze CPU at startup (use c monitor command to start execution). | ||
| − | hostpci[n]: [host=] | + | hostpci[n]: [host=]<HOSTPCIID[;HOSTPCIID2...]> [,pcie=<1|0>] [,rombar=<1|0>] [,romfile=<string>] [,x-vga=<1|0>] |
Map host PCI devices into guest. | Map host PCI devices into guest. | ||
This option allows direct access to host hardware. So it is no longer | This option allows direct access to host hardware. So it is no longer | ||
possible to migrate such machines - use with special care. | possible to migrate such machines - use with special care. | ||
Experimental! User reported problems with this option. | Experimental! User reported problems with this option. | ||
| − | host= | + | host=<HOSTPCIID[;HOSTPCIID2...]> |
| − | Host PCI device pass through. The PCI ID of a | + | Host PCI device pass through. The PCI ID of a host’s PCI device or a list |
of PCI virtual functions of the host. HOSTPCIID syntax is: | of PCI virtual functions of the host. HOSTPCIID syntax is: | ||
bus:dev.func (hexadecimal numbers) | bus:dev.func (hexadecimal numbers) | ||
You can us the lspci command to list existing PCI devices. | You can us the lspci command to list existing PCI devices. | ||
| − | pcie=boolean (default=0) | + | pcie=<boolean> (default = 0) |
Choose the PCI-express bus (needs the q35 machine model). | Choose the PCI-express bus (needs the q35 machine model). | ||
| − | rombar=boolean (default=1) | + | rombar=<boolean> (default = 1) |
| − | Specify whether or not the | + | Specify whether or not the device’s ROM will be visible in the guest’s memory map. |
| − | x-vga=boolean (default=0) | + | romfile=<string> |
| + | Custom pci device rom filename (must be located in /usr/share/kvm/). | ||
| + | x-vga=<boolean> (default = 0) | ||
Enable vfio-vga device support. | Enable vfio-vga device support. | ||
| − | hotplug: string (default=network,disk,usb) | + | hotplug: <string> (default = network,disk,usb) |
Selectively enable hotplug features. This is a comma separated list of hotplug features: network, disk, cpu, memory and usb. Use 0 to disable hotplug completely. Value 1 is an alias for the default network,disk,usb. | Selectively enable hotplug features. This is a comma separated list of hotplug features: network, disk, cpu, memory and usb. Use 0 to disable hotplug completely. Value 1 is an alias for the default network,disk,usb. | ||
| − | hugepages: | + | hugepages: <1024 | 2 | any> |
Enable/disable hugepages memory. | Enable/disable hugepages memory. | ||
| − | ide[n]: [file=] | + | ide[n]: [file=]<volume> [,aio=<native|threads>] [,backup=<1|0>] [,bps=<bps>] [,bps_max_length=<seconds>] [,bps_rd=<bps>] [,bps_rd_max_length=<seconds>] [,bps_wr=<bps>] [,bps_wr_max_length=<seconds>] [,cache=<enum>] [,cyls=<integer>] [,detect_zeroes=<1|0>] [,discard=<ignore|on>] [,format=<enum>] [,heads=<integer>] [,iops=<iops>] [,iops_max=<iops>] [,iops_max_length=<seconds>] [,iops_rd=<iops>] [,iops_rd_max=<iops>] [,iops_rd_max_length=<seconds>] [,iops_wr=<iops>] [,iops_wr_max=<iops>] [,iops_wr_max_length=<seconds>] [,mbps=<mbps>] [,mbps_max=<mbps>] [,mbps_rd=<mbps>] [,mbps_rd_max=<mbps>] [,mbps_wr=<mbps>] [,mbps_wr_max=<mbps>] [,media=<cdrom|disk>] [,model=<model>] [,replicate=<1|0>] [,rerror=<ignore|report|stop>] [,secs=<integer>] [,serial=<serial>] [,size=<DiskSize>] [,snapshot=<1|0>] [,trans=<none|lba|auto>] [,werror=<enum>] |
Use volume as IDE hard disk or CD-ROM (n is 0 to 3). | Use volume as IDE hard disk or CD-ROM (n is 0 to 3). | ||
| − | aio= | + | aio=<native | threads> |
AIO type to use. | AIO type to use. | ||
| − | backup=boolean | + | backup=<boolean> |
Whether the drive should be included when making backups. | Whether the drive should be included when making backups. | ||
| − | bps= | + | bps=<bps> |
| − | Maximum r/w | + | Maximum r/w speed in bytes per second. |
| − | bps_rd= | + | bps_max_length=<seconds> |
| − | Maximum read | + | Maximum length of I/O bursts in seconds. |
| − | bps_wr= | + | bps_rd=<bps> |
| − | Maximum write | + | Maximum read speed in bytes per second. |
| − | cache= | + | bps_rd_max_length=<seconds> |
| − | The | + | Maximum length of read I/O bursts in seconds. |
| − | cyls=integer | + | bps_wr=<bps> |
| − | Force the | + | Maximum write speed in bytes per second. |
| − | detect_zeroes=boolean | + | bps_wr_max_length=<seconds> |
| + | Maximum length of write I/O bursts in seconds. | ||
| + | cache=<directsync | none | unsafe | writeback | writethrough> | ||
| + | The drive’s cache mode | ||
| + | cyls=<integer> | ||
| + | Force the drive’s physical geometry to have a specific cylinder count. | ||
| + | detect_zeroes=<boolean> | ||
Controls whether to detect and try to optimize writes of zeroes. | Controls whether to detect and try to optimize writes of zeroes. | ||
| − | discard= | + | discard=<ignore | on> |
Controls whether to pass discard/trim requests to the underlying storage. | Controls whether to pass discard/trim requests to the underlying storage. | ||
| − | file= | + | file=<volume> |
| − | The | + | The drive’s backing volume. |
| − | format= | + | format=<cloop | cow | qcow | qcow2 | qed | raw | vmdk> |
| − | The | + | The drive’s backing file’s data format. |
| − | heads=integer | + | heads=<integer> |
| − | Force the | + | Force the drive’s physical geometry to have a specific head count. |
| − | iops= | + | iops=<iops> |
| − | Maximum r/w I/O | + | Maximum r/w I/O in operations per second. |
| − | iops_max= | + | iops_max=<iops> |
| − | Maximum unthrottled r/w I/O pool | + | Maximum unthrottled r/w I/O pool in operations per second. |
| − | iops_rd= | + | iops_max_length=<seconds> |
| − | Maximum read I/O | + | Maximum length of I/O bursts in seconds. |
| − | iops_rd_max= | + | iops_rd=<iops> |
| − | Maximum unthrottled read I/O pool | + | Maximum read I/O in operations per second. |
| − | iops_wr= | + | iops_rd_max=<iops> |
| − | Maximum write I/O | + | Maximum unthrottled read I/O pool in operations per second. |
| − | iops_wr_max= | + | iops_rd_max_length=<seconds> |
| − | Maximum unthrottled write I/O pool | + | Maximum length of read I/O bursts in seconds. |
| − | mbps= | + | iops_wr=<iops> |
| − | Maximum r/w | + | Maximum write I/O in operations per second. |
| − | mbps_max= | + | iops_wr_max=<iops> |
| − | Maximum unthrottled r/w pool | + | Maximum unthrottled write I/O pool in operations per second. |
| − | mbps_rd= | + | iops_wr_max_length=<seconds> |
| − | Maximum read | + | Maximum length of write I/O bursts in seconds. |
| − | mbps_rd_max= | + | mbps=<mbps> |
| − | Maximum unthrottled read pool | + | Maximum r/w speed in megabytes per second. |
| − | mbps_wr= | + | mbps_max=<mbps> |
| − | Maximum write | + | Maximum unthrottled r/w pool in megabytes per second. |
| − | mbps_wr_max= | + | mbps_rd=<mbps> |
| − | Maximum unthrottled write pool | + | Maximum read speed in megabytes per second. |
| − | media= | + | mbps_rd_max=<mbps> |
| − | The | + | Maximum unthrottled read pool in megabytes per second. |
| − | model= | + | mbps_wr=<mbps> |
| − | The | + | Maximum write speed in megabytes per second. |
| − | rerror= | + | mbps_wr_max=<mbps> |
| + | Maximum unthrottled write pool in megabytes per second. | ||
| + | media=<cdrom | disk> (default = disk) | ||
| + | The drive’s media type. | ||
| + | model=<model> | ||
| + | The drive’s reported model name, url-encoded, up to 40 bytes long. | ||
| + | replicate=<boolean> (default = 1) | ||
| + | Whether the drive should considered for replication jobs. | ||
| + | rerror=<ignore | report | stop> | ||
Read error action. | Read error action. | ||
| − | secs=integer | + | secs=<integer> |
| − | Force the | + | Force the drive’s physical geometry to have a specific sector count. |
| − | serial= | + | serial=<serial> |
| − | The | + | The drive’s reported serial number, url-encoded, up to 20 bytes long. |
| − | size= | + | size=<DiskSize> |
Disk size. This is purely informational and has no effect. | Disk size. This is purely informational and has no effect. | ||
| − | snapshot=boolean | + | snapshot=<boolean> |
Whether the drive should be included when making snapshots. | Whether the drive should be included when making snapshots. | ||
| − | trans= | + | trans=<auto | lba | none> |
Force disk geometry bios translation mode. | Force disk geometry bios translation mode. | ||
| − | werror= | + | werror=<enospc | ignore | report | stop> |
Write error action. | Write error action. | ||
| − | keyboard: | + | keyboard: <da | de | de-ch | en-gb | en-us | es | fi | fr | fr-be | fr-ca | fr-ch | hu | is | it | ja | lt | mk | nl | no | pl | pt | pt-br | sl | sv | tr> (default = en-us) |
Keybord layout for vnc server. Default is read from the /etc/pve/datacenter.conf configuration file. | Keybord layout for vnc server. Default is read from the /etc/pve/datacenter.conf configuration file. | ||
| − | kvm: boolean (default=1) | + | kvm: <boolean> (default = 1) |
Enable/disable KVM hardware virtualization. | Enable/disable KVM hardware virtualization. | ||
| − | localtime: boolean | + | localtime: <boolean> |
Set the real time clock to local time. This is enabled by default if ostype indicates a Microsoft OS. | Set the real time clock to local time. This is enabled by default if ostype indicates a Microsoft OS. | ||
| − | lock: | + | lock: <backup | migrate | rollback | snapshot> |
Lock/unlock the VM. | Lock/unlock the VM. | ||
machine: (pc|pc(-i440fx)?-\d+\.\d+(\.pxe)?|q35|pc-q35-\d+\.\d+(\.pxe)?) | machine: (pc|pc(-i440fx)?-\d+\.\d+(\.pxe)?|q35|pc-q35-\d+\.\d+(\.pxe)?) | ||
Specific the Qemu machine type. | Specific the Qemu machine type. | ||
| − | memory: integer (16 - N) (default=512) | + | memory: <integer> (16 - N) (default = 512) |
Amount of RAM for the VM in MB. This is the maximum available memory when you use the balloon device. | Amount of RAM for the VM in MB. This is the maximum available memory when you use the balloon device. | ||
| − | migrate_downtime: number (0 - N) (default=0.1) | + | migrate_downtime: <number> (0 - N) (default = 0.1) |
Set maximum tolerated downtime (in seconds) for migrations. | Set maximum tolerated downtime (in seconds) for migrations. | ||
| − | migrate_speed: integer (0 - N) (default=0) | + | migrate_speed: <integer> (0 - N) (default = 0) |
Set maximum speed (in MB/s) for migrations. Value 0 is no limit. | Set maximum speed (in MB/s) for migrations. Value 0 is no limit. | ||
| − | name: string | + | name: <string> |
Set a name for the VM. Only used on the configuration web interface. | Set a name for the VM. Only used on the configuration web interface. | ||
| − | net[n]: [model=] | + | net[n]: [model=]<enum> [,bridge=<bridge>] [,firewall=<1|0>] [,link_down=<1|0>] [,macaddr=<XX:XX:XX:XX:XX:XX>] [,queues=<integer>] [,rate=<number>] [,tag=<integer>] [,trunks=<vlanid[;vlanid...]>] [,<model>=<macaddr>] |
Specify network devices. | Specify network devices. | ||
| − | bridge= | + | bridge=<bridge> |
Bridge to attach the network device to. The Proxmox VE standard bridge | Bridge to attach the network device to. The Proxmox VE standard bridge | ||
is called vmbr0. | is called vmbr0. | ||
| Line 478: | Line 720: | ||
10.0.2.4 SMB Server | 10.0.2.4 SMB Server | ||
The DHCP server assign addresses to the guest starting from 10.0.2.15. | The DHCP server assign addresses to the guest starting from 10.0.2.15. | ||
| − | firewall=boolean | + | firewall=<boolean> |
Whether this interface should be protected by the firewall. | Whether this interface should be protected by the firewall. | ||
| − | link_down=boolean | + | link_down=<boolean> |
Whether this interface should be disconnected (like pulling the plug). | Whether this interface should be disconnected (like pulling the plug). | ||
| − | macaddr= | + | macaddr=<XX:XX:XX:XX:XX:XX> |
MAC address. That address must be unique withing your network. This is automatically generated if not specified. | MAC address. That address must be unique withing your network. This is automatically generated if not specified. | ||
| − | model= | + | model=<e1000 | e1000-82540em | e1000-82544gc | e1000-82545em | i82551 | i82557b | i82559er | ne2k_isa | ne2k_pci | pcnet | rtl8139 | virtio | vmxnet3> |
Network Card Model. The virtio model provides the best performance with very low CPU overhead. If your guest does not support this driver, it is usually best to use e1000. | Network Card Model. The virtio model provides the best performance with very low CPU overhead. If your guest does not support this driver, it is usually best to use e1000. | ||
| − | queues=integer (0 - 16) | + | queues=<integer> (0 - 16) |
Number of packet queues to be used on the device. | Number of packet queues to be used on the device. | ||
| − | rate=number (0 - N) | + | rate=<number> (0 - N) |
Rate limit in mbps (megabytes per second) as floating point number. | Rate limit in mbps (megabytes per second) as floating point number. | ||
| − | tag=integer (1 - 4094) | + | tag=<integer> (1 - 4094) |
VLAN tag to apply to packets on this interface. | VLAN tag to apply to packets on this interface. | ||
| − | trunks= | + | trunks=<vlanid[;vlanid...]> |
VLAN trunks to pass through this interface. | VLAN trunks to pass through this interface. | ||
| − | numa: boolean (default=0) | + | numa: <boolean> (default = 0) |
Enable/disable NUMA. | Enable/disable NUMA. | ||
| − | numa[n]: cpus= | + | numa[n]: cpus=<id[-id];...> [,hostnodes=<id[-id];...>] [,memory=<number>] [,policy=<preferred|bind|interleave>] |
NUMA topology. | NUMA topology. | ||
| − | cpus= | + | cpus=<id[-id];...> |
CPUs accessing this NUMA node. | CPUs accessing this NUMA node. | ||
| − | hostnodes= | + | hostnodes=<id[-id];...> |
Host NUMA nodes to use. | Host NUMA nodes to use. | ||
| − | memory=number | + | memory=<number> |
Amount of memory this NUMA node provides. | Amount of memory this NUMA node provides. | ||
| − | policy= | + | policy=<bind | interleave | preferred> |
NUMA allocation policy. | NUMA allocation policy. | ||
| − | onboot: boolean (default=0) | + | onboot: <boolean> (default = 0) |
Specifies whether a VM will be started during system bootup. | Specifies whether a VM will be started during system bootup. | ||
| − | ostype: | + | ostype: <l24 | l26 | other | solaris | w2k | w2k3 | w2k8 | win10 | win7 | win8 | wvista | wxp> |
Specify guest operating system. This is used to enable special | Specify guest operating system. This is used to enable special | ||
optimization/features for specific operating systems: | optimization/features for specific operating systems: | ||
| Line 537: | Line 779: | ||
This option allows direct access to host hardware. So it is no longer possible to migrate such machines - use with special care. | This option allows direct access to host hardware. So it is no longer possible to migrate such machines - use with special care. | ||
Experimental! User reported problems with this option. | Experimental! User reported problems with this option. | ||
| − | protection: boolean (default=0) | + | protection: <boolean> (default = 0) |
Sets the protection flag of the VM. This will disable the remove VM and remove disk operations. | Sets the protection flag of the VM. This will disable the remove VM and remove disk operations. | ||
| − | reboot: boolean (default=1) | + | reboot: <boolean> (default = 1) |
Allow reboot. If set to 0 the VM exit on reboot. | Allow reboot. If set to 0 the VM exit on reboot. | ||
| − | sata[n]: [file=] | + | sata[n]: [file=]<volume> [,aio=<native|threads>] [,backup=<1|0>] [,bps=<bps>] [,bps_max_length=<seconds>] [,bps_rd=<bps>] [,bps_rd_max_length=<seconds>] [,bps_wr=<bps>] [,bps_wr_max_length=<seconds>] [,cache=<enum>] [,cyls=<integer>] [,detect_zeroes=<1|0>] [,discard=<ignore|on>] [,format=<enum>] [,heads=<integer>] [,iops=<iops>] [,iops_max=<iops>] [,iops_max_length=<seconds>] [,iops_rd=<iops>] [,iops_rd_max=<iops>] [,iops_rd_max_length=<seconds>] [,iops_wr=<iops>] [,iops_wr_max=<iops>] [,iops_wr_max_length=<seconds>] [,mbps=<mbps>] [,mbps_max=<mbps>] [,mbps_rd=<mbps>] [,mbps_rd_max=<mbps>] [,mbps_wr=<mbps>] [,mbps_wr_max=<mbps>] [,media=<cdrom|disk>] [,replicate=<1|0>] [,rerror=<ignore|report|stop>] [,secs=<integer>] [,serial=<serial>] [,size=<DiskSize>] [,snapshot=<1|0>] [,trans=<none|lba|auto>] [,werror=<enum>] |
Use volume as SATA hard disk or CD-ROM (n is 0 to 5). | Use volume as SATA hard disk or CD-ROM (n is 0 to 5). | ||
| − | aio= | + | aio=<native | threads> |
AIO type to use. | AIO type to use. | ||
| − | backup=boolean | + | backup=<boolean> |
Whether the drive should be included when making backups. | Whether the drive should be included when making backups. | ||
| − | bps= | + | bps=<bps> |
| − | Maximum r/w | + | Maximum r/w speed in bytes per second. |
| − | bps_rd= | + | bps_max_length=<seconds> |
| − | Maximum read | + | Maximum length of I/O bursts in seconds. |
| − | bps_wr= | + | bps_rd=<bps> |
| − | Maximum write | + | Maximum read speed in bytes per second. |
| − | cache= | + | bps_rd_max_length=<seconds> |
| − | The | + | Maximum length of read I/O bursts in seconds. |
| − | cyls=integer | + | bps_wr=<bps> |
| − | Force the | + | Maximum write speed in bytes per second. |
| − | detect_zeroes=boolean | + | bps_wr_max_length=<seconds> |
| + | Maximum length of write I/O bursts in seconds. | ||
| + | cache=<directsync | none | unsafe | writeback | writethrough> | ||
| + | The drive’s cache mode | ||
| + | cyls=<integer> | ||
| + | Force the drive’s physical geometry to have a specific cylinder count. | ||
| + | detect_zeroes=<boolean> | ||
Controls whether to detect and try to optimize writes of zeroes. | Controls whether to detect and try to optimize writes of zeroes. | ||
| − | discard= | + | discard=<ignore | on> |
Controls whether to pass discard/trim requests to the underlying storage. | Controls whether to pass discard/trim requests to the underlying storage. | ||
| − | file= | + | file=<volume> |
| − | The | + | The drive’s backing volume. |
| − | format= | + | format=<cloop | cow | qcow | qcow2 | qed | raw | vmdk> |
| − | The | + | The drive’s backing file’s data format. |
| − | heads=integer | + | heads=<integer> |
| − | Force the | + | Force the drive’s physical geometry to have a specific head count. |
| − | iops= | + | iops=<iops> |
| − | Maximum r/w I/O | + | Maximum r/w I/O in operations per second. |
| − | iops_max= | + | iops_max=<iops> |
| − | Maximum unthrottled r/w I/O pool | + | Maximum unthrottled r/w I/O pool in operations per second. |
| − | iops_rd= | + | iops_max_length=<seconds> |
| − | Maximum read I/O | + | Maximum length of I/O bursts in seconds. |
| − | iops_rd_max= | + | iops_rd=<iops> |
| − | Maximum unthrottled read I/O pool | + | Maximum read I/O in operations per second. |
| − | iops_wr= | + | iops_rd_max=<iops> |
| − | Maximum write I/O | + | Maximum unthrottled read I/O pool in operations per second. |
| − | iops_wr_max= | + | iops_rd_max_length=<seconds> |
| − | Maximum unthrottled write I/O pool | + | Maximum length of read I/O bursts in seconds. |
| − | mbps= | + | iops_wr=<iops> |
| − | Maximum r/w | + | Maximum write I/O in operations per second. |
| − | mbps_max= | + | iops_wr_max=<iops> |
| − | Maximum unthrottled r/w pool | + | Maximum unthrottled write I/O pool in operations per second. |
| − | mbps_rd= | + | iops_wr_max_length=<seconds> |
| − | Maximum read | + | Maximum length of write I/O bursts in seconds. |
| − | mbps_rd_max= | + | mbps=<mbps> |
| − | Maximum unthrottled read pool | + | Maximum r/w speed in megabytes per second. |
| − | mbps_wr= | + | mbps_max=<mbps> |
| − | Maximum write | + | Maximum unthrottled r/w pool in megabytes per second. |
| − | mbps_wr_max= | + | mbps_rd=<mbps> |
| − | Maximum unthrottled write pool | + | Maximum read speed in megabytes per second. |
| − | media= | + | mbps_rd_max=<mbps> |
| − | The | + | Maximum unthrottled read pool in megabytes per second. |
| − | rerror= | + | mbps_wr=<mbps> |
| + | Maximum write speed in megabytes per second. | ||
| + | mbps_wr_max=<mbps> | ||
| + | Maximum unthrottled write pool in megabytes per second. | ||
| + | media=<cdrom | disk> (default = disk) | ||
| + | The drive’s media type. | ||
| + | replicate=<boolean> (default = 1) | ||
| + | Whether the drive should considered for replication jobs. | ||
| + | rerror=<ignore | report | stop> | ||
Read error action. | Read error action. | ||
| − | secs=integer | + | secs=<integer> |
| − | Force the | + | Force the drive’s physical geometry to have a specific sector count. |
| − | serial= | + | serial=<serial> |
| − | The | + | The drive’s reported serial number, url-encoded, up to 20 bytes long. |
| − | size= | + | size=<DiskSize> |
Disk size. This is purely informational and has no effect. | Disk size. This is purely informational and has no effect. | ||
| − | snapshot=boolean | + | snapshot=<boolean> |
Whether the drive should be included when making snapshots. | Whether the drive should be included when making snapshots. | ||
| − | trans= | + | trans=<auto | lba | none> |
Force disk geometry bios translation mode. | Force disk geometry bios translation mode. | ||
| − | werror= | + | werror=<enospc | ignore | report | stop> |
Write error action. | Write error action. | ||
| − | scsi[n]: [file=] | + | scsi[n]: [file=]<volume> [,aio=<native|threads>] [,backup=<1|0>] [,bps=<bps>] [,bps_max_length=<seconds>] [,bps_rd=<bps>] [,bps_rd_max_length=<seconds>] [,bps_wr=<bps>] [,bps_wr_max_length=<seconds>] [,cache=<enum>] [,cyls=<integer>] [,detect_zeroes=<1|0>] [,discard=<ignore|on>] [,format=<enum>] [,heads=<integer>] [,iops=<iops>] [,iops_max=<iops>] [,iops_max_length=<seconds>] [,iops_rd=<iops>] [,iops_rd_max=<iops>] [,iops_rd_max_length=<seconds>] [,iops_wr=<iops>] [,iops_wr_max=<iops>] [,iops_wr_max_length=<seconds>] [,iothread=<1|0>] [,mbps=<mbps>] [,mbps_max=<mbps>] [,mbps_rd=<mbps>] [,mbps_rd_max=<mbps>] [,mbps_wr=<mbps>] [,mbps_wr_max=<mbps>] [,media=<cdrom|disk>] [,queues=<integer>] [,replicate=<1|0>] [,rerror=<ignore|report|stop>] [,scsiblock=<1|0>] [,secs=<integer>] [,serial=<serial>] [,size=<DiskSize>] [,snapshot=<1|0>] [,trans=<none|lba|auto>] [,werror=<enum>] |
Use volume as SCSI hard disk or CD-ROM (n is 0 to 13). | Use volume as SCSI hard disk or CD-ROM (n is 0 to 13). | ||
| − | aio= | + | aio=<native | threads> |
AIO type to use. | AIO type to use. | ||
| − | backup=boolean | + | backup=<boolean> |
Whether the drive should be included when making backups. | Whether the drive should be included when making backups. | ||
| − | bps= | + | bps=<bps> |
| − | Maximum r/w | + | Maximum r/w speed in bytes per second. |
| − | bps_rd= | + | bps_max_length=<seconds> |
| − | Maximum read | + | Maximum length of I/O bursts in seconds. |
| − | bps_wr= | + | bps_rd=<bps> |
| − | Maximum write | + | Maximum read speed in bytes per second. |
| − | cache= | + | bps_rd_max_length=<seconds> |
| − | The | + | Maximum length of read I/O bursts in seconds. |
| − | cyls=integer | + | bps_wr=<bps> |
| − | Force the | + | Maximum write speed in bytes per second. |
| − | detect_zeroes=boolean | + | bps_wr_max_length=<seconds> |
| + | Maximum length of write I/O bursts in seconds. | ||
| + | cache=<directsync | none | unsafe | writeback | writethrough> | ||
| + | The drive’s cache mode | ||
| + | cyls=<integer> | ||
| + | Force the drive’s physical geometry to have a specific cylinder count. | ||
| + | detect_zeroes=<boolean> | ||
Controls whether to detect and try to optimize writes of zeroes. | Controls whether to detect and try to optimize writes of zeroes. | ||
| − | discard= | + | discard=<ignore | on> |
Controls whether to pass discard/trim requests to the underlying storage. | Controls whether to pass discard/trim requests to the underlying storage. | ||
| − | file= | + | file=<volume> |
| − | The | + | The drive’s backing volume. |
| − | format= | + | format=<cloop | cow | qcow | qcow2 | qed | raw | vmdk> |
| − | The | + | The drive’s backing file’s data format. |
| − | heads=integer | + | heads=<integer> |
| − | Force the | + | Force the drive’s physical geometry to have a specific head count. |
| − | iops= | + | iops=<iops> |
| − | Maximum r/w I/O | + | Maximum r/w I/O in operations per second. |
| − | iops_max= | + | iops_max=<iops> |
| − | Maximum unthrottled r/w I/O pool | + | Maximum unthrottled r/w I/O pool in operations per second. |
| − | iops_rd= | + | iops_max_length=<seconds> |
| − | Maximum read I/O | + | Maximum length of I/O bursts in seconds. |
| − | iops_rd_max= | + | iops_rd=<iops> |
| − | Maximum unthrottled read I/O pool | + | Maximum read I/O in operations per second. |
| − | iops_wr= | + | iops_rd_max=<iops> |
| − | Maximum write I/O | + | Maximum unthrottled read I/O pool in operations per second. |
| − | iops_wr_max= | + | iops_rd_max_length=<seconds> |
| − | Maximum unthrottled write I/O pool | + | Maximum length of read I/O bursts in seconds. |
| − | iothread=boolean | + | iops_wr=<iops> |
| + | Maximum write I/O in operations per second. | ||
| + | iops_wr_max=<iops> | ||
| + | Maximum unthrottled write I/O pool in operations per second. | ||
| + | iops_wr_max_length=<seconds> | ||
| + | Maximum length of write I/O bursts in seconds. | ||
| + | iothread=<boolean> | ||
Whether to use iothreads for this drive | Whether to use iothreads for this drive | ||
| − | mbps= | + | mbps=<mbps> |
| − | Maximum r/w | + | Maximum r/w speed in megabytes per second. |
| − | mbps_max= | + | mbps_max=<mbps> |
| − | Maximum unthrottled r/w pool | + | Maximum unthrottled r/w pool in megabytes per second. |
| − | mbps_rd= | + | mbps_rd=<mbps> |
| − | Maximum read | + | Maximum read speed in megabytes per second. |
| − | mbps_rd_max= | + | mbps_rd_max=<mbps> |
| − | Maximum unthrottled read pool | + | Maximum unthrottled read pool in megabytes per second. |
| − | mbps_wr= | + | mbps_wr=<mbps> |
| − | Maximum write | + | Maximum write speed in megabytes per second. |
| − | mbps_wr_max= | + | mbps_wr_max=<mbps> |
| − | Maximum unthrottled write pool | + | Maximum unthrottled write pool in megabytes per second. |
| − | media= | + | media=<cdrom | disk> (default = disk) |
| − | The | + | The drive’s media type. |
| − | queues=integer (2 - N) | + | queues=<integer> (2 - N) |
Number of queues. | Number of queues. | ||
| − | secs=integer | + | replicate=<boolean> (default = 1) |
| − | Force the | + | Whether the drive should considered for replication jobs. |
| − | serial= | + | rerror=<ignore | report | stop> |
| − | The | + | Read error action. |
| − | size= | + | scsiblock=<boolean> (default = 0) |
| + | whether to use scsi-block for full passthrough of host block device | ||
| + | can lead to I/O errors in combination with low memory or high memory fragmentation on host | ||
| + | secs=<integer> | ||
| + | Force the drive’s physical geometry to have a specific sector count. | ||
| + | serial=<serial> | ||
| + | The drive’s reported serial number, url-encoded, up to 20 bytes long. | ||
| + | size=<DiskSize> | ||
Disk size. This is purely informational and has no effect. | Disk size. This is purely informational and has no effect. | ||
| − | snapshot=boolean | + | snapshot=<boolean> |
Whether the drive should be included when making snapshots. | Whether the drive should be included when making snapshots. | ||
| − | trans= | + | trans=<auto | lba | none> |
Force disk geometry bios translation mode. | Force disk geometry bios translation mode. | ||
| − | werror= | + | werror=<enospc | ignore | report | stop> |
Write error action. | Write error action. | ||
| − | scsihw: | + | scsihw: <lsi | lsi53c810 | megasas | pvscsi | virtio-scsi-pci | virtio-scsi-single> (default = lsi) |
SCSI controller model | SCSI controller model | ||
serial[n]: (/dev/.+|socket) | serial[n]: (/dev/.+|socket) | ||
| Line 683: | Line 958: | ||
If you pass through a host serial device, it is no longer possible to migrate such machines - use with special care. | If you pass through a host serial device, it is no longer possible to migrate such machines - use with special care. | ||
Experimental! User reported problems with this option. | Experimental! User reported problems with this option. | ||
| − | shares: integer (0 - 50000) (default=1000) | + | shares: <integer> (0 - 50000) (default = 1000) |
Amount of memory shares for auto-ballooning. The larger the number is, the more memory this VM gets. Number is relative to weights of all other running VMs. Using zero disables auto-ballooning | Amount of memory shares for auto-ballooning. The larger the number is, the more memory this VM gets. Number is relative to weights of all other running VMs. Using zero disables auto-ballooning | ||
| − | smbios1: [family= | + | smbios1: [family=<string>] [,manufacturer=<string>] [,product=<string>] [,serial=<string>] [,sku=<string>] [,uuid=<UUID>] [,version=<string>] |
Specify SMBIOS type 1 fields. | Specify SMBIOS type 1 fields. | ||
| − | family= | + | family=<string> |
Set SMBIOS1 family string. | Set SMBIOS1 family string. | ||
| − | manufacturer= | + | manufacturer=<string> |
Set SMBIOS1 manufacturer. | Set SMBIOS1 manufacturer. | ||
| − | product= | + | product=<string> |
Set SMBIOS1 product ID. | Set SMBIOS1 product ID. | ||
| − | serial= | + | serial=<string> |
Set SMBIOS1 serial number. | Set SMBIOS1 serial number. | ||
| − | sku= | + | sku=<string> |
Set SMBIOS1 SKU string. | Set SMBIOS1 SKU string. | ||
| − | uuid= | + | uuid=<UUID> |
Set SMBIOS1 UUID. | Set SMBIOS1 UUID. | ||
| − | version= | + | version=<string> |
Set SMBIOS1 version. | Set SMBIOS1 version. | ||
| − | smp: integer (1 - N) (default=1) | + | smp: <integer> (1 - N) (default = 1) |
The number of CPUs. Please use option -sockets instead. | The number of CPUs. Please use option -sockets instead. | ||
| − | sockets: integer (1 - N) (default=1) | + | sockets: <integer> (1 - N) (default = 1) |
The number of CPU sockets. | The number of CPU sockets. | ||
| − | startdate: (now | YYYY-MM-DD | YYYY-MM-DDTHH:MM:SS) (default=now) | + | startdate: (now | YYYY-MM-DD | YYYY-MM-DDTHH:MM:SS) (default = now) |
Set the initial date of the real time clock. Valid format for date are: now or 2006-06-17T16:01:21 or 2006-06-17. | Set the initial date of the real time clock. Valid format for date are: now or 2006-06-17T16:01:21 or 2006-06-17. | ||
startup: `[[order=]\d+] [,up=\d+] [,down=\d+] ` | startup: `[[order=]\d+] [,up=\d+] [,down=\d+] ` | ||
Startup and shutdown behavior. Order is a non-negative number defining the general startup order. Shutdown in done with reverse ordering. Additionally you can set the up or down delay in seconds, which specifies a delay to wait before the next VM is started or stopped. | Startup and shutdown behavior. Order is a non-negative number defining the general startup order. Shutdown in done with reverse ordering. Additionally you can set the up or down delay in seconds, which specifies a delay to wait before the next VM is started or stopped. | ||
| − | tablet: boolean (default=1) | + | tablet: <boolean> (default = 1) |
| − | Enable/disable the USB tablet device. This device is usually needed to allow absolute mouse positioning with VNC. Else the mouse runs out of sync with normal VNC clients. If | + | Enable/disable the USB tablet device. This device is usually needed to allow absolute mouse positioning with VNC. Else the mouse runs out of sync with normal VNC clients. If you’re running lots of console-only guests on one host, you may consider disabling this to save some context switches. This is turned off by default if you use spice (-vga=qxl). |
| − | tdf: boolean (default=0) | + | tdf: <boolean> (default = 0) |
Enable/disable time drift fix. | Enable/disable time drift fix. | ||
| − | template: boolean (default=0) | + | template: <boolean> (default = 0) |
Enable/disable Template. | Enable/disable Template. | ||
| − | unused[n]: string | + | unused[n]: <string> |
Reference to unused volumes. This is used internally, and should not be modified manually. | Reference to unused volumes. This is used internally, and should not be modified manually. | ||
| − | usb[n]: [host=] | + | usb[n]: [host=]<HOSTUSBDEVICE|spice> [,usb3=<1|0>] |
Configure an USB device (n is 0 to 4). | Configure an USB device (n is 0 to 4). | ||
| − | host= | + | host=<HOSTUSBDEVICE|spice> |
The Host USB device or port or the value spice. HOSTUSBDEVICE syntax is: | The Host USB device or port or the value spice. HOSTUSBDEVICE syntax is: | ||
'bus-port(.port)*' (decimal numbers) or | 'bus-port(.port)*' (decimal numbers) or | ||
| Line 727: | Line 1,002: | ||
This option allows direct access to host hardware. So it is no longer possible to migrate such machines - use with special care. | This option allows direct access to host hardware. So it is no longer possible to migrate such machines - use with special care. | ||
The value spice can be used to add a usb redirection devices for spice. | The value spice can be used to add a usb redirection devices for spice. | ||
| − | usb3=boolean (default=0) | + | usb3=<boolean> (default = 0) |
Specifies whether if given host option is a USB3 device or port (this does currently not work reliably with spice redirection and is then ignored). | Specifies whether if given host option is a USB3 device or port (this does currently not work reliably with spice redirection and is then ignored). | ||
| − | vcpus: integer (1 - N) (default=0) | + | vcpus: <integer> (1 - N) (default = 0) |
Number of hotplugged vcpus. | Number of hotplugged vcpus. | ||
| − | vga: | + | vga: <cirrus | qxl | qxl2 | qxl3 | qxl4 | serial0 | serial1 | serial2 | serial3 | std | vmware> |
| − | Select the VGA type. If you want to use high resolution modes ( | + | Select the VGA type. If you want to use high resolution modes (>= 1280x1024x16) then you should use the options std or vmware. Default is std for win8/win7/w2k8, and cirrus for other OS types. The qxl option enables the SPICE display sever. For win* OS you can select how many independent displays you want, Linux guests can add displays them self. You can also run without any graphic card, using a serial device as terminal. |
| − | virtio[n]: [file=] | + | virtio[n]: [file=]<volume> [,aio=<native|threads>] [,backup=<1|0>] [,bps=<bps>] [,bps_max_length=<seconds>] [,bps_rd=<bps>] [,bps_rd_max_length=<seconds>] [,bps_wr=<bps>] [,bps_wr_max_length=<seconds>] [,cache=<enum>] [,cyls=<integer>] [,detect_zeroes=<1|0>] [,discard=<ignore|on>] [,format=<enum>] [,heads=<integer>] [,iops=<iops>] [,iops_max=<iops>] [,iops_max_length=<seconds>] [,iops_rd=<iops>] [,iops_rd_max=<iops>] [,iops_rd_max_length=<seconds>] [,iops_wr=<iops>] [,iops_wr_max=<iops>] [,iops_wr_max_length=<seconds>] [,iothread=<1|0>] [,mbps=<mbps>] [,mbps_max=<mbps>] [,mbps_rd=<mbps>] [,mbps_rd_max=<mbps>] [,mbps_wr=<mbps>] [,mbps_wr_max=<mbps>] [,media=<cdrom|disk>] [,replicate=<1|0>] [,rerror=<ignore|report|stop>] [,secs=<integer>] [,serial=<serial>] [,size=<DiskSize>] [,snapshot=<1|0>] [,trans=<none|lba|auto>] [,werror=<enum>] |
Use volume as VIRTIO hard disk (n is 0 to 15). | Use volume as VIRTIO hard disk (n is 0 to 15). | ||
| − | aio= | + | aio=<native | threads> |
AIO type to use. | AIO type to use. | ||
| − | backup=boolean | + | backup=<boolean> |
Whether the drive should be included when making backups. | Whether the drive should be included when making backups. | ||
| − | bps= | + | bps=<bps> |
| − | Maximum r/w | + | Maximum r/w speed in bytes per second. |
| − | bps_rd= | + | bps_max_length=<seconds> |
| − | Maximum read | + | Maximum length of I/O bursts in seconds. |
| − | bps_wr= | + | bps_rd=<bps> |
| − | Maximum write | + | Maximum read speed in bytes per second. |
| − | cache= | + | bps_rd_max_length=<seconds> |
| − | The | + | Maximum length of read I/O bursts in seconds. |
| − | cyls=integer | + | bps_wr=<bps> |
| − | Force the | + | Maximum write speed in bytes per second. |
| − | detect_zeroes=boolean | + | bps_wr_max_length=<seconds> |
| + | Maximum length of write I/O bursts in seconds. | ||
| + | cache=<directsync | none | unsafe | writeback | writethrough> | ||
| + | The drive’s cache mode | ||
| + | cyls=<integer> | ||
| + | Force the drive’s physical geometry to have a specific cylinder count. | ||
| + | detect_zeroes=<boolean> | ||
Controls whether to detect and try to optimize writes of zeroes. | Controls whether to detect and try to optimize writes of zeroes. | ||
| − | discard= | + | discard=<ignore | on> |
Controls whether to pass discard/trim requests to the underlying storage. | Controls whether to pass discard/trim requests to the underlying storage. | ||
| − | file= | + | file=<volume> |
| − | The | + | The drive’s backing volume. |
| − | format= | + | format=<cloop | cow | qcow | qcow2 | qed | raw | vmdk> |
| − | The | + | The drive’s backing file’s data format. |
| − | heads=integer | + | heads=<integer> |
| − | Force the | + | Force the drive’s physical geometry to have a specific head count. |
| − | iops= | + | iops=<iops> |
| − | Maximum r/w I/O | + | Maximum r/w I/O in operations per second. |
| − | iops_max= | + | iops_max=<iops> |
| − | Maximum unthrottled r/w I/O pool | + | Maximum unthrottled r/w I/O pool in operations per second. |
| − | iops_rd= | + | iops_max_length=<seconds> |
| − | Maximum read I/O | + | Maximum length of I/O bursts in seconds. |
| − | iops_rd_max= | + | iops_rd=<iops> |
| − | Maximum unthrottled read I/O pool | + | Maximum read I/O in operations per second. |
| − | iops_wr= | + | iops_rd_max=<iops> |
| − | Maximum write I/O | + | Maximum unthrottled read I/O pool in operations per second. |
| − | iops_wr_max= | + | iops_rd_max_length=<seconds> |
| − | Maximum unthrottled write I/O pool | + | Maximum length of read I/O bursts in seconds. |
| − | iothread=boolean | + | iops_wr=<iops> |
| + | Maximum write I/O in operations per second. | ||
| + | iops_wr_max=<iops> | ||
| + | Maximum unthrottled write I/O pool in operations per second. | ||
| + | iops_wr_max_length=<seconds> | ||
| + | Maximum length of write I/O bursts in seconds. | ||
| + | iothread=<boolean> | ||
Whether to use iothreads for this drive | Whether to use iothreads for this drive | ||
| − | mbps= | + | mbps=<mbps> |
| − | Maximum r/w | + | Maximum r/w speed in megabytes per second. |
| − | mbps_max= | + | mbps_max=<mbps> |
| − | Maximum unthrottled r/w pool | + | Maximum unthrottled r/w pool in megabytes per second. |
| − | mbps_rd= | + | mbps_rd=<mbps> |
| − | Maximum read | + | Maximum read speed in megabytes per second. |
| − | mbps_rd_max= | + | mbps_rd_max=<mbps> |
| − | Maximum unthrottled read pool | + | Maximum unthrottled read pool in megabytes per second. |
| − | mbps_wr= | + | mbps_wr=<mbps> |
| − | Maximum write | + | Maximum write speed in megabytes per second. |
| − | mbps_wr_max= | + | mbps_wr_max=<mbps> |
| − | Maximum unthrottled write pool | + | Maximum unthrottled write pool in megabytes per second. |
| − | media= | + | media=<cdrom | disk> (default = disk) |
| − | The | + | The drive’s media type. |
| − | rerror= | + | replicate=<boolean> (default = 1) |
| + | Whether the drive should considered for replication jobs. | ||
| + | rerror=<ignore | report | stop> | ||
Read error action. | Read error action. | ||
| − | secs=integer | + | secs=<integer> |
| − | Force the | + | Force the drive’s physical geometry to have a specific sector count. |
| − | serial= | + | serial=<serial> |
| − | The | + | The drive’s reported serial number, url-encoded, up to 20 bytes long. |
| − | size= | + | size=<DiskSize> |
Disk size. This is purely informational and has no effect. | Disk size. This is purely informational and has no effect. | ||
| − | snapshot=boolean | + | snapshot=<boolean> |
Whether the drive should be included when making snapshots. | Whether the drive should be included when making snapshots. | ||
| − | trans= | + | trans=<auto | lba | none> |
Force disk geometry bios translation mode. | Force disk geometry bios translation mode. | ||
| − | werror= | + | werror=<enospc | ignore | report | stop> |
Write error action. | Write error action. | ||
| − | watchdog: [[model=] | + | watchdog: [[model=]<i6300esb|ib700>] [,action=<enum>] |
Create a virtual hardware watchdog device. Once enabled (by a guest action), the watchdog must be periodically polled by an agent inside the guest or else the watchdog will reset the guest (or execute the respective action specified) | Create a virtual hardware watchdog device. Once enabled (by a guest action), the watchdog must be periodically polled by an agent inside the guest or else the watchdog will reset the guest (or execute the respective action specified) | ||
| − | action= | + | action=<debug | none | pause | poweroff | reset | shutdown> |
The action to perform if after activation the guest fails to poll the watchdog in time. | The action to perform if after activation the guest fails to poll the watchdog in time. | ||
| − | model= | + | model=<i6300esb | ib700> (default = i6300esb) |
Watchdog type to emulate. | Watchdog type to emulate. | ||
Locks | Locks | ||
| − | Online migrations and backups (vzdump) set a lock to prevent incompatible | + | Online migrations, snapshots and backups (vzdump) set a lock to |
| − | concurrent actions on the affected VMs. Sometimes you need to remove such a | + | prevent incompatible concurrent actions on the affected VMs. Sometimes |
| − | lock manually (e.g., after a power failure). | + | you need to remove such a lock manually (e.g., after a power failure). |
| − | qm unlock | + | qm unlock <vmid> |
| + | Only do that if you are sure the action which set the lock is | ||
| + | no longer running. | ||
</pvehide> | </pvehide> | ||
<!--PVE_IMPORT_END_MARKER--> | <!--PVE_IMPORT_END_MARKER--> | ||
Revision as of 11:30, 10 July 2017
QEMU (short form for Quick Emulator) is an open source hypervisor that emulates a physical computer. From the perspective of the host system where QEMU is running, QEMU is a user program which has access to a number of local resources like partitions, files, network cards which are then passed to an emulated computer which sees them as if they were real devices.
A guest operating system running in the emulated computer accesses these devices, and runs as if it were running on real hardware. For instance, you can pass an ISO image as a parameter to QEMU, and the OS running in the emulated computer will see a real CD-ROM inserted into a CD drive.
QEMU can emulate a great variety of hardware from ARM to Sparc, but Proxmox VE is only concerned with 32 and 64 bits PC clone emulation, since it represents the overwhelming majority of server hardware. The emulation of PC clones is also one of the fastest due to the availability of processor extensions which greatly speed up QEMU when the emulated architecture is the same as the host architecture.

|
You may sometimes encounter the term KVM (Kernel-based Virtual Machine). It means that QEMU is running with the support of the virtualization processor extensions, via the Linux KVM module. In the context of Proxmox VE QEMU and KVM can be used interchangeably, as QEMU in Proxmox VE will always try to load the KVM module. |
QEMU inside Proxmox VE runs as a root process, since this is required to access block and PCI devices.
Emulated devices and paravirtualized devices
The PC hardware emulated by QEMU includes a motherboard, network controllers, SCSI, IDE and SATA controllers, serial ports (the complete list can be seen in the kvm(1) man page) all of them emulated in software. All these devices are the exact software equivalent of existing hardware devices, and if the OS running in the guest has the proper drivers it will use the devices as if it were running on real hardware. This allows QEMU to run unmodified operating systems.
This however has a performance cost, as running in software what was meant to run in hardware involves a lot of extra work for the host CPU. To mitigate this, QEMU can present to the guest operating system paravirtualized devices, where the guest OS recognizes it is running inside QEMU and cooperates with the hypervisor.
QEMU relies on the virtio virtualization standard, and is thus able to present paravirtualized virtio devices, which includes a paravirtualized generic disk controller, a paravirtualized network card, a paravirtualized serial port, a paravirtualized SCSI controller, etc …

|
It is highly recommended to use the virtio devices whenever you can, as
they provide a big performance improvement and are generally better maintained.
Using the virtio generic disk controller versus an emulated IDE controller will
double the sequential write throughput, as measured with bonnie++(8). Using
the virtio network interface can deliver up to three times the throughput of an
emulated Intel E1000 network card, as measured with iperf(1). [See this benchmark on the KVM wiki https://www.linux-kvm.org/page/Using_VirtIO_NIC] |
Virtual Machines Settings
Generally speaking Proxmox VE tries to choose sane defaults for virtual machines (VM). Make sure you understand the meaning of the settings you change, as it could incur a performance slowdown, or putting your data at risk.
General Settings
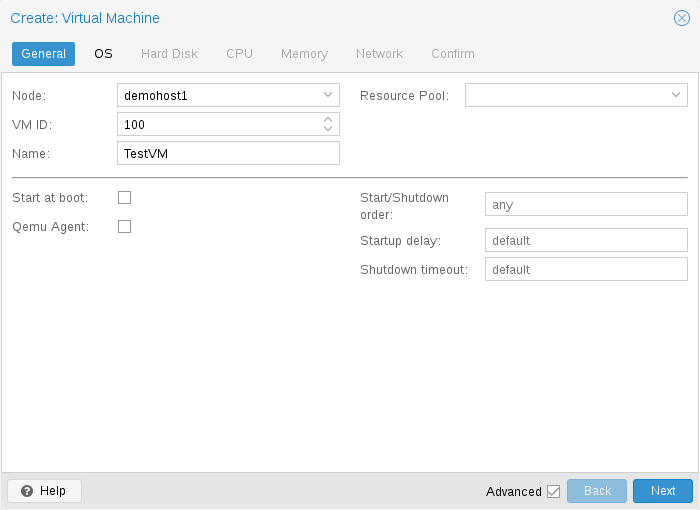
General settings of a VM include
-
the Node : the physical server on which the VM will run
-
the VM ID: a unique number in this Proxmox VE installation used to identify your VM
-
Name: a free form text string you can use to describe the VM
-
Resource Pool: a logical group of VMs
OS Settings
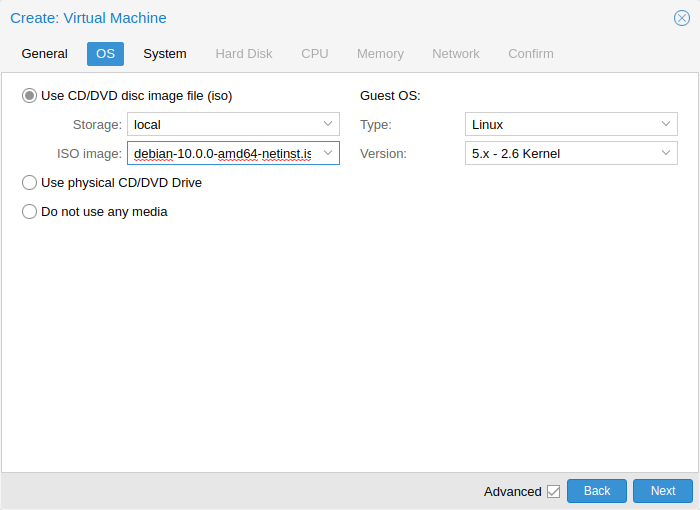
When creating a virtual machine (VM), setting the proper Operating System(OS) allows Proxmox VE to optimize some low level parameters. For instance Windows OS expect the BIOS clock to use the local time, while Unix based OS expect the BIOS clock to have the UTC time.
System Settings
On VM creation you can change some basic system components of the new VM. You can specify which display type you want to use.
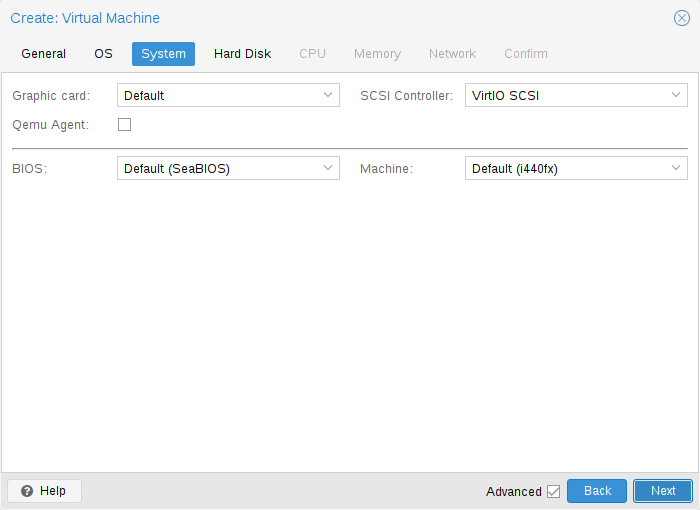
Additionally, the SCSI controller can be changed. If you plan to install the QEMU Guest Agent, or if your selected ISO image already ships and installs it automatically, you may want to tick the QEMU Agent box, which lets Proxmox VE know that it can use its features to show some more information, and complete some actions (for example, shutdown or snapshots) more intelligently.
Proxmox VE allows to boot VMs with different firmware and machine types, namely SeaBIOS and OVMF. In most cases you want to switch from the default SeaBIOS to OVMF only if you plan to use PCIe passthrough.
Machine Type
A VM’s Machine Type defines the hardware layout of the VM’s virtual motherboard. You can choose between the default Intel 440FX or the Q35 chipset, which also provides a virtual PCIe bus, and thus may be desired if you want to pass through PCIe hardware.
Machine Version
Each machine type is versioned in QEMU and a given QEMU binary supports many machine versions. New versions might bring support for new features, fixes or general improvements. However, they also change properties of the virtual hardware. To avoid sudden changes from the guest’s perspective and ensure compatibility of the VM state, live-migration and snapshots with RAM will keep using the same machine version in the new QEMU instance.
For Windows guests, the machine version is pinned during creation, because Windows is sensitive to changes in the virtual hardware - even between cold boots. For example, the enumeration of network devices might be different with different machine versions. Other OSes like Linux can usually deal with such changes just fine. For those, the Latest machine version is used by default. This means that after a fresh start, the newest machine version supported by the QEMU binary is used (e.g. the newest machine version QEMU 8.1 supports is version 8.1 for each machine type).
Update to a Newer Machine Version
Very old machine versions might become deprecated in QEMU. For example, this is the case for versions 1.4 to 1.7 for the i440fx machine type. It is expected that support for these machine versions will be dropped at some point. If you see a deprecation warning, you should change the machine version to a newer one. Be sure to have a working backup first and be prepared for changes to how the guest sees hardware. In some scenarios, re-installing certain drivers might be required. You should also check for snapshots with RAM that were taken with these machine versions (i.e. the runningmachine configuration entry). Unfortunately, there is no way to change the machine version of a snapshot, so you’d need to load the snapshot to salvage any data from it.
Hard Disk
Bus/Controller
QEMU can emulate a number of storage controllers:
|
|
It is highly recommended to use the VirtIO SCSI or VirtIO Block controller for performance reasons and because they are better maintained. |
-
the IDE controller, has a design which goes back to the 1984 PC/AT disk controller. Even if this controller has been superseded by recent designs, each and every OS you can think of has support for it, making it a great choice if you want to run an OS released before 2003. You can connect up to 4 devices on this controller.
-
the SATA (Serial ATA) controller, dating from 2003, has a more modern design, allowing higher throughput and a greater number of devices to be connected. You can connect up to 6 devices on this controller.
-
the SCSI controller, designed in 1985, is commonly found on server grade hardware, and can connect up to 14 storage devices. Proxmox VE emulates by default a LSI 53C895A controller.
A SCSI controller of type VirtIO SCSI single and enabling the IO Thread setting for the attached disks is recommended if you aim for performance. This is the default for newly created Linux VMs since Proxmox VE 7.3. Each disk will have its own VirtIO SCSI controller, and QEMU will handle the disks IO in a dedicated thread. Linux distributions have support for this controller since 2012, and FreeBSD since 2014. For Windows OSes, you need to provide an extra ISO containing the drivers during the installation.
-
The VirtIO Block controller, often just called VirtIO or virtio-blk, is an older type of paravirtualized controller. It has been superseded by the VirtIO SCSI Controller, in terms of features.
Image Format
On each controller you attach a number of emulated hard disks, which are backed by a file or a block device residing in the configured storage. The choice of a storage type will determine the format of the hard disk image. Storages which present block devices (LVM, ZFS, Ceph) will require the raw disk image format, whereas files based storages (Ext4, NFS, CIFS, GlusterFS) will let you to choose either the raw disk image format or the QEMU image format.
-
the QEMU image format is a copy on write format which allows snapshots, and thin provisioning of the disk image.
-
the raw disk image is a bit-to-bit image of a hard disk, similar to what you would get when executing the dd command on a block device in Linux. This format does not support thin provisioning or snapshots by itself, requiring cooperation from the storage layer for these tasks. It may, however, be up to 10% faster than the QEMU image format.
[See this benchmark for details https://events.static.linuxfound.org/sites/events/files/slides/CloudOpen2013_Khoa_Huynh_v3.pdf]
-
the VMware image format only makes sense if you intend to import/export the disk image to other hypervisors.
Cache Mode
Setting the Cache mode of the hard drive will impact how the host system will notify the guest systems of block write completions. The No cache default means that the guest system will be notified that a write is complete when each block reaches the physical storage write queue, ignoring the host page cache. This provides a good balance between safety and speed.
If you want the Proxmox VE backup manager to skip a disk when doing a backup of a VM, you can set the No backup option on that disk.
If you want the Proxmox VE storage replication mechanism to skip a disk when starting a replication job, you can set the Skip replication option on that disk. As of Proxmox VE 5.0, replication requires the disk images to be on a storage of type zfspool, so adding a disk image to other storages when the VM has replication configured requires to skip replication for this disk image.
Trim/Discard
If your storage supports thin provisioning (see the storage chapter in the
Proxmox VE guide), you can activate the Discard option on a drive. With Discard
set and a TRIM-enabled guest OS
[TRIM, UNMAP, and discard
https://en.wikipedia.org/wiki/Trim_%28computing%29]
, when the VM’s filesystem
marks blocks as unused after deleting files, the controller will relay this
information to the storage, which will then shrink the disk image accordingly.
For the guest to be able to issue TRIM commands, you must enable the Discard
option on the drive. Some guest operating systems may also require the
SSD Emulation flag to be set. Note that Discard on VirtIO Block drives is
only supported on guests using Linux Kernel 5.0 or higher.
If you would like a drive to be presented to the guest as a solid-state drive rather than a rotational hard disk, you can set the SSD emulation option on that drive. There is no requirement that the underlying storage actually be backed by SSDs; this feature can be used with physical media of any type. Note that SSD emulation is not supported on VirtIO Block drives.
IO Thread
The option IO Thread can only be used when using a disk with the VirtIO controller, or with the SCSI controller, when the emulated controller type is VirtIO SCSI single. With IO Thread enabled, QEMU creates one I/O thread per storage controller rather than handling all I/O in the main event loop or vCPU threads. One benefit is better work distribution and utilization of the underlying storage. Another benefit is reduced latency (hangs) in the guest for very I/O-intensive host workloads, since neither the main thread nor a vCPU thread can be blocked by disk I/O.
CPU
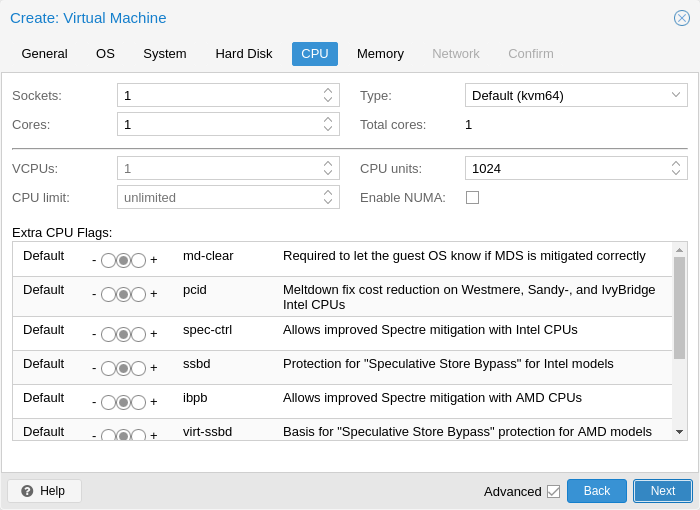
A CPU socket is a physical slot on a PC motherboard where you can plug a CPU. This CPU can then contain one or many cores, which are independent processing units. Whether you have a single CPU socket with 4 cores, or two CPU sockets with two cores is mostly irrelevant from a performance point of view. However some software licenses depend on the number of sockets a machine has, in that case it makes sense to set the number of sockets to what the license allows you.
Increasing the number of virtual CPUs (cores and sockets) will usually provide a performance improvement though that is heavily dependent on the use of the VM. Multi-threaded applications will of course benefit from a large number of virtual CPUs, as for each virtual cpu you add, QEMU will create a new thread of execution on the host system. If you’re not sure about the workload of your VM, it is usually a safe bet to set the number of Total cores to 2.
|
|
It is perfectly safe if the overall number of cores of all your VMs is greater than the number of cores on the server (for example, 4 VMs each with 4 cores (= total 16) on a machine with only 8 cores). In that case the host system will balance the QEMU execution threads between your server cores, just like if you were running a standard multi-threaded application. However, Proxmox VE will prevent you from starting VMs with more virtual CPU cores than physically available, as this will only bring the performance down due to the cost of context switches. |
Resource Limits
cpulimit
In addition to the number of virtual cores, the total available “Host CPU Time” for the VM can be set with the cpulimit option. It is a floating point value representing CPU time in percent, so 1.0 is equal to 100%, 2.5 to 250% and so on. If a single process would fully use one single core it would have 100% CPU Time usage. If a VM with four cores utilizes all its cores fully it would theoretically use 400%. In reality the usage may be even a bit higher as QEMU can have additional threads for VM peripherals besides the vCPU core ones.
This setting can be useful when a VM should have multiple vCPUs because it is running some processes in parallel, but the VM as a whole should not be able to run all vCPUs at 100% at the same time.
For example, suppose you have a virtual machine that would benefit from having 8 virtual CPUs, but you don’t want the VM to be able to max out all 8 cores running at full load - because that would overload the server and leave other virtual machines and containers with too little CPU time. To solve this, you could set cpulimit to 4.0 (=400%). This means that if the VM fully utilizes all 8 virtual CPUs by running 8 processes simultaneously, each vCPU will receive a maximum of 50% CPU time from the physical cores. However, if the VM workload only fully utilizes 4 virtual CPUs, it could still receive up to 100% CPU time from a physical core, for a total of 400%.
|
|
VMs can, depending on their configuration, use additional threads, such as for networking or IO operations but also live migration. Thus a VM can show up to use more CPU time than just its virtual CPUs could use. To ensure that a VM never uses more CPU time than vCPUs assigned, set the cpulimit to the same value as the total core count. |
cpuuntis
With the cpuunits option, nowadays often called CPU shares or CPU weight, you can control how much CPU time a VM gets compared to other running VMs. It is a relative weight which defaults to 100 (or 1024 if the host uses legacy cgroup v1). If you increase this for a VM it will be prioritized by the scheduler in comparison to other VMs with lower weight.
For example, if VM 100 has set the default 100 and VM 200 was changed to 200, the latter VM 200 would receive twice the CPU bandwidth than the first VM 100.
For more information see man systemd.resource-control, here CPUQuota corresponds to cpulimit and CPUWeight to our cpuunits setting. Visit its Notes section for references and implementation details.
affinity
With the affinity option, you can specify the physical CPU cores that are used to run the VM’s vCPUs. Peripheral VM processes, such as those for I/O, are not affected by this setting. Note that the CPU affinity is not a security feature.
Forcing a CPU affinity can make sense in certain cases but is accompanied by an increase in complexity and maintenance effort. For example, if you want to add more VMs later or migrate VMs to nodes with fewer CPU cores. It can also easily lead to asynchronous and therefore limited system performance if some CPUs are fully utilized while others are almost idle.
The affinity is set through the taskset CLI tool. It accepts the host CPU numbers (see lscpu) in the List Format from man cpuset. This ASCII decimal list can contain numbers but also number ranges. For example, the affinity 0-1,8-11 (expanded 0, 1, 8, 9, 10, 11) would allow the VM to run on only these six specific host cores.
CPU Type
QEMU can emulate a number different of CPU types from 486 to the latest Xeon processors. Each new processor generation adds new features, like hardware assisted 3d rendering, random number generation, memory protection, etc. Also, a current generation can be upgraded through microcode update with bug or security fixes.
Usually you should select for your VM a processor type which closely matches the CPU of the host system, as it means that the host CPU features (also called CPU flags ) will be available in your VMs. If you want an exact match, you can set the CPU type to host in which case the VM will have exactly the same CPU flags as your host system.
This has a downside though. If you want to do a live migration of VMs between different hosts, your VM might end up on a new system with a different CPU type or a different microcode version. If the CPU flags passed to the guest are missing, the QEMU process will stop. To remedy this QEMU has also its own virtual CPU types, that Proxmox VE uses by default.
The backend default is kvm64 which works on essentially all x86_64 host CPUs and the UI default when creating a new VM is x86-64-v2-AES, which requires a host CPU starting from Westmere for Intel or at least a fourth generation Opteron for AMD.
In short:
If you don’t care about live migration or have a homogeneous cluster where all nodes have the same CPU and same microcode version, set the CPU type to host, as in theory this will give your guests maximum performance.
If you care about live migration and security, and you have only Intel CPUs or only AMD CPUs, choose the lowest generation CPU model of your cluster.
If you care about live migration without security, or have mixed Intel/AMD cluster, choose the lowest compatible virtual QEMU CPU type.
|
|
Live migrations between Intel and AMD host CPUs have no guarantee to work. |
QEMU CPU Types
QEMU also provide virtual CPU types, compatible with both Intel and AMD host CPUs.
|
|
To mitigate the Spectre vulnerability for virtual CPU types, you need to add the relevant CPU flags, see Meltdown / Spectre related CPU flags. |
Historically, Proxmox VE had the kvm64 CPU model, with CPU flags at the level of Pentium 4 enabled, so performance was not great for certain workloads.
In the summer of 2020, AMD, Intel, Red Hat, and SUSE collaborated to define three x86-64 microarchitecture levels on top of the x86-64 baseline, with modern flags enabled. For details, see the x86-64-ABI specification.
|
|
Some newer distributions like CentOS 9 are now built with x86-64-v2 flags as a minimum requirement. |
-
kvm64 (x86-64-v1): Compatible with Intel CPU >= Pentium 4, AMD CPU >= Phenom.
-
x86-64-v2: Compatible with Intel CPU >= Nehalem, AMD CPU >= Opteron_G3. Added CPU flags compared to x86-64-v1: +cx16, +lahf-lm, +popcnt, +pni, +sse4.1, +sse4.2, +ssse3.
-
x86-64-v2-AES: Compatible with Intel CPU >= Westmere, AMD CPU >= Opteron_G4. Added CPU flags compared to x86-64-v2: +aes.
-
x86-64-v3: Compatible with Intel CPU >= Broadwell, AMD CPU >= EPYC. Added CPU flags compared to x86-64-v2-AES: +avx, +avx2, +bmi1, +bmi2, +f16c, +fma, +movbe, +xsave.
-
x86-64-v4: Compatible with Intel CPU >= Skylake, AMD CPU >= EPYC v4 Genoa. Added CPU flags compared to x86-64-v3: +avx512f, +avx512bw, +avx512cd, +avx512dq, +avx512vl.
Custom CPU Types
You can specify custom CPU types with a configurable set of features. These are maintained in the configuration file /etc/pve/virtual-guest/cpu-models.conf by an administrator. See man cpu-models.conf for format details.
Specified custom types can be selected by any user with the Sys.Audit privilege on /nodes. When configuring a custom CPU type for a VM via the CLI or API, the name needs to be prefixed with custom-.
Meltdown / Spectre related CPU flags
There are several CPU flags related to the Meltdown and Spectre vulnerabilities
[Meltdown Attack https://meltdownattack.com/]
which need to be set
manually unless the selected CPU type of your VM already enables them by default.
There are two requirements that need to be fulfilled in order to use these CPU flags:
-
The host CPU(s) must support the feature and propagate it to the guest’s virtual CPU(s)
-
The guest operating system must be updated to a version which mitigates the attacks and is able to utilize the CPU feature
Otherwise you need to set the desired CPU flag of the virtual CPU, either by editing the CPU options in the web UI, or by setting the flags property of the cpu option in the VM configuration file.
For Spectre v1,v2,v4 fixes, your CPU or system vendor also needs to provide a so-called “microcode update” for your CPU, see chapter Firmware Updates. Note that not all affected CPUs can be updated to support spec-ctrl.
To check if the Proxmox VE host is vulnerable, execute the following command as root:
for f in /sys/devices/system/cpu/vulnerabilities/*; do echo "${f##*/} -" $(cat "$f"); done
A community script is also available to detect if the host is still vulnerable.
[spectre-meltdown-checker https://meltdown.ovh/]
Intel processors
-
pcid
This reduces the performance impact of the Meltdown (CVE-2017-5754) mitigation called Kernel Page-Table Isolation (KPTI), which effectively hides the Kernel memory from the user space. Without PCID, KPTI is quite an expensive mechanism
[PCID is now a critical performance/security feature on x86 https://groups.google.com/forum/m/#!topic/mechanical-sympathy/L9mHTbeQLNU]
.To check if the Proxmox VE host supports PCID, execute the following command as root:
# grep ' pcid ' /proc/cpuinfo
If this does not return empty your host’s CPU has support for pcid.
-
spec-ctrl
Required to enable the Spectre v1 (CVE-2017-5753) and Spectre v2 (CVE-2017-5715) fix, in cases where retpolines are not sufficient. Included by default in Intel CPU models with -IBRS suffix. Must be explicitly turned on for Intel CPU models without -IBRS suffix. Requires an updated host CPU microcode (intel-microcode >= 20180425).
-
ssbd
Required to enable the Spectre V4 (CVE-2018-3639) fix. Not included by default in any Intel CPU model. Must be explicitly turned on for all Intel CPU models. Requires an updated host CPU microcode(intel-microcode >= 20180703).
AMD processors
-
ibpb
Required to enable the Spectre v1 (CVE-2017-5753) and Spectre v2 (CVE-2017-5715) fix, in cases where retpolines are not sufficient. Included by default in AMD CPU models with -IBPB suffix. Must be explicitly turned on for AMD CPU models without -IBPB suffix. Requires the host CPU microcode to support this feature before it can be used for guest CPUs.
-
virt-ssbd
Required to enable the Spectre v4 (CVE-2018-3639) fix. Not included by default in any AMD CPU model. Must be explicitly turned on for all AMD CPU models. This should be provided to guests, even if amd-ssbd is also provided, for maximum guest compatibility. Note that this must be explicitly enabled when when using the "host" cpu model, because this is a virtual feature which does not exist in the physical CPUs.
-
amd-ssbd
Required to enable the Spectre v4 (CVE-2018-3639) fix. Not included by default in any AMD CPU model. Must be explicitly turned on for all AMD CPU models. This provides higher performance than virt-ssbd, therefore a host supporting this should always expose this to guests if possible. virt-ssbd should none the less also be exposed for maximum guest compatibility as some kernels only know about virt-ssbd.
-
amd-no-ssb
Recommended to indicate the host is not vulnerable to Spectre V4 (CVE-2018-3639). Not included by default in any AMD CPU model. Future hardware generations of CPU will not be vulnerable to CVE-2018-3639, and thus the guest should be told not to enable its mitigations, by exposing amd-no-ssb. This is mutually exclusive with virt-ssbd and amd-ssbd.
NUMA
You can also optionally emulate a NUMA
[https://en.wikipedia.org/wiki/Non-uniform_memory_access]
architecture
in your VMs. The basics of the NUMA architecture mean that instead of having a
global memory pool available to all your cores, the memory is spread into local
banks close to each socket.
This can bring speed improvements as the memory bus is not a bottleneck
anymore. If your system has a NUMA architecture
[if the command
numactl --hardware | grep available returns more than one node, then your host
system has a NUMA architecture]
we recommend to activate the option, as this
will allow proper distribution of the VM resources on the host system.
This option is also required to hot-plug cores or RAM in a VM.
If the NUMA option is used, it is recommended to set the number of sockets to the number of nodes of the host system.
vCPU hot-plug
Modern operating systems introduced the capability to hot-plug and, to a certain extent, hot-unplug CPUs in a running system. Virtualization allows us to avoid a lot of the (physical) problems real hardware can cause in such scenarios. Still, this is a rather new and complicated feature, so its use should be restricted to cases where its absolutely needed. Most of the functionality can be replicated with other, well tested and less complicated, features, see Resource Limits.
In Proxmox VE the maximal number of plugged CPUs is always cores * sockets. To start a VM with less than this total core count of CPUs you may use the vcpus setting, it denotes how many vCPUs should be plugged in at VM start.
Currently only this feature is only supported on Linux, a kernel newer than 3.10 is needed, a kernel newer than 4.7 is recommended.
You can use a udev rule as follow to automatically set new CPUs as online in the guest:
SUBSYSTEM=="cpu", ACTION=="add", TEST=="online", ATTR{online}=="0", ATTR{online}="1"
Save this under /etc/udev/rules.d/ as a file ending in .rules.
Note: CPU hot-remove is machine dependent and requires guest cooperation. The deletion command does not guarantee CPU removal to actually happen, typically it’s a request forwarded to guest OS using target dependent mechanism, such as ACPI on x86/amd64.
Memory
For each VM you have the option to set a fixed size memory or asking Proxmox VE to dynamically allocate memory based on the current RAM usage of the host.
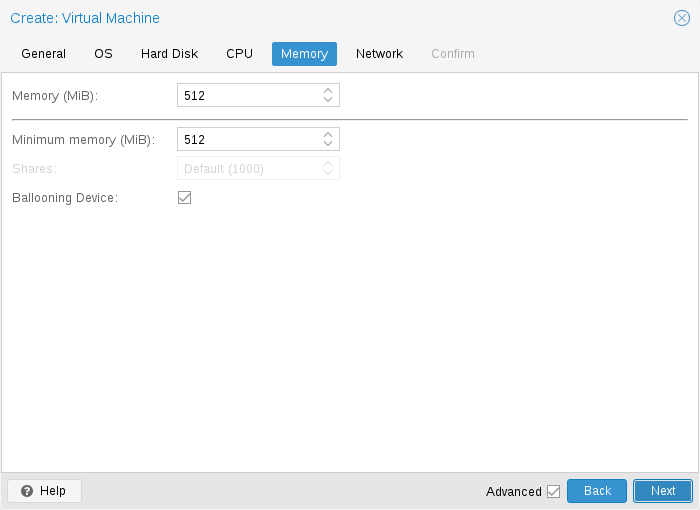
Fixed Memory Allocation
When setting memory and minimum memory to the same amount Proxmox VE will simply allocate what you specify to your VM.
Even when using a fixed memory size, the ballooning device gets added to the VM, because it delivers useful information such as how much memory the guest really uses. In general, you should leave ballooning enabled, but if you want to disable it (like for debugging purposes), simply uncheck Ballooning Device or set
balloon: 0
in the configuration.
Automatic Memory Allocation
When setting the minimum memory lower than memory, Proxmox VE will make sure that the minimum amount you specified is always available to the VM, and if RAM usage on the host is below 80%, will dynamically add memory to the guest up to the maximum memory specified.
When the host is running low on RAM, the VM will then release some memory
back to the host, swapping running processes if needed and starting the oom
killer in last resort. The passing around of memory between host and guest is
done via a special balloon kernel driver running inside the guest, which will
grab or release memory pages from the host.
[A good explanation of the inner workings of the balloon driver can be found here https://rwmj.wordpress.com/2010/07/17/virtio-balloon/]
When multiple VMs use the autoallocate facility, it is possible to set a
Shares coefficient which indicates the relative amount of the free host memory
that each VM should take. Suppose for instance you have four VMs, three of them
running an HTTP server and the last one is a database server. To cache more
database blocks in the database server RAM, you would like to prioritize the
database VM when spare RAM is available. For this you assign a Shares property
of 3000 to the database VM, leaving the other VMs to the Shares default setting
of 1000. The host server has 32GB of RAM, and is currently using 16GB, leaving 32
* 80/100 - 16 = 9GB RAM to be allocated to the VMs on top of their configured
minimum memory amount. The database VM will benefit from 9 * 3000 / (3000
1000 + 1000 + 1000) = 4.5 GB extra RAM and each HTTP server from 1.5 GB.
All Linux distributions released after 2010 have the balloon kernel driver included. For Windows OSes, the balloon driver needs to be added manually and can incur a slowdown of the guest, so we don’t recommend using it on critical systems.
When allocating RAM to your VMs, a good rule of thumb is always to leave 1GB of RAM available to the host.
Network Device
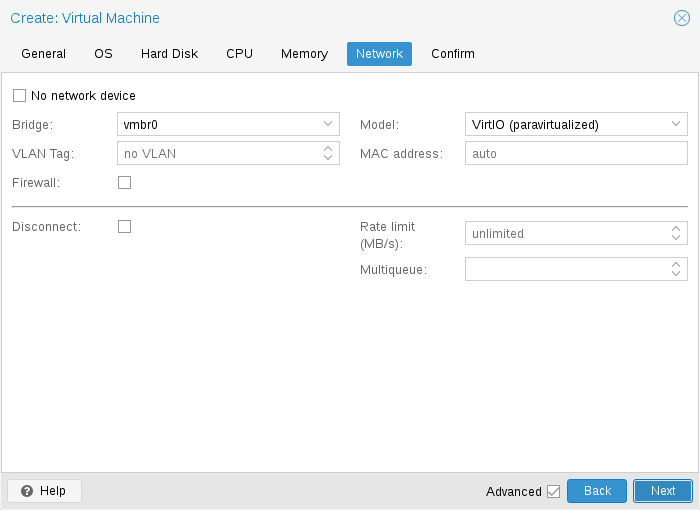
Each VM can have many Network interface controllers (NIC), of four different types:
-
Intel E1000 is the default, and emulates an Intel Gigabit network card.
-
the VirtIO paravirtualized NIC should be used if you aim for maximum performance. Like all VirtIO devices, the guest OS should have the proper driver installed.
-
the Realtek 8139 emulates an older 100 MB/s network card, and should only be used when emulating older operating systems ( released before 2002 )
-
the vmxnet3 is another paravirtualized device, which should only be used when importing a VM from another hypervisor.
Proxmox VE will generate for each NIC a random MAC address, so that your VM is addressable on Ethernet networks.
The NIC you added to the VM can follow one of two different models:
-
in the default Bridged mode each virtual NIC is backed on the host by a tap device, ( a software loopback device simulating an Ethernet NIC ). This tap device is added to a bridge, by default vmbr0 in Proxmox VE. In this mode, VMs have direct access to the Ethernet LAN on which the host is located.
-
in the alternative NAT mode, each virtual NIC will only communicate with the QEMU user networking stack, where a built-in router and DHCP server can provide network access. This built-in DHCP will serve addresses in the private 10.0.2.0/24 range. The NAT mode is much slower than the bridged mode, and should only be used for testing. This mode is only available via CLI or the API, but not via the web UI.
You can also skip adding a network device when creating a VM by selecting No network device.
You can overwrite the MTU setting for each VM network device. The option mtu=1 represents a special case, in which the MTU value will be inherited from the underlying bridge. This option is only available for VirtIO network devices.
Multiqueue
If you are using the VirtIO driver, you can optionally activate the Multiqueue option. This option allows the guest OS to process networking packets using multiple virtual CPUs, providing an increase in the total number of packets transferred.
When using the VirtIO driver with Proxmox VE, each NIC network queue is passed to the host kernel, where the queue will be processed by a kernel thread spawned by the vhost driver. With this option activated, it is possible to pass multiple network queues to the host kernel for each NIC.
When using Multiqueue, it is recommended to set it to a value equal to the number of vCPUs of your guest. Remember that the number of vCPUs is the number of sockets times the number of cores configured for the VM. You also need to set the number of multi-purpose channels on each VirtIO NIC in the VM with this ethtool command:
ethtool -L ens1 combined X
where X is the number of the number of vCPUs of the VM.
To configure a Windows guest for Multiqueue install the Redhat VirtIO Ethernet Adapter drivers, then adapt the NIC’s configuration as follows. Open the device manager, right click the NIC under "Network adapters", and select "Properties". Then open the "Advanced" tab and select "Receive Side Scaling" from the list on the left. Make sure it is set to "Enabled". Next, navigate to "Maximum number of RSS Queues" in the list and set it to the number of vCPUs of your VM. Once you verified that the settings are correct, click "OK" to confirm them.
You should note that setting the Multiqueue parameter to a value greater than one will increase the CPU load on the host and guest systems as the traffic increases. We recommend to set this option only when the VM has to process a great number of incoming connections, such as when the VM is running as a router, reverse proxy or a busy HTTP server doing long polling.
Display
QEMU can virtualize a few types of VGA hardware. Some examples are:
-
std, the default, emulates a card with Bochs VBE extensions.
-
cirrus, this was once the default, it emulates a very old hardware module with all its problems. This display type should only be used if really necessary
[https://www.kraxel.org/blog/2014/10/qemu-using-cirrus-considered-harmful/ qemu: using cirrus considered harmful]
, for example, if using Windows XP or earlier -
vmware, is a VMWare SVGA-II compatible adapter.
-
qxl, is the QXL paravirtualized graphics card. Selecting this also enables SPICE (a remote viewer protocol) for the VM.
-
virtio-gl, often named VirGL is a virtual 3D GPU for use inside VMs that can offload workloads to the host GPU without requiring special (expensive) models and drivers and neither binding the host GPU completely, allowing reuse between multiple guests and or the host.
VirGL support needs some extra libraries that aren’t installed by default due to being relatively big and also not available as open source for all GPU models/vendors. For most setups you’ll just need to do: apt install libgl1 libegl1
You can edit the amount of memory given to the virtual GPU, by setting the memory option. This can enable higher resolutions inside the VM, especially with SPICE/QXL.
As the memory is reserved by display device, selecting Multi-Monitor mode for SPICE (such as qxl2 for dual monitors) has some implications:
-
Windows needs a device for each monitor, so if your ostype is some version of Windows, Proxmox VE gives the VM an extra device per monitor. Each device gets the specified amount of memory.
-
Linux VMs, can always enable more virtual monitors, but selecting a Multi-Monitor mode multiplies the memory given to the device with the number of monitors.
Selecting serialX as display type disables the VGA output, and redirects the Web Console to the selected serial port. A configured display memory setting will be ignored in that case.
VNC clipboard
You can enable the VNC clipboard by setting clipboard to vnc.
# qm set <vmid> -vga <displaytype>,clipboard=vnc
In order to use the clipboard feature, you must first install the SPICE guest tools. On Debian-based distributions, this can be achieved by installing spice-vdagent. For other Operating Systems search for it in the offical repositories or see: https://www.spice-space.org/download.html
Once you have installed the spice guest tools, you can use the VNC clipboard function (e.g. in the noVNC console panel). However, if you’re using SPICE, virtio or virgl, you’ll need to choose which clipboard to use. This is because the default SPICE clipboard will be replaced by the VNC clipboard, if clipboard is set to vnc.
USB Passthrough
There are two different types of USB passthrough devices:
-
Host USB passthrough
-
SPICE USB passthrough
Host USB passthrough works by giving a VM a USB device of the host. This can either be done via the vendor- and product-id, or via the host bus and port.
The vendor/product-id looks like this: 0123:abcd, where 0123 is the id of the vendor, and abcd is the id of the product, meaning two pieces of the same usb device have the same id.
The bus/port looks like this: 1-2.3.4, where 1 is the bus and 2.3.4 is the port path. This represents the physical ports of your host (depending of the internal order of the usb controllers).
If a device is present in a VM configuration when the VM starts up, but the device is not present in the host, the VM can boot without problems. As soon as the device/port is available in the host, it gets passed through.

|
Using this kind of USB passthrough means that you cannot move a VM online to another host, since the hardware is only available on the host the VM is currently residing. |
The second type of passthrough is SPICE USB passthrough. If you add one or more SPICE USB ports to your VM, you can dynamically pass a local USB device from your SPICE client through to the VM. This can be useful to redirect an input device or hardware dongle temporarily.
It is also possible to map devices on a cluster level, so that they can be properly used with HA and hardware changes are detected and non root users can configure them. See Resource Mapping for details on that.
BIOS and UEFI
In order to properly emulate a computer, QEMU needs to use a firmware. Which, on common PCs often known as BIOS or (U)EFI, is executed as one of the first steps when booting a VM. It is responsible for doing basic hardware initialization and for providing an interface to the firmware and hardware for the operating system. By default QEMU uses SeaBIOS for this, which is an open-source, x86 BIOS implementation. SeaBIOS is a good choice for most standard setups.
Some operating systems (such as Windows 11) may require use of an UEFI
compatible implementation. In such cases, you must use OVMF instead,
which is an open-source UEFI implementation.
[See the OVMF Project https://github.com/tianocore/tianocore.github.io/wiki/OVMF]
There are other scenarios in which the SeaBIOS may not be the ideal firmware to
boot from, for example if you want to do VGA passthrough.
[Alex
Williamson has a good blog entry about this
https://vfio.blogspot.co.at/2014/08/primary-graphics-assignment-without-vga.html]
If you want to use OVMF, there are several things to consider:
In order to save things like the boot order, there needs to be an EFI Disk. This disk will be included in backups and snapshots, and there can only be one.
You can create such a disk with the following command:
# qm set <vmid> -efidisk0 <storage>:1,format=<format>,efitype=4m,pre-enrolled-keys=1
Where <storage> is the storage where you want to have the disk, and <format> is a format which the storage supports. Alternatively, you can create such a disk through the web interface with Add → EFI Disk in the hardware section of a VM.
The efitype option specifies which version of the OVMF firmware should be used. For new VMs, this should always be 4m, as it supports Secure Boot and has more space allocated to support future development (this is the default in the GUI).
pre-enroll-keys specifies if the efidisk should come pre-loaded with distribution-specific and Microsoft Standard Secure Boot keys. It also enables Secure Boot by default (though it can still be disabled in the OVMF menu within the VM).
|
|
If you want to start using Secure Boot in an existing VM (that still uses a 2m efidisk), you need to recreate the efidisk. To do so, delete the old one (qm set <vmid> -delete efidisk0) and add a new one as described above. This will reset any custom configurations you have made in the OVMF menu! |
When using OVMF with a virtual display (without VGA passthrough), you need to set the client resolution in the OVMF menu (which you can reach with a press of the ESC button during boot), or you have to choose SPICE as the display type.
Trusted Platform Module (TPM)
A Trusted Platform Module is a device which stores secret data - such as encryption keys - securely and provides tamper-resistance functions for validating system boot.
Certain operating systems (such as Windows 11) require such a device to be attached to a machine (be it physical or virtual).
A TPM is added by specifying a tpmstate volume. This works similar to an efidisk, in that it cannot be changed (only removed) once created. You can add one via the following command:
# qm set <vmid> -tpmstate0 <storage>:1,version=<version>
Where <storage> is the storage you want to put the state on, and <version> is either v1.2 or v2.0. You can also add one via the web interface, by choosing Add → TPM State in the hardware section of a VM.
The v2.0 TPM spec is newer and better supported, so unless you have a specific implementation that requires a v1.2 TPM, it should be preferred.
|
|
Compared to a physical TPM, an emulated one does not provide any real security benefits. The point of a TPM is that the data on it cannot be modified easily, except via commands specified as part of the TPM spec. Since with an emulated device the data storage happens on a regular volume, it can potentially be edited by anyone with access to it. |
Inter-VM shared memory
You can add an Inter-VM shared memory device (ivshmem), which allows one to share memory between the host and a guest, or also between multiple guests.
To add such a device, you can use qm:
# qm set <vmid> -ivshmem size=32,name=foo
Where the size is in MiB. The file will be located under /dev/shm/pve-shm-$name (the default name is the vmid).
|
|
Currently the device will get deleted as soon as any VM using it got shutdown or stopped. Open connections will still persist, but new connections to the exact same device cannot be made anymore. |
A use case for such a device is the Looking Glass
[Looking Glass: https://looking-glass.io/]
project, which enables high
performance, low-latency display mirroring between host and guest.
Audio Device
To add an audio device run the following command:
qm set <vmid> -audio0 device=<device>
Supported audio devices are:
-
ich9-intel-hda: Intel HD Audio Controller, emulates ICH9
-
intel-hda: Intel HD Audio Controller, emulates ICH6
-
AC97: Audio Codec '97, useful for older operating systems like Windows XP
There are two backends available:
-
spice
-
none
The spice backend can be used in combination with SPICE while the none backend can be useful if an audio device is needed in the VM for some software to work. To use the physical audio device of the host use device passthrough (see PCI Passthrough and USB Passthrough). Remote protocols like Microsoft’s RDP have options to play sound.
VirtIO RNG
A RNG (Random Number Generator) is a device providing entropy (randomness) to a system. A virtual hardware-RNG can be used to provide such entropy from the host system to a guest VM. This helps to avoid entropy starvation problems in the guest (a situation where not enough entropy is available and the system may slow down or run into problems), especially during the guests boot process.
To add a VirtIO-based emulated RNG, run the following command:
qm set <vmid> -rng0 source=<source>[,max_bytes=X,period=Y]
source specifies where entropy is read from on the host and has to be one of the following:
-
/dev/urandom: Non-blocking kernel entropy pool (preferred)
-
/dev/random: Blocking kernel pool (not recommended, can lead to entropy starvation on the host system)
-
/dev/hwrng: To pass through a hardware RNG attached to the host (if multiple are available, the one selected in /sys/devices/virtual/misc/hw_random/rng_current will be used)
A limit can be specified via the max_bytes and period parameters, they are read as max_bytes per period in milliseconds. However, it does not represent a linear relationship: 1024B/1000ms would mean that up to 1 KiB of data becomes available on a 1 second timer, not that 1 KiB is streamed to the guest over the course of one second. Reducing the period can thus be used to inject entropy into the guest at a faster rate.
By default, the limit is set to 1024 bytes per 1000 ms (1 KiB/s). It is recommended to always use a limiter to avoid guests using too many host resources. If desired, a value of 0 for max_bytes can be used to disable all limits.
Device Boot Order
QEMU can tell the guest which devices it should boot from, and in which order. This can be specified in the config via the boot property, for example:
boot: order=scsi0;net0;hostpci0
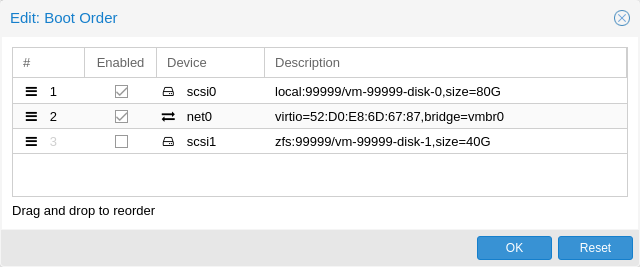
This way, the guest would first attempt to boot from the disk scsi0, if that fails, it would go on to attempt network boot from net0, and in case that fails too, finally attempt to boot from a passed through PCIe device (seen as disk in case of NVMe, otherwise tries to launch into an option ROM).
On the GUI you can use a drag-and-drop editor to specify the boot order, and use the checkbox to enable or disable certain devices for booting altogether.
|
|
If your guest uses multiple disks to boot the OS or load the bootloader, all of them must be marked as bootable (that is, they must have the checkbox enabled or appear in the list in the config) for the guest to be able to boot. This is because recent SeaBIOS and OVMF versions only initialize disks if they are marked bootable. |
In any case, even devices not appearing in the list or having the checkmark disabled will still be available to the guest, once it’s operating system has booted and initialized them. The bootable flag only affects the guest BIOS and bootloader.
Automatic Start and Shutdown of Virtual Machines
After creating your VMs, you probably want them to start automatically when the host system boots. For this you need to select the option Start at boot from the Options Tab of your VM in the web interface, or set it with the following command:
# qm set <vmid> -onboot 1

Start and Shutdown Order
In some case you want to be able to fine tune the boot order of your VMs, for instance if one of your VM is providing firewalling or DHCP to other guest systems. For this you can use the following parameters:
-
Start/Shutdown order: Defines the start order priority. For example, set it to 1 if you want the VM to be the first to be started. (We use the reverse startup order for shutdown, so a machine with a start order of 1 would be the last to be shut down). If multiple VMs have the same order defined on a host, they will additionally be ordered by VMID in ascending order.
-
Startup delay: Defines the interval between this VM start and subsequent VMs starts. For example, set it to 240 if you want to wait 240 seconds before starting other VMs.
-
Shutdown timeout: Defines the duration in seconds Proxmox VE should wait for the VM to be offline after issuing a shutdown command. By default this value is set to 180, which means that Proxmox VE will issue a shutdown request and wait 180 seconds for the machine to be offline. If the machine is still online after the timeout it will be stopped forcefully.
|
|
VMs managed by the HA stack do not follow the start on boot and boot order options currently. Those VMs will be skipped by the startup and shutdown algorithm as the HA manager itself ensures that VMs get started and stopped. |
Please note that machines without a Start/Shutdown order parameter will always start after those where the parameter is set. Further, this parameter can only be enforced between virtual machines running on the same host, not cluster-wide.
If you require a delay between the host boot and the booting of the first VM, see the section on Proxmox VE Node Management.
QEMU Guest Agent
The QEMU Guest Agent is a service which runs inside the VM, providing a communication channel between the host and the guest. It is used to exchange information and allows the host to issue commands to the guest.
For example, the IP addresses in the VM summary panel are fetched via the guest agent.
Or when starting a backup, the guest is told via the guest agent to sync outstanding writes via the fs-freeze and fs-thaw commands.
For the guest agent to work properly the following steps must be taken:
-
install the agent in the guest and make sure it is running
-
enable the communication via the agent in Proxmox VE
Install Guest Agent
For most Linux distributions, the guest agent is available. The package is usually named qemu-guest-agent.
For Windows, it can be installed from the Fedora VirtIO driver ISO.
Enable Guest Agent Communication
Communication from Proxmox VE with the guest agent can be enabled in the VM’s Options panel. A fresh start of the VM is necessary for the changes to take effect.
Automatic TRIM Using QGA
It is possible to enable the Run guest-trim option. With this enabled, Proxmox VE will issue a trim command to the guest after the following operations that have the potential to write out zeros to the storage:
-
moving a disk to another storage
-
live migrating a VM to another node with local storage
On a thin provisioned storage, this can help to free up unused space.
|
|
There is a caveat with ext4 on Linux, because it uses an in-memory optimization to avoid issuing duplicate TRIM requests. Since the guest doesn’t know about the change in the underlying storage, only the first guest-trim will run as expected. Subsequent ones, until the next reboot, will only consider parts of the filesystem that changed since then. |
Filesystem Freeze & Thaw on Backup
By default, guest filesystems are synced via the fs-freeze QEMU Guest Agent Command when a backup is performed, to provide consistency.
On Windows guests, some applications might handle consistent backups themselves by hooking into the Windows VSS (Volume Shadow Copy Service) layer, a fs-freeze then might interfere with that. For example, it has been observed that calling fs-freeze with some SQL Servers triggers VSS to call the SQL Writer VSS module in a mode that breaks the SQL Server backup chain for differential backups.
For such setups you can configure Proxmox VE to not issue a freeze-and-thaw cycle on backup by setting the freeze-fs-on-backup QGA option to 0. This can also be done via the GUI with the Freeze/thaw guest filesystems on backup for consistency option.

|
Disabling this option can potentially lead to backups with inconsistent filesystems and should therefore only be disabled if you know what you are doing. |
Troubleshooting
VM does not shut down
Make sure the guest agent is installed and running.
Once the guest agent is enabled, Proxmox VE will send power commands like shutdown via the guest agent. If the guest agent is not running, commands cannot get executed properly and the shutdown command will run into a timeout.
SPICE Enhancements
SPICE Enhancements are optional features that can improve the remote viewer experience.
To enable them via the GUI go to the Options panel of the virtual machine. Run the following command to enable them via the CLI:
qm set <vmid> -spice_enhancements foldersharing=1,videostreaming=all
|
|
To use these features the Display of the virtual machine must be set to SPICE (qxl). |
Folder Sharing
Share a local folder with the guest. The spice-webdavd daemon needs to be installed in the guest. It makes the shared folder available through a local WebDAV server located at http://localhost:9843.
For Windows guests the installer for the Spice WebDAV daemon can be downloaded from the official SPICE website.
Most Linux distributions have a package called spice-webdavd that can be installed.
To share a folder in Virt-Viewer (Remote Viewer) go to File → Preferences. Select the folder to share and then enable the checkbox.
|
|
Folder sharing currently only works in the Linux version of Virt-Viewer. |

|
Experimental! Currently this feature does not work reliably. |
Video Streaming
Fast refreshing areas are encoded into a video stream. Two options exist:
-
all: Any fast refreshing area will be encoded into a video stream.
-
filter: Additional filters are used to decide if video streaming should be used (currently only small window surfaces are skipped).
A general recommendation if video streaming should be enabled and which option to choose from cannot be given. Your mileage may vary depending on the specific circumstances.
Troubleshooting
Shared folder does not show up
Make sure the WebDAV service is enabled and running in the guest. On Windows it is called Spice webdav proxy. In Linux the name is spice-webdavd but can be different depending on the distribution.
If the service is running, check the WebDAV server by opening http://localhost:9843 in a browser in the guest.
It can help to restart the SPICE session.
Migration
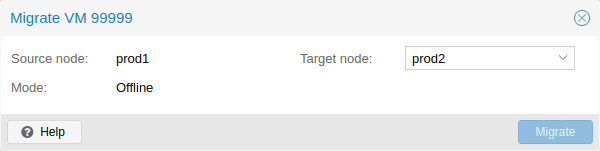
If you have a cluster, you can migrate your VM to another host with
# qm migrate <vmid> <target>
There are generally two mechanisms for this
-
Online Migration (aka Live Migration)
-
Offline Migration
Online Migration
If your VM is running and no locally bound resources are configured (such as devices that are passed through), you can initiate a live migration with the --online flag in the qm migration command evocation. The web interface defaults to live migration when the VM is running.
How it works
Online migration first starts a new QEMU process on the target host with the incoming flag, which performs only basic initialization with the guest vCPUs still paused and then waits for the guest memory and device state data streams of the source Virtual Machine. All other resources, such as disks, are either shared or got already sent before runtime state migration of the VMs begins; so only the memory content and device state remain to be transferred.
Once this connection is established, the source begins asynchronously sending the memory content to the target. If the guest memory on the source changes, those sections are marked dirty and another pass is made to send the guest memory data. This loop is repeated until the data difference between running source VM and incoming target VM is small enough to be sent in a few milliseconds, because then the source VM can be paused completely, without a user or program noticing the pause, so that the remaining data can be sent to the target, and then unpause the targets VM’s CPU to make it the new running VM in well under a second.
Requirements
For Live Migration to work, there are some things required:
-
The VM has no local resources that cannot be migrated. For example, PCI or USB devices that are passed through currently block live-migration. Local Disks, on the other hand, can be migrated by sending them to the target just fine.
-
The hosts are located in the same Proxmox VE cluster.
-
The hosts have a working (and reliable) network connection between them.
-
The target host must have the same, or higher versions of the Proxmox VE packages. Although it can sometimes work the other way around, this cannot be guaranteed.
-
The hosts have CPUs from the same vendor with similar capabilities. Different vendor might work depending on the actual models and VMs CPU type configured, but it cannot be guaranteed - so please test before deploying such a setup in production.
Offline Migration
If you have local resources, you can still migrate your VMs offline as long as all disk are on storage defined on both hosts. Migration then copies the disks to the target host over the network, as with online migration. Note that any hardware passthrough configuration may need to be adapted to the device location on the target host.
Copies and Clones
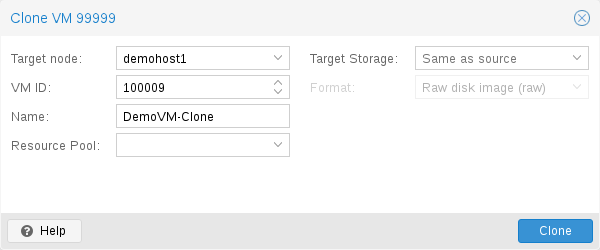
VM installation is usually done using an installation media (CD-ROM) from the operating system vendor. Depending on the OS, this can be a time consuming task one might want to avoid.
An easy way to deploy many VMs of the same type is to copy an existing VM. We use the term clone for such copies, and distinguish between linked and full clones.
- Full Clone
-
The result of such copy is an independent VM. The new VM does not share any storage resources with the original.
It is possible to select a Target Storage, so one can use this to migrate a VM to a totally different storage. You can also change the disk image Format if the storage driver supports several formats.
A full clone needs to read and copy all VM image data. This is usually much slower than creating a linked clone. Some storage types allows to copy a specific Snapshot, which defaults to the current VM data. This also means that the final copy never includes any additional snapshots from the original VM.
- Linked Clone
-
Modern storage drivers support a way to generate fast linked clones. Such a clone is a writable copy whose initial contents are the same as the original data. Creating a linked clone is nearly instantaneous, and initially consumes no additional space.
They are called linked because the new image still refers to the original. Unmodified data blocks are read from the original image, but modification are written (and afterwards read) from a new location. This technique is called Copy-on-write.
This requires that the original volume is read-only. With Proxmox VE one can convert any VM into a read-only Template). Such templates can later be used to create linked clones efficiently.
You cannot delete an original template while linked clones exist. It is not possible to change the Target storage for linked clones, because this is a storage internal feature.
The Target node option allows you to create the new VM on a different node. The only restriction is that the VM is on shared storage, and that storage is also available on the target node.
To avoid resource conflicts, all network interface MAC addresses get randomized, and we generate a new UUID for the VM BIOS (smbios1) setting.
Virtual Machine Templates
One can convert a VM into a Template. Such templates are read-only, and you can use them to create linked clones.
|
|
It is not possible to start templates, because this would modify the disk images. If you want to change the template, create a linked clone and modify that. |
VM Generation ID
Proxmox VE supports Virtual Machine Generation ID (vmgenid)
[Official
vmgenid Specification
https://docs.microsoft.com/en-us/windows/desktop/hyperv_v2/virtual-machine-generation-identifier]
for virtual machines.
This can be used by the guest operating system to detect any event resulting
in a time shift event, for example, restoring a backup or a snapshot rollback.
When creating new VMs, a vmgenid will be automatically generated and saved in its configuration file.
To create and add a vmgenid to an already existing VM one can pass the
special value ‘1’ to let Proxmox VE autogenerate one or manually set the UUID
[Online GUID generator http://guid.one/]
by using it as value, for
example:
# qm set VMID -vmgenid 1
# qm set VMID -vmgenid 00000000-0000-0000-0000-000000000000
|
|
The initial addition of a vmgenid device to an existing VM, may result in the same effects as a change on snapshot rollback, backup restore, etc., has as the VM can interpret this as generation change. |
In the rare case the vmgenid mechanism is not wanted one can pass ‘0’ for its value on VM creation, or retroactively delete the property in the configuration with:
# qm set VMID -delete vmgenid
The most prominent use case for vmgenid are newer Microsoft Windows
operating systems, which use it to avoid problems in time sensitive or
replicate services (such as databases or domain controller
[https://docs.microsoft.com/en-us/windows-server/identity/ad-ds/get-started/virtual-dc/virtualized-domain-controller-architecture]
)
on snapshot rollback, backup restore or a whole VM clone operation.
Importing Virtual Machines
Importing existing virtual machines from foreign hypervisors or other Proxmox VE clusters can be achieved through various methods, the most common ones are:
-
Using the native import wizard, which utilizes the import content type, such as provided by the ESXi special storage.
-
Performing a backup on the source and then restoring on the target. This method works best when migrating from another Proxmox VE instance.
-
using the OVF-specific import command of the qm command-line tool.
If you import VMs to Proxmox VE from other hypervisors, it’s recommended to familiarize yourself with the concepts of Proxmox VE.
Import Wizard
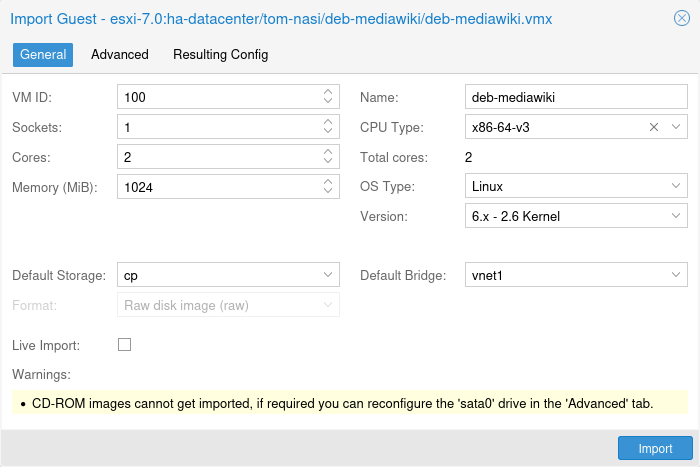
Proxmox VE provides an integrated VM importer using the storage plugin system for native integration into the API and web-based user interface. You can use this to import the VM as a whole, with most of its config mapped to Proxmox VE’s config model and reduced downtime.
|
|
The import wizard was added during the Proxmox VE 8.2 development cycle and is in tech preview state. While it’s already promising and working stable, it’s still under active development, focusing on adding other import-sources, like for example OVF/OVA files, in the future. |
To use the import wizard you have to first set up a new storage for an import source, you can do so on the web-interface under Datacenter → Storage → Add.
Then you can select the new storage in the resource tree and use the Virtual Guests content tab to see all available guests that can be imported.
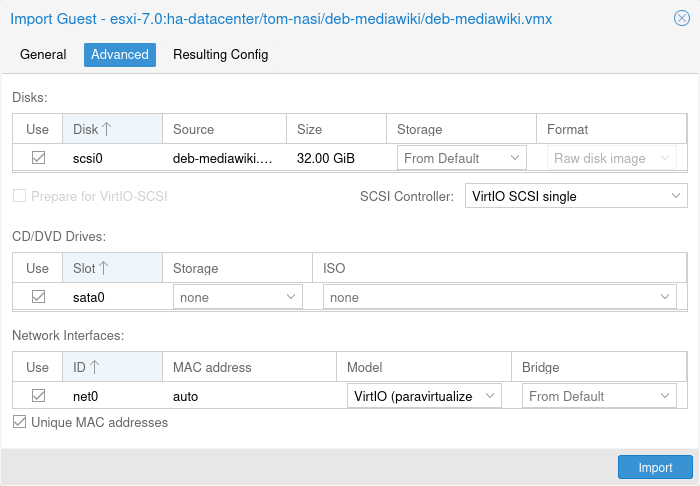
Select one and use the Import button (or double-click) to open the import wizard. You can modify a subset of the available options here and then start the import. Please note that you can do more advanced modifications after the import finished.
|
|
The import wizard is currently (2024-03) available for ESXi and has been tested with ESXi versions 6.5 through 8.0. Note that guests using vSAN storage cannot be directly imported directly; their disks must first be moved to another storage. While it is possible to use a vCenter as the import source, performance is dramatically degraded (5 to 10 times slower). |
For a step-by-step guide and tips for how to adapt the virtual guest to the new hyper-visor see our migrate to Proxmox VE wiki article.
Import OVF/OVA Through CLI
A VM export from a foreign hypervisor takes usually the form of one or more disk
images, with a configuration file describing the settings of the VM (RAM,
number of cores).
The disk images can be in the vmdk format, if the disks come from
VMware or VirtualBox, or qcow2 if the disks come from a KVM hypervisor.
The most popular configuration format for VM exports is the OVF standard, but in
practice interoperation is limited because many settings are not implemented in
the standard itself, and hypervisors export the supplementary information
in non-standard extensions.
Besides the problem of format, importing disk images from other hypervisors may fail if the emulated hardware changes too much from one hypervisor to another. Windows VMs are particularly concerned by this, as the OS is very picky about any changes of hardware. This problem may be solved by installing the MergeIDE.zip utility available from the Internet before exporting and choosing a hard disk type of IDE before booting the imported Windows VM.
Finally there is the question of paravirtualized drivers, which improve the speed of the emulated system and are specific to the hypervisor. GNU/Linux and other free Unix OSes have all the necessary drivers installed by default and you can switch to the paravirtualized drivers right after importing the VM. For Windows VMs, you need to install the Windows paravirtualized drivers by yourself.
GNU/Linux and other free Unix can usually be imported without hassle. Note that we cannot guarantee a successful import/export of Windows VMs in all cases due to the problems above.
Step-by-step example of a Windows OVF import
Microsoft provides Virtual Machines downloads to get started with Windows development.We are going to use one of these to demonstrate the OVF import feature.
Download the Virtual Machine zip
After getting informed about the user agreement, choose the Windows 10 Enterprise (Evaluation - Build) for the VMware platform, and download the zip.
Extract the disk image from the zip
Using the unzip utility or any archiver of your choice, unpack the zip, and copy via ssh/scp the ovf and vmdk files to your Proxmox VE host.
Import the Virtual Machine
This will create a new virtual machine, using cores, memory and VM name as read from the OVF manifest, and import the disks to the local-lvm storage. You have to configure the network manually.
# qm importovf 999 WinDev1709Eval.ovf local-lvm
The VM is ready to be started.
Adding an external disk image to a Virtual Machine
You can also add an existing disk image to a VM, either coming from a foreign hypervisor, or one that you created yourself.
Suppose you created a Debian/Ubuntu disk image with the vmdebootstrap tool:
vmdebootstrap --verbose \
 --size 10GiB --serial-console \
 --grub --no-extlinux \
 --package openssh-server \
 --package avahi-daemon \
 --package qemu-guest-agent \
 --hostname vm600 --enable-dhcp \
 --customize=./copy_pub_ssh.sh \
 --sparse --image vm600.raw
You can now create a new target VM, importing the image to the storage pvedir and attaching it to the VM’s SCSI controller:
# qm create 600 --net0 virtio,bridge=vmbr0 --name vm600 --serial0 socket \
   --boot order=scsi0 --scsihw virtio-scsi-pci --ostype l26 \
   --scsi0 pvedir:0,import-from=/path/to/dir/vm600.raw
The VM is ready to be started.
Hookscripts
You can add a hook script to VMs with the config property hookscript.
# qm set 100 --hookscript local:snippets/hookscript.pl
It will be called during various phases of the guests lifetime. For an example and documentation see the example script under /usr/share/pve-docs/examples/guest-example-hookscript.pl.
Hibernation
You can suspend a VM to disk with the GUI option Hibernate or with
# qm suspend ID --todisk
That means that the current content of the memory will be saved onto disk and the VM gets stopped. On the next start, the memory content will be loaded and the VM can continue where it was left off.
State storage selection
If no target storage for the memory is given, it will be automatically chosen, the first of:
-
The storage vmstatestorage from the VM config.
-
The first shared storage from any VM disk.
-
The first non-shared storage from any VM disk.
-
The storage local as a fallback.
Resource Mapping
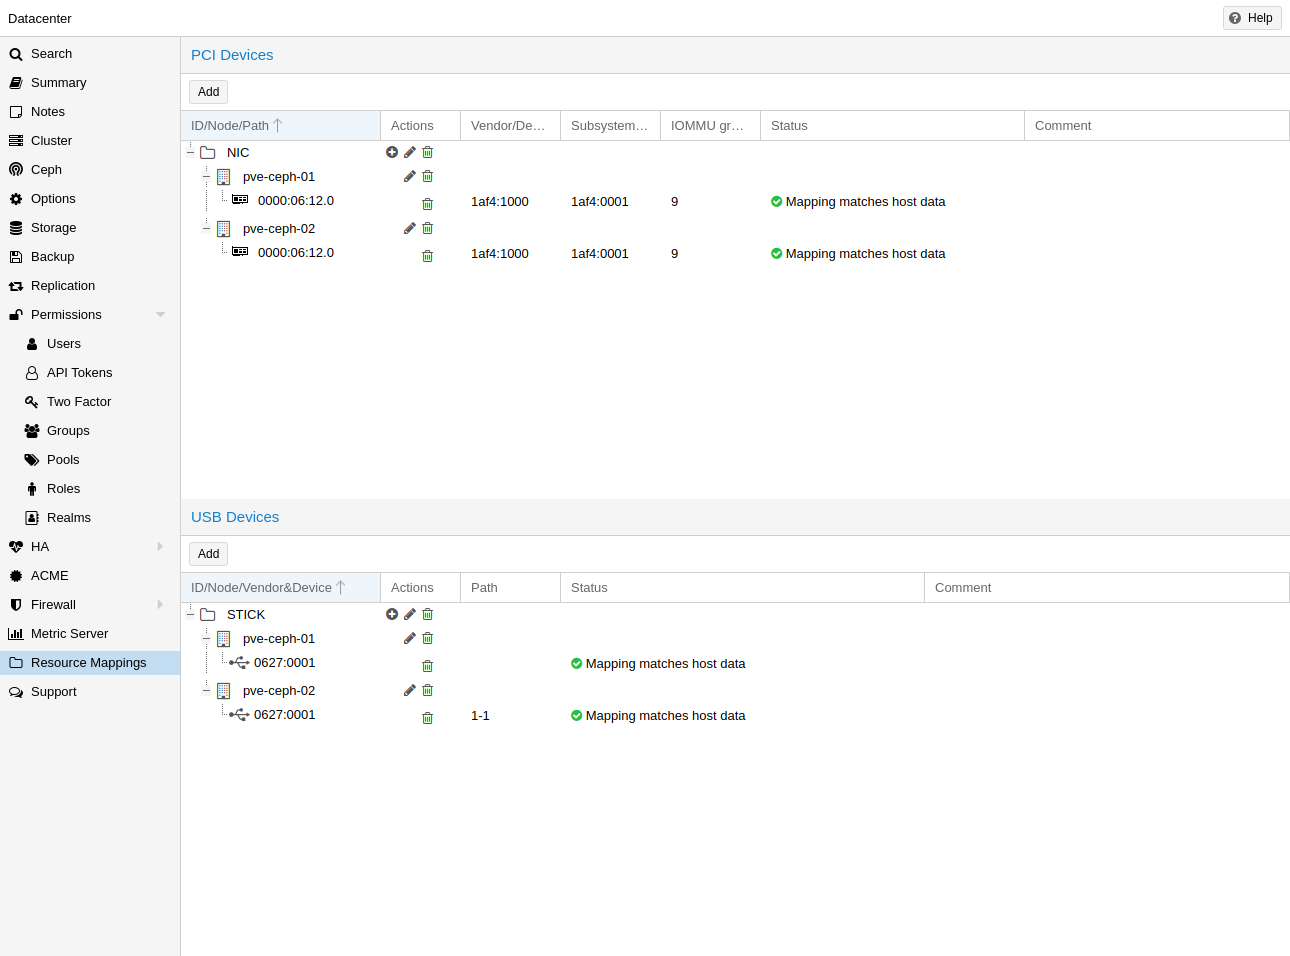
When using or referencing local resources (e.g. address of a pci device), using the raw address or id is sometimes problematic, for example:
-
when using HA, a different device with the same id or path may exist on the target node, and if one is not careful when assigning such guests to HA groups, the wrong device could be used, breaking configurations.
-
changing hardware can change ids and paths, so one would have to check all assigned devices and see if the path or id is still correct.
To handle this better, one can define cluster wide resource mappings, such that a resource has a cluster unique, user selected identifier which can correspond to different devices on different hosts. With this, HA won’t start a guest with a wrong device, and hardware changes can be detected.
Creating such a mapping can be done with the Proxmox VE web GUI under Datacenter in the relevant tab in the Resource Mappings category, or on the cli with
# pvesh create /cluster/mapping/<type> <options>
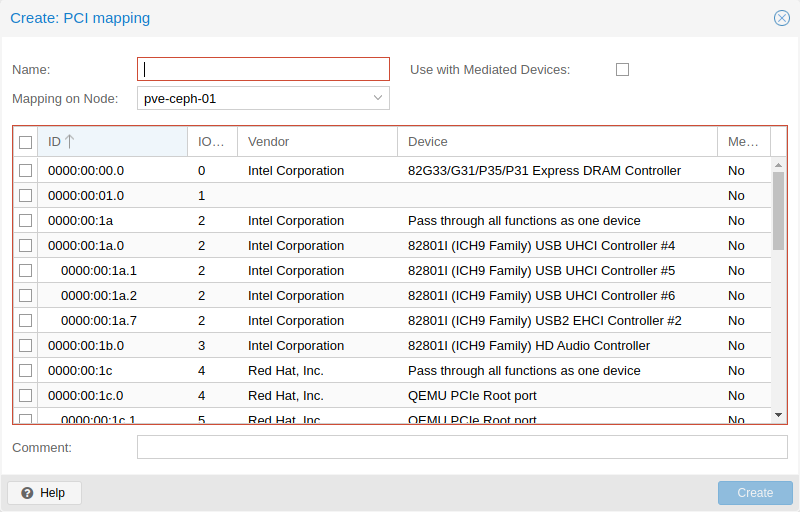
Where <type> is the hardware type (currently either pci or usb) and <options> are the device mappings and other configuration parameters.
Note that the options must include a map property with all identifying properties of that hardware, so that it’s possible to verify the hardware did not change and the correct device is passed through.
For example to add a PCI device as device1 with the path 0000:01:00.0 that has the device id 0001 and the vendor id 0002 on the node node1, and 0000:02:00.0 on node2 you can add it with:
# pvesh create /cluster/mapping/pci --id device1 \
 --map node=node1,path=0000:01:00.0,id=0002:0001 \
 --map node=node2,path=0000:02:00.0,id=0002:0001
You must repeat the map parameter for each node where that device should have a mapping (note that you can currently only map one USB device per node per mapping).
Using the GUI makes this much easier, as the correct properties are automatically picked up and sent to the API.
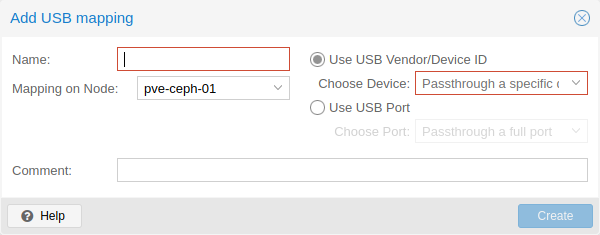
It’s also possible for PCI devices to provide multiple devices per node with multiple map properties for the nodes. If such a device is assigned to a guest, the first free one will be used when the guest is started. The order of the paths given is also the order in which they are tried, so arbitrary allocation policies can be implemented.
This is useful for devices with SR-IOV, since some times it is not important which exact virtual function is passed through.
You can assign such a device to a guest either with the GUI or with
# qm set ID -hostpci0 <name>
for PCI devices, or
# qm set <vmid> -usb0 <name>
for USB devices.
Where <vmid> is the guests id and <name> is the chosen name for the created mapping. All usual options for passing through the devices are allowed, such as mdev.
To create mappings Mapping.Modify on /mapping/<type>/<name> is necessary (where <type> is the device type and <name> is the name of the mapping).
To use these mappings, Mapping.Use on /mapping/<type>/<name> is necessary (in addition to the normal guest privileges to edit the configuration).
Managing Virtual Machines with qm
qm is the tool to manage QEMU/KVM virtual machines on Proxmox VE. You can create and destroy virtual machines, and control execution (start/stop/suspend/resume). Besides that, you can use qm to set parameters in the associated config file. It is also possible to create and delete virtual disks.
CLI Usage Examples
Using an iso file uploaded on the local storage, create a VM with a 4 GB IDE disk on the local-lvm storage
# qm create 300 -ide0 local-lvm:4 -net0 e1000 -cdrom local:iso/proxmox-mailgateway_2.1.iso
Start the new VM
# qm start 300
Send a shutdown request, then wait until the VM is stopped.
# qm shutdown 300 && qm wait 300
Same as above, but only wait for 40 seconds.
# qm shutdown 300 && qm wait 300 -timeout 40
Destroying a VM always removes it from Access Control Lists and it always removes the firewall configuration of the VM. You have to activate --purge, if you want to additionally remove the VM from replication jobs, backup jobs and HA resource configurations.
# qm destroy 300 --purge
Move a disk image to a different storage.
# qm move-disk 300 scsi0 other-storage
Reassign a disk image to a different VM. This will remove the disk scsi1 from the source VM and attaches it as scsi3 to the target VM. In the background the disk image is being renamed so that the name matches the new owner.
# qm move-disk 300 scsi1 --target-vmid 400 --target-disk scsi3
Configuration
VM configuration files are stored inside the Proxmox cluster file system, and can be accessed at /etc/pve/qemu-server/<VMID>.conf. Like other files stored inside /etc/pve/, they get automatically replicated to all other cluster nodes.
|
|
VMIDs < 100 are reserved for internal purposes, and VMIDs need to be unique cluster wide. |
boot: order=virtio0;net0
cores: 1
sockets: 1
memory: 512
name: webmail
ostype: l26
net0: e1000=EE:D2:28:5F:B6:3E,bridge=vmbr0
virtio0: local:vm-100-disk-1,size=32G
Those configuration files are simple text files, and you can edit them using a normal text editor (vi, nano, …). This is sometimes useful to do small corrections, but keep in mind that you need to restart the VM to apply such changes.
For that reason, it is usually better to use the qm command to generate and modify those files, or do the whole thing using the GUI. Our toolkit is smart enough to instantaneously apply most changes to running VM. This feature is called "hot plug", and there is no need to restart the VM in that case.
File Format
VM configuration files use a simple colon separated key/value format. Each line has the following format:
# this is a comment
OPTION: value
Blank lines in those files are ignored, and lines starting with a # character are treated as comments and are also ignored.
Snapshots
When you create a snapshot, qm stores the configuration at snapshot time into a separate snapshot section within the same configuration file. For example, after creating a snapshot called “testsnapshot”, your configuration file will look like this:
memory: 512
swap: 512
parent: testsnaphot
...

[testsnaphot]
memory: 512
swap: 512
snaptime: 1457170803
...
There are a few snapshot related properties like parent and snaptime. The parent property is used to store the parent/child relationship between snapshots. snaptime is the snapshot creation time stamp (Unix epoch).
You can optionally save the memory of a running VM with the option vmstate. For details about how the target storage gets chosen for the VM state, see State storage selection in the chapter Hibernation.
Options
- acpi: <boolean> (default = 1)
-
Enable/disable ACPI.
- affinity: <string>
-
List of host cores used to execute guest processes, for example: 0,5,8-11
- agent: [enabled=]<1|0> [,freeze-fs-on-backup=<1|0>] [,fstrim_cloned_disks=<1|0>] [,type=<virtio|isa>]
-
Enable/disable communication with the QEMU Guest Agent and its properties.
- enabled=<boolean> (default = 0)
-
Enable/disable communication with a QEMU Guest Agent (QGA) running in the VM.
- freeze-fs-on-backup=<boolean> (default = 1)
-
Freeze/thaw guest filesystems on backup for consistency.
- fstrim_cloned_disks=<boolean> (default = 0)
-
Run fstrim after moving a disk or migrating the VM.
- type=<isa | virtio> (default = virtio)
-
Select the agent type
- arch: <aarch64 | x86_64>
-
Virtual processor architecture. Defaults to the host.
- args: <string>
-
Arbitrary arguments passed to kvm, for example:
args: -no-reboot -smbios type=0,vendor=FOO
this option is for experts only. - audio0: device=<ich9-intel-hda|intel-hda|AC97> [,driver=<spice|none>]
-
Configure a audio device, useful in combination with QXL/Spice.
- device=<AC97 | ich9-intel-hda | intel-hda>
-
Configure an audio device.
- driver=<none | spice> (default = spice)
-
Driver backend for the audio device.
- autostart: <boolean> (default = 0)
-
Automatic restart after crash (currently ignored).
- balloon: <integer> (0 - N)
-
Amount of target RAM for the VM in MiB. Using zero disables the ballon driver.
- bios: <ovmf | seabios> (default = seabios)
-
Select BIOS implementation.
- boot: [[legacy=]<[acdn]{1,4}>] [,order=<device[;device...]>]
-
Specify guest boot order. Use the order= sub-property as usage with no key or legacy= is deprecated.
- legacy=<[acdn]{1,4}> (default = cdn)
-
Boot on floppy (a), hard disk (c), CD-ROM (d), or network (n). Deprecated, use order= instead.
- order=<device[;device...]>
-
The guest will attempt to boot from devices in the order they appear here.
Disks, optical drives and passed-through storage USB devices will be directly booted from, NICs will load PXE, and PCIe devices will either behave like disks (e.g. NVMe) or load an option ROM (e.g. RAID controller, hardware NIC).
Note that only devices in this list will be marked as bootable and thus loaded by the guest firmware (BIOS/UEFI). If you require multiple disks for booting (e.g. software-raid), you need to specify all of them here.
Overrides the deprecated legacy=[acdn]* value when given.
- bootdisk: (ide|sata|scsi|virtio)\d+
-
Enable booting from specified disk. Deprecated: Use boot: order=foo;bar instead.
- cdrom: <volume>
-
This is an alias for option -ide2
- cicustom: [meta=<volume>] [,network=<volume>] [,user=<volume>] [,vendor=<volume>]
-
cloud-init: Specify custom files to replace the automatically generated ones at start.
- meta=<volume>
-
Specify a custom file containing all meta data passed to the VM via" ." cloud-init. This is provider specific meaning configdrive2 and nocloud differ.
- network=<volume>
-
To pass a custom file containing all network data to the VM via cloud-init.
- user=<volume>
-
To pass a custom file containing all user data to the VM via cloud-init.
- vendor=<volume>
-
To pass a custom file containing all vendor data to the VM via cloud-init.
- cipassword: <string>
-
cloud-init: Password to assign the user. Using this is generally not recommended. Use ssh keys instead. Also note that older cloud-init versions do not support hashed passwords.
- citype: <configdrive2 | nocloud | opennebula>
-
Specifies the cloud-init configuration format. The default depends on the configured operating system type (ostype. We use the nocloud format for Linux, and configdrive2 for windows.
- ciupgrade: <boolean> (default = 1)
-
cloud-init: do an automatic package upgrade after the first boot.
- ciuser: <string>
-
cloud-init: User name to change ssh keys and password for instead of the image’s configured default user.
- cores: <integer> (1 - N) (default = 1)
-
The number of cores per socket.
- cpu: [[cputype=]<string>] [,flags=<+FLAG[;-FLAG...]>] [,hidden=<1|0>] [,hv-vendor-id=<vendor-id>] [,phys-bits=<8-64|host>] [,reported-model=<enum>]
-
Emulated CPU type.
- cputype=<string> (default = kvm64)
-
Emulated CPU type. Can be default or custom name (custom model names must be prefixed with custom-).
- flags=<+FLAG[;-FLAG...]>
-
List of additional CPU flags separated by ;. Use +FLAG to enable, -FLAG to disable a flag. Custom CPU models can specify any flag supported by QEMU/KVM, VM-specific flags must be from the following set for security reasons: pcid, spec-ctrl, ibpb, ssbd, virt-ssbd, amd-ssbd, amd-no-ssb, pdpe1gb, md-clear, hv-tlbflush, hv-evmcs, aes
- hidden=<boolean> (default = 0)
-
Do not identify as a KVM virtual machine.
- hv-vendor-id=<vendor-id>
-
The Hyper-V vendor ID. Some drivers or programs inside Windows guests need a specific ID.
- phys-bits=<8-64|host>
-
The physical memory address bits that are reported to the guest OS. Should be smaller or equal to the host’s. Set to host to use value from host CPU, but note that doing so will break live migration to CPUs with other values.
- reported-model=<486 | Broadwell | Broadwell-IBRS | Broadwell-noTSX | Broadwell-noTSX-IBRS | Cascadelake-Server | Cascadelake-Server-noTSX | Cascadelake-Server-v2 | Cascadelake-Server-v4 | Cascadelake-Server-v5 | Conroe | Cooperlake | Cooperlake-v2 | EPYC | EPYC-Genoa | EPYC-IBPB | EPYC-Milan | EPYC-Milan-v2 | EPYC-Rome | EPYC-Rome-v2 | EPYC-Rome-v3 | EPYC-Rome-v4 | EPYC-v3 | EPYC-v4 | GraniteRapids | Haswell | Haswell-IBRS | Haswell-noTSX | Haswell-noTSX-IBRS | Icelake-Client | Icelake-Client-noTSX | Icelake-Server | Icelake-Server-noTSX | Icelake-Server-v3 | Icelake-Server-v4 | Icelake-Server-v5 | Icelake-Server-v6 | IvyBridge | IvyBridge-IBRS | KnightsMill | Nehalem | Nehalem-IBRS | Opteron_G1 | Opteron_G2 | Opteron_G3 | Opteron_G4 | Opteron_G5 | Penryn | SandyBridge | SandyBridge-IBRS | SapphireRapids | SapphireRapids-v2 | Skylake-Client | Skylake-Client-IBRS | Skylake-Client-noTSX-IBRS | Skylake-Client-v4 | Skylake-Server | Skylake-Server-IBRS | Skylake-Server-noTSX-IBRS | Skylake-Server-v4 | Skylake-Server-v5 | Westmere | Westmere-IBRS | athlon | core2duo | coreduo | host | kvm32 | kvm64 | max | pentium | pentium2 | pentium3 | phenom | qemu32 | qemu64> (default = kvm64)
-
CPU model and vendor to report to the guest. Must be a QEMU/KVM supported model. Only valid for custom CPU model definitions, default models will always report themselves to the guest OS.
- cpulimit: <number> (0 - 128) (default = 0)
-
Limit of CPU usage.
If the computer has 2 CPUs, it has total of 2 CPU time. Value 0 indicates no CPU limit. - cpuunits: <integer> (1 - 262144) (default = cgroup v1: 1024, cgroup v2: 100)
-
CPU weight for a VM. Argument is used in the kernel fair scheduler. The larger the number is, the more CPU time this VM gets. Number is relative to weights of all the other running VMs.
- description: <string>
-
Description for the VM. Shown in the web-interface VM’s summary. This is saved as comment inside the configuration file.
- efidisk0: [file=]<volume> [,efitype=<2m|4m>] [,format=<enum>] [,pre-enrolled-keys=<1|0>] [,size=<DiskSize>]
-
Configure a disk for storing EFI vars.
- efitype=<2m | 4m> (default = 2m)
-
Size and type of the OVMF EFI vars. 4m is newer and recommended, and required for Secure Boot. For backwards compatibility, 2m is used if not otherwise specified. Ignored for VMs with arch=aarch64 (ARM).
- file=<volume>
-
The drive’s backing volume.
- format=<cloop | cow | qcow | qcow2 | qed | raw | vmdk>
-
The drive’s backing file’s data format.
- pre-enrolled-keys=<boolean> (default = 0)
-
Use am EFI vars template with distribution-specific and Microsoft Standard keys enrolled, if used with efitype=4m. Note that this will enable Secure Boot by default, though it can still be turned off from within the VM.
- size=<DiskSize>
-
Disk size. This is purely informational and has no effect.
- freeze: <boolean>
-
Freeze CPU at startup (use c monitor command to start execution).
- hookscript: <string>
-
Script that will be executed during various steps in the vms lifetime.
- hostpci[n]: [[host=]<HOSTPCIID[;HOSTPCIID2...]>] [,device-id=<hex id>] [,legacy-igd=<1|0>] [,mapping=<mapping-id>] [,mdev=<string>] [,pcie=<1|0>] [,rombar=<1|0>] [,romfile=<string>] [,sub-device-id=<hex id>] [,sub-vendor-id=<hex id>] [,vendor-id=<hex id>] [,x-vga=<1|0>]
-
Map host PCI devices into guest.
This option allows direct access to host hardware. So it is no longer possible to migrate such machines - use with special care.
Experimental! User reported problems with this option. - device-id=<hex id>
-
Override PCI device ID visible to guest
- host=<HOSTPCIID[;HOSTPCIID2...]>
-
Host PCI device pass through. The PCI ID of a host’s PCI device or a list of PCI virtual functions of the host. HOSTPCIID syntax is:
bus:dev.func (hexadecimal numbers)
You can us the lspci command to list existing PCI devices.
Either this or the mapping key must be set.
- legacy-igd=<boolean> (default = 0)
-
Pass this device in legacy IGD mode, making it the primary and exclusive graphics device in the VM. Requires pc-i440fx machine type and VGA set to none.
- mapping=<mapping-id>
-
The ID of a cluster wide mapping. Either this or the default-key host must be set.
- mdev=<string>
-
The type of mediated device to use. An instance of this type will be created on startup of the VM and will be cleaned up when the VM stops.
- pcie=<boolean> (default = 0)
-
Choose the PCI-express bus (needs the q35 machine model).
- rombar=<boolean> (default = 1)
-
Specify whether or not the device’s ROM will be visible in the guest’s memory map.
- romfile=<string>
-
Custom pci device rom filename (must be located in /usr/share/kvm/).
- sub-device-id=<hex id>
-
Override PCI subsystem device ID visible to guest
- sub-vendor-id=<hex id>
-
Override PCI subsystem vendor ID visible to guest
- vendor-id=<hex id>
-
Override PCI vendor ID visible to guest
- x-vga=<boolean> (default = 0)
-
Enable vfio-vga device support.
- hotplug: <string> (default = network,disk,usb)
-
Selectively enable hotplug features. This is a comma separated list of hotplug features: network, disk, cpu, memory, usb and cloudinit. Use 0 to disable hotplug completely. Using 1 as value is an alias for the default network,disk,usb. USB hotplugging is possible for guests with machine version >= 7.1 and ostype l26 or windows > 7.
- hugepages: <1024 | 2 | any>
-
Enable/disable hugepages memory.
- ide[n]: [file=]<volume> [,aio=<native|threads|io_uring>] [,backup=<1|0>] [,bps=<bps>] [,bps_max_length=<seconds>] [,bps_rd=<bps>] [,bps_rd_max_length=<seconds>] [,bps_wr=<bps>] [,bps_wr_max_length=<seconds>] [,cache=<enum>] [,cyls=<integer>] [,detect_zeroes=<1|0>] [,discard=<ignore|on>] [,format=<enum>] [,heads=<integer>] [,iops=<iops>] [,iops_max=<iops>] [,iops_max_length=<seconds>] [,iops_rd=<iops>] [,iops_rd_max=<iops>] [,iops_rd_max_length=<seconds>] [,iops_wr=<iops>] [,iops_wr_max=<iops>] [,iops_wr_max_length=<seconds>] [,mbps=<mbps>] [,mbps_max=<mbps>] [,mbps_rd=<mbps>] [,mbps_rd_max=<mbps>] [,mbps_wr=<mbps>] [,mbps_wr_max=<mbps>] [,media=<cdrom|disk>] [,model=<model>] [,replicate=<1|0>] [,rerror=<ignore|report|stop>] [,secs=<integer>] [,serial=<serial>] [,shared=<1|0>] [,size=<DiskSize>] [,snapshot=<1|0>] [,ssd=<1|0>] [,trans=<none|lba|auto>] [,werror=<enum>] [,wwn=<wwn>]
-
Use volume as IDE hard disk or CD-ROM (n is 0 to 3).
- aio=<io_uring | native | threads>
-
AIO type to use.
- backup=<boolean>
-
Whether the drive should be included when making backups.
- bps=<bps>
-
Maximum r/w speed in bytes per second.
- bps_max_length=<seconds>
-
Maximum length of I/O bursts in seconds.
- bps_rd=<bps>
-
Maximum read speed in bytes per second.
- bps_rd_max_length=<seconds>
-
Maximum length of read I/O bursts in seconds.
- bps_wr=<bps>
-
Maximum write speed in bytes per second.
- bps_wr_max_length=<seconds>
-
Maximum length of write I/O bursts in seconds.
- cache=<directsync | none | unsafe | writeback | writethrough>
-
The drive’s cache mode
- cyls=<integer>
-
Force the drive’s physical geometry to have a specific cylinder count.
- detect_zeroes=<boolean>
-
Controls whether to detect and try to optimize writes of zeroes.
- discard=<ignore | on>
-
Controls whether to pass discard/trim requests to the underlying storage.
- file=<volume>
-
The drive’s backing volume.
- format=<cloop | cow | qcow | qcow2 | qed | raw | vmdk>
-
The drive’s backing file’s data format.
- heads=<integer>
-
Force the drive’s physical geometry to have a specific head count.
- iops=<iops>
-
Maximum r/w I/O in operations per second.
- iops_max=<iops>
-
Maximum unthrottled r/w I/O pool in operations per second.
- iops_max_length=<seconds>
-
Maximum length of I/O bursts in seconds.
- iops_rd=<iops>
-
Maximum read I/O in operations per second.
- iops_rd_max=<iops>
-
Maximum unthrottled read I/O pool in operations per second.
- iops_rd_max_length=<seconds>
-
Maximum length of read I/O bursts in seconds.
- iops_wr=<iops>
-
Maximum write I/O in operations per second.
- iops_wr_max=<iops>
-
Maximum unthrottled write I/O pool in operations per second.
- iops_wr_max_length=<seconds>
-
Maximum length of write I/O bursts in seconds.
- mbps=<mbps>
-
Maximum r/w speed in megabytes per second.
- mbps_max=<mbps>
-
Maximum unthrottled r/w pool in megabytes per second.
- mbps_rd=<mbps>
-
Maximum read speed in megabytes per second.
- mbps_rd_max=<mbps>
-
Maximum unthrottled read pool in megabytes per second.
- mbps_wr=<mbps>
-
Maximum write speed in megabytes per second.
- mbps_wr_max=<mbps>
-
Maximum unthrottled write pool in megabytes per second.
- media=<cdrom | disk> (default = disk)
-
The drive’s media type.
- model=<model>
-
The drive’s reported model name, url-encoded, up to 40 bytes long.
- replicate=<boolean> (default = 1)
-
Whether the drive should considered for replication jobs.
- rerror=<ignore | report | stop>
-
Read error action.
- secs=<integer>
-
Force the drive’s physical geometry to have a specific sector count.
- serial=<serial>
-
The drive’s reported serial number, url-encoded, up to 20 bytes long.
- shared=<boolean> (default = 0)
-
Mark this locally-managed volume as available on all nodes.
This option does not share the volume automatically, it assumes it is shared already! - size=<DiskSize>
-
Disk size. This is purely informational and has no effect.
- snapshot=<boolean>
-
Controls qemu’s snapshot mode feature. If activated, changes made to the disk are temporary and will be discarded when the VM is shutdown.
- ssd=<boolean>
-
Whether to expose this drive as an SSD, rather than a rotational hard disk.
- trans=<auto | lba | none>
-
Force disk geometry bios translation mode.
- werror=<enospc | ignore | report | stop>
-
Write error action.
- wwn=<wwn>
-
The drive’s worldwide name, encoded as 16 bytes hex string, prefixed by 0x.
- ipconfig[n]: [gw=<GatewayIPv4>] [,gw6=<GatewayIPv6>] [,ip=<IPv4Format/CIDR>] [,ip6=<IPv6Format/CIDR>]
-
cloud-init: Specify IP addresses and gateways for the corresponding interface.
IP addresses use CIDR notation, gateways are optional but need an IP of the same type specified.
The special string dhcp can be used for IP addresses to use DHCP, in which case no explicit gateway should be provided. For IPv6 the special string auto can be used to use stateless autoconfiguration. This requires cloud-init 19.4 or newer.
If cloud-init is enabled and neither an IPv4 nor an IPv6 address is specified, it defaults to using dhcp on IPv4.
- gw=<GatewayIPv4>
-
Default gateway for IPv4 traffic.
Requires option(s): ip - gw6=<GatewayIPv6>
-
Default gateway for IPv6 traffic.
Requires option(s): ip6 - ip=<IPv4Format/CIDR> (default = dhcp)
-
IPv4 address in CIDR format.
- ip6=<IPv6Format/CIDR> (default = dhcp)
-
IPv6 address in CIDR format.
- ivshmem: size=<integer> [,name=<string>]
-
Inter-VM shared memory. Useful for direct communication between VMs, or to the host.
- name=<string>
-
The name of the file. Will be prefixed with pve-shm-. Default is the VMID. Will be deleted when the VM is stopped.
- size=<integer> (1 - N)
-
The size of the file in MB.
- keephugepages: <boolean> (default = 0)
-
Use together with hugepages. If enabled, hugepages will not not be deleted after VM shutdown and can be used for subsequent starts.
- keyboard: <da | de | de-ch | en-gb | en-us | es | fi | fr | fr-be | fr-ca | fr-ch | hu | is | it | ja | lt | mk | nl | no | pl | pt | pt-br | sl | sv | tr>
-
Keyboard layout for VNC server. This option is generally not required and is often better handled from within the guest OS.
- kvm: <boolean> (default = 1)
-
Enable/disable KVM hardware virtualization.
- localtime: <boolean>
-
Set the real time clock (RTC) to local time. This is enabled by default if the ostype indicates a Microsoft Windows OS.
- lock: <backup | clone | create | migrate | rollback | snapshot | snapshot-delete | suspended | suspending>
-
Lock/unlock the VM.
- machine: (pc|pc(-i440fx)?-\d+(\.\d+)+(\+pve\d+)?(\.pxe)?|q35|pc-q35-\d+(\.\d+)+(\+pve\d+)?(\.pxe)?|virt(?:-\d+(\.\d+)+)?(\+pve\d+)?)
-
Specifies the QEMU machine type.
- memory: [current=]<integer>
-
Memory properties.
- current=<integer> (16 - N) (default = 512)
-
Current amount of online RAM for the VM in MiB. This is the maximum available memory when you use the balloon device.
- migrate_downtime: <number> (0 - N) (default = 0.1)
-
Set maximum tolerated downtime (in seconds) for migrations.
- migrate_speed: <integer> (0 - N) (default = 0)
-
Set maximum speed (in MB/s) for migrations. Value 0 is no limit.
- name: <string>
-
Set a name for the VM. Only used on the configuration web interface.
- nameserver: <string>
-
cloud-init: Sets DNS server IP address for a container. Create will automatically use the setting from the host if neither searchdomain nor nameserver are set.
- net[n]: [model=]<enum> [,bridge=<bridge>] [,firewall=<1|0>] [,link_down=<1|0>] [,macaddr=<XX:XX:XX:XX:XX:XX>] [,mtu=<integer>] [,queues=<integer>] [,rate=<number>] [,tag=<integer>] [,trunks=<vlanid[;vlanid...]>] [,<model>=<macaddr>]
-
Specify network devices.
- bridge=<bridge>
-
Bridge to attach the network device to. The Proxmox VE standard bridge is called vmbr0.
If you do not specify a bridge, we create a kvm user (NATed) network device, which provides DHCP and DNS services. The following addresses are used:
10.0.2.2   Gateway
10.0.2.3   DNS Server
10.0.2.4   SMB Server
The DHCP server assign addresses to the guest starting from 10.0.2.15.
- firewall=<boolean>
-
Whether this interface should be protected by the firewall.
- link_down=<boolean>
-
Whether this interface should be disconnected (like pulling the plug).
- macaddr=<XX:XX:XX:XX:XX:XX>
-
A common MAC address with the I/G (Individual/Group) bit not set.
- model=<e1000 | e1000-82540em | e1000-82544gc | e1000-82545em | e1000e | i82551 | i82557b | i82559er | ne2k_isa | ne2k_pci | pcnet | rtl8139 | virtio | vmxnet3>
-
Network Card Model. The virtio model provides the best performance with very low CPU overhead. If your guest does not support this driver, it is usually best to use e1000.
- mtu=<integer> (1 - 65520)
-
Force MTU, for VirtIO only. Set to 1 to use the bridge MTU
- queues=<integer> (0 - 64)
-
Number of packet queues to be used on the device.
- rate=<number> (0 - N)
-
Rate limit in mbps (megabytes per second) as floating point number.
- tag=<integer> (1 - 4094)
-
VLAN tag to apply to packets on this interface.
- trunks=<vlanid[;vlanid...]>
-
VLAN trunks to pass through this interface.
- numa: <boolean> (default = 0)
-
Enable/disable NUMA.
- numa[n]: cpus=<id[-id];...> [,hostnodes=<id[-id];...>] [,memory=<number>] [,policy=<preferred|bind|interleave>]
-
NUMA topology.
- cpus=<id[-id];...>
-
CPUs accessing this NUMA node.
- hostnodes=<id[-id];...>
-
Host NUMA nodes to use.
- memory=<number>
-
Amount of memory this NUMA node provides.
- policy=<bind | interleave | preferred>
-
NUMA allocation policy.
- onboot: <boolean> (default = 0)
-
Specifies whether a VM will be started during system bootup.
- ostype: <l24 | l26 | other | solaris | w2k | w2k3 | w2k8 | win10 | win11 | win7 | win8 | wvista | wxp>
-
Specify guest operating system. This is used to enable special optimization/features for specific operating systems:
other
unspecified OS
wxp
Microsoft Windows XP
w2k
Microsoft Windows 2000
w2k3
Microsoft Windows 2003
w2k8
Microsoft Windows 2008
wvista
Microsoft Windows Vista
win7
Microsoft Windows 7
win8
Microsoft Windows 8/2012/2012r2
win10
Microsoft Windows 10/2016/2019
win11
Microsoft Windows 11/2022
l24
Linux 2.4 Kernel
l26
Linux 2.6 - 6.X Kernel
solaris
Solaris/OpenSolaris/OpenIndiania kernel
- parallel[n]: /dev/parport\d+|/dev/usb/lp\d+
-
Map host parallel devices (n is 0 to 2).
This option allows direct access to host hardware. So it is no longer possible to migrate such machines - use with special care.
Experimental! User reported problems with this option. - protection: <boolean> (default = 0)
-
Sets the protection flag of the VM. This will disable the remove VM and remove disk operations.
- reboot: <boolean> (default = 1)
-
Allow reboot. If set to 0 the VM exit on reboot.
- rng0: [source=]</dev/urandom|/dev/random|/dev/hwrng> [,max_bytes=<integer>] [,period=<integer>]
-
Configure a VirtIO-based Random Number Generator.
- max_bytes=<integer> (default = 1024)
-
Maximum bytes of entropy allowed to get injected into the guest every period milliseconds. Prefer a lower value when using /dev/random as source. Use 0 to disable limiting (potentially dangerous!).
- period=<integer> (default = 1000)
-
Every period milliseconds the entropy-injection quota is reset, allowing the guest to retrieve another max_bytes of entropy.
- source=</dev/hwrng | /dev/random | /dev/urandom>
-
The file on the host to gather entropy from. In most cases /dev/urandom should be preferred over /dev/random to avoid entropy-starvation issues on the host. Using urandom does not decrease security in any meaningful way, as it’s still seeded from real entropy, and the bytes provided will most likely be mixed with real entropy on the guest as well. /dev/hwrng can be used to pass through a hardware RNG from the host.
- sata[n]: [file=]<volume> [,aio=<native|threads|io_uring>] [,backup=<1|0>] [,bps=<bps>] [,bps_max_length=<seconds>] [,bps_rd=<bps>] [,bps_rd_max_length=<seconds>] [,bps_wr=<bps>] [,bps_wr_max_length=<seconds>] [,cache=<enum>] [,cyls=<integer>] [,detect_zeroes=<1|0>] [,discard=<ignore|on>] [,format=<enum>] [,heads=<integer>] [,iops=<iops>] [,iops_max=<iops>] [,iops_max_length=<seconds>] [,iops_rd=<iops>] [,iops_rd_max=<iops>] [,iops_rd_max_length=<seconds>] [,iops_wr=<iops>] [,iops_wr_max=<iops>] [,iops_wr_max_length=<seconds>] [,mbps=<mbps>] [,mbps_max=<mbps>] [,mbps_rd=<mbps>] [,mbps_rd_max=<mbps>] [,mbps_wr=<mbps>] [,mbps_wr_max=<mbps>] [,media=<cdrom|disk>] [,replicate=<1|0>] [,rerror=<ignore|report|stop>] [,secs=<integer>] [,serial=<serial>] [,shared=<1|0>] [,size=<DiskSize>] [,snapshot=<1|0>] [,ssd=<1|0>] [,trans=<none|lba|auto>] [,werror=<enum>] [,wwn=<wwn>]
-
Use volume as SATA hard disk or CD-ROM (n is 0 to 5).
- aio=<io_uring | native | threads>
-
AIO type to use.
- backup=<boolean>
-
Whether the drive should be included when making backups.
- bps=<bps>
-
Maximum r/w speed in bytes per second.
- bps_max_length=<seconds>
-
Maximum length of I/O bursts in seconds.
- bps_rd=<bps>
-
Maximum read speed in bytes per second.
- bps_rd_max_length=<seconds>
-
Maximum length of read I/O bursts in seconds.
- bps_wr=<bps>
-
Maximum write speed in bytes per second.
- bps_wr_max_length=<seconds>
-
Maximum length of write I/O bursts in seconds.
- cache=<directsync | none | unsafe | writeback | writethrough>
-
The drive’s cache mode
- cyls=<integer>
-
Force the drive’s physical geometry to have a specific cylinder count.
- detect_zeroes=<boolean>
-
Controls whether to detect and try to optimize writes of zeroes.
- discard=<ignore | on>
-
Controls whether to pass discard/trim requests to the underlying storage.
- file=<volume>
-
The drive’s backing volume.
- format=<cloop | cow | qcow | qcow2 | qed | raw | vmdk>
-
The drive’s backing file’s data format.
- heads=<integer>
-
Force the drive’s physical geometry to have a specific head count.
- iops=<iops>
-
Maximum r/w I/O in operations per second.
- iops_max=<iops>
-
Maximum unthrottled r/w I/O pool in operations per second.
- iops_max_length=<seconds>
-
Maximum length of I/O bursts in seconds.
- iops_rd=<iops>
-
Maximum read I/O in operations per second.
- iops_rd_max=<iops>
-
Maximum unthrottled read I/O pool in operations per second.
- iops_rd_max_length=<seconds>
-
Maximum length of read I/O bursts in seconds.
- iops_wr=<iops>
-
Maximum write I/O in operations per second.
- iops_wr_max=<iops>
-
Maximum unthrottled write I/O pool in operations per second.
- iops_wr_max_length=<seconds>
-
Maximum length of write I/O bursts in seconds.
- mbps=<mbps>
-
Maximum r/w speed in megabytes per second.
- mbps_max=<mbps>
-
Maximum unthrottled r/w pool in megabytes per second.
- mbps_rd=<mbps>
-
Maximum read speed in megabytes per second.
- mbps_rd_max=<mbps>
-
Maximum unthrottled read pool in megabytes per second.
- mbps_wr=<mbps>
-
Maximum write speed in megabytes per second.
- mbps_wr_max=<mbps>
-
Maximum unthrottled write pool in megabytes per second.
- media=<cdrom | disk> (default = disk)
-
The drive’s media type.
- replicate=<boolean> (default = 1)
-
Whether the drive should considered for replication jobs.
- rerror=<ignore | report | stop>
-
Read error action.
- secs=<integer>
-
Force the drive’s physical geometry to have a specific sector count.
- serial=<serial>
-
The drive’s reported serial number, url-encoded, up to 20 bytes long.
- shared=<boolean> (default = 0)
-
Mark this locally-managed volume as available on all nodes.
This option does not share the volume automatically, it assumes it is shared already! - size=<DiskSize>
-
Disk size. This is purely informational and has no effect.
- snapshot=<boolean>
-
Controls qemu’s snapshot mode feature. If activated, changes made to the disk are temporary and will be discarded when the VM is shutdown.
- ssd=<boolean>
-
Whether to expose this drive as an SSD, rather than a rotational hard disk.
- trans=<auto | lba | none>
-
Force disk geometry bios translation mode.
- werror=<enospc | ignore | report | stop>
-
Write error action.
- wwn=<wwn>
-
The drive’s worldwide name, encoded as 16 bytes hex string, prefixed by 0x.
- scsi[n]: [file=]<volume> [,aio=<native|threads|io_uring>] [,backup=<1|0>] [,bps=<bps>] [,bps_max_length=<seconds>] [,bps_rd=<bps>] [,bps_rd_max_length=<seconds>] [,bps_wr=<bps>] [,bps_wr_max_length=<seconds>] [,cache=<enum>] [,cyls=<integer>] [,detect_zeroes=<1|0>] [,discard=<ignore|on>] [,format=<enum>] [,heads=<integer>] [,iops=<iops>] [,iops_max=<iops>] [,iops_max_length=<seconds>] [,iops_rd=<iops>] [,iops_rd_max=<iops>] [,iops_rd_max_length=<seconds>] [,iops_wr=<iops>] [,iops_wr_max=<iops>] [,iops_wr_max_length=<seconds>] [,iothread=<1|0>] [,mbps=<mbps>] [,mbps_max=<mbps>] [,mbps_rd=<mbps>] [,mbps_rd_max=<mbps>] [,mbps_wr=<mbps>] [,mbps_wr_max=<mbps>] [,media=<cdrom|disk>] [,product=<product>] [,queues=<integer>] [,replicate=<1|0>] [,rerror=<ignore|report|stop>] [,ro=<1|0>] [,scsiblock=<1|0>] [,secs=<integer>] [,serial=<serial>] [,shared=<1|0>] [,size=<DiskSize>] [,snapshot=<1|0>] [,ssd=<1|0>] [,trans=<none|lba|auto>] [,vendor=<vendor>] [,werror=<enum>] [,wwn=<wwn>]
-
Use volume as SCSI hard disk or CD-ROM (n is 0 to 30).
- aio=<io_uring | native | threads>
-
AIO type to use.
- backup=<boolean>
-
Whether the drive should be included when making backups.
- bps=<bps>
-
Maximum r/w speed in bytes per second.
- bps_max_length=<seconds>
-
Maximum length of I/O bursts in seconds.
- bps_rd=<bps>
-
Maximum read speed in bytes per second.
- bps_rd_max_length=<seconds>
-
Maximum length of read I/O bursts in seconds.
- bps_wr=<bps>
-
Maximum write speed in bytes per second.
- bps_wr_max_length=<seconds>
-
Maximum length of write I/O bursts in seconds.
- cache=<directsync | none | unsafe | writeback | writethrough>
-
The drive’s cache mode
- cyls=<integer>
-
Force the drive’s physical geometry to have a specific cylinder count.
- detect_zeroes=<boolean>
-
Controls whether to detect and try to optimize writes of zeroes.
- discard=<ignore | on>
-
Controls whether to pass discard/trim requests to the underlying storage.
- file=<volume>
-
The drive’s backing volume.
- format=<cloop | cow | qcow | qcow2 | qed | raw | vmdk>
-
The drive’s backing file’s data format.
- heads=<integer>
-
Force the drive’s physical geometry to have a specific head count.
- iops=<iops>
-
Maximum r/w I/O in operations per second.
- iops_max=<iops>
-
Maximum unthrottled r/w I/O pool in operations per second.
- iops_max_length=<seconds>
-
Maximum length of I/O bursts in seconds.
- iops_rd=<iops>
-
Maximum read I/O in operations per second.
- iops_rd_max=<iops>
-
Maximum unthrottled read I/O pool in operations per second.
- iops_rd_max_length=<seconds>
-
Maximum length of read I/O bursts in seconds.
- iops_wr=<iops>
-
Maximum write I/O in operations per second.
- iops_wr_max=<iops>
-
Maximum unthrottled write I/O pool in operations per second.
- iops_wr_max_length=<seconds>
-
Maximum length of write I/O bursts in seconds.
- iothread=<boolean>
-
Whether to use iothreads for this drive
- mbps=<mbps>
-
Maximum r/w speed in megabytes per second.
- mbps_max=<mbps>
-
Maximum unthrottled r/w pool in megabytes per second.
- mbps_rd=<mbps>
-
Maximum read speed in megabytes per second.
- mbps_rd_max=<mbps>
-
Maximum unthrottled read pool in megabytes per second.
- mbps_wr=<mbps>
-
Maximum write speed in megabytes per second.
- mbps_wr_max=<mbps>
-
Maximum unthrottled write pool in megabytes per second.
- media=<cdrom | disk> (default = disk)
-
The drive’s media type.
- product=<product>
-
The drive’s product name, up to 16 bytes long.
- queues=<integer> (2 - N)
-
Number of queues.
- replicate=<boolean> (default = 1)
-
Whether the drive should considered for replication jobs.
- rerror=<ignore | report | stop>
-
Read error action.
- ro=<boolean>
-
Whether the drive is read-only.
- scsiblock=<boolean> (default = 0)
-
whether to use scsi-block for full passthrough of host block device
can lead to I/O errors in combination with low memory or high memory fragmentation on host - secs=<integer>
-
Force the drive’s physical geometry to have a specific sector count.
- serial=<serial>
-
The drive’s reported serial number, url-encoded, up to 20 bytes long.
- shared=<boolean> (default = 0)
-
Mark this locally-managed volume as available on all nodes.
This option does not share the volume automatically, it assumes it is shared already! - size=<DiskSize>
-
Disk size. This is purely informational and has no effect.
- snapshot=<boolean>
-
Controls qemu’s snapshot mode feature. If activated, changes made to the disk are temporary and will be discarded when the VM is shutdown.
- ssd=<boolean>
-
Whether to expose this drive as an SSD, rather than a rotational hard disk.
- trans=<auto | lba | none>
-
Force disk geometry bios translation mode.
- vendor=<vendor>
-
The drive’s vendor name, up to 8 bytes long.
- werror=<enospc | ignore | report | stop>
-
Write error action.
- wwn=<wwn>
-
The drive’s worldwide name, encoded as 16 bytes hex string, prefixed by 0x.
- scsihw: <lsi | lsi53c810 | megasas | pvscsi | virtio-scsi-pci | virtio-scsi-single> (default = lsi)
-
SCSI controller model
- searchdomain: <string>
-
cloud-init: Sets DNS search domains for a container. Create will automatically use the setting from the host if neither searchdomain nor nameserver are set.
- serial[n]: (/dev/.+|socket)
-
Create a serial device inside the VM (n is 0 to 3), and pass through a host serial device (i.e. /dev/ttyS0), or create a unix socket on the host side (use qm terminal to open a terminal connection).
If you pass through a host serial device, it is no longer possible to migrate such machines - use with special care.
Experimental! User reported problems with this option. - shares: <integer> (0 - 50000) (default = 1000)
-
Amount of memory shares for auto-ballooning. The larger the number is, the more memory this VM gets. Number is relative to weights of all other running VMs. Using zero disables auto-ballooning. Auto-ballooning is done by pvestatd.
- smbios1: [base64=<1|0>] [,family=<Base64 encoded string>] [,manufacturer=<Base64 encoded string>] [,product=<Base64 encoded string>] [,serial=<Base64 encoded string>] [,sku=<Base64 encoded string>] [,uuid=<UUID>] [,version=<Base64 encoded string>]
-
Specify SMBIOS type 1 fields.
- base64=<boolean>
-
Flag to indicate that the SMBIOS values are base64 encoded
- family=<Base64 encoded string>
-
Set SMBIOS1 family string.
- manufacturer=<Base64 encoded string>
-
Set SMBIOS1 manufacturer.
- product=<Base64 encoded string>
-
Set SMBIOS1 product ID.
- serial=<Base64 encoded string>
-
Set SMBIOS1 serial number.
- sku=<Base64 encoded string>
-
Set SMBIOS1 SKU string.
- uuid=<UUID>
-
Set SMBIOS1 UUID.
- version=<Base64 encoded string>
-
Set SMBIOS1 version.
- smp: <integer> (1 - N) (default = 1)
-
The number of CPUs. Please use option -sockets instead.
- sockets: <integer> (1 - N) (default = 1)
-
The number of CPU sockets.
- spice_enhancements: [foldersharing=<1|0>] [,videostreaming=<off|all|filter>]
-
Configure additional enhancements for SPICE.
- foldersharing=<boolean> (default = 0)
-
Enable folder sharing via SPICE. Needs Spice-WebDAV daemon installed in the VM.
- videostreaming=<all | filter | off> (default = off)
-
Enable video streaming. Uses compression for detected video streams.
- sshkeys: <string>
-
cloud-init: Setup public SSH keys (one key per line, OpenSSH format).
- startdate: (now | YYYY-MM-DD | YYYY-MM-DDTHH:MM:SS) (default = now)
-
Set the initial date of the real time clock. Valid format for date are:'now' or 2006-06-17T16:01:21 or 2006-06-17.
- startup: `[[order=]\d+] [,up=\d+] [,down=\d+] `
-
Startup and shutdown behavior. Order is a non-negative number defining the general startup order. Shutdown in done with reverse ordering. Additionally you can set the up or down delay in seconds, which specifies a delay to wait before the next VM is started or stopped.
- tablet: <boolean> (default = 1)
-
Enable/disable the USB tablet device. This device is usually needed to allow absolute mouse positioning with VNC. Else the mouse runs out of sync with normal VNC clients. If you’re running lots of console-only guests on one host, you may consider disabling this to save some context switches. This is turned off by default if you use spice (qm set <vmid> --vga qxl).
- tags: <string>
-
Tags of the VM. This is only meta information.
- tdf: <boolean> (default = 0)
-
Enable/disable time drift fix.
- template: <boolean> (default = 0)
-
Enable/disable Template.
- tpmstate0: [file=]<volume> [,size=<DiskSize>] [,version=<v1.2|v2.0>]
-
Configure a Disk for storing TPM state. The format is fixed to raw.
- file=<volume>
-
The drive’s backing volume.
- size=<DiskSize>
-
Disk size. This is purely informational and has no effect.
- version=<v1.2 | v2.0> (default = v2.0)
-
The TPM interface version. v2.0 is newer and should be preferred. Note that this cannot be changed later on.
- unused[n]: [file=]<volume>
-
Reference to unused volumes. This is used internally, and should not be modified manually.
- file=<volume>
-
The drive’s backing volume.
- usb[n]: [[host=]<HOSTUSBDEVICE|spice>] [,mapping=<mapping-id>] [,usb3=<1|0>]
-
Configure an USB device (n is 0 to 4, for machine version >= 7.1 and ostype l26 or windows > 7, n can be up to 14).
- host=<HOSTUSBDEVICE|spice>
-
The Host USB device or port or the value spice. HOSTUSBDEVICE syntax is:
'bus-port(.port)*' (decimal numbers) or
'vendor_id:product_id' (hexadeciaml numbers) or
'spice'
You can use the lsusb -t command to list existing usb devices.
This option allows direct access to host hardware. So it is no longer possible to migrate such machines - use with special care. The value spice can be used to add a usb redirection devices for spice.
Either this or the mapping key must be set.
- mapping=<mapping-id>
-
The ID of a cluster wide mapping. Either this or the default-key host must be set.
- usb3=<boolean> (default = 0)
-
Specifies whether if given host option is a USB3 device or port. For modern guests (machine version >= 7.1 and ostype l26 and windows > 7), this flag is irrelevant (all devices are plugged into a xhci controller).
- vcpus: <integer> (1 - N) (default = 0)
-
Number of hotplugged vcpus.
- vga: [[type=]<enum>] [,clipboard=<vnc>] [,memory=<integer>]
-
Configure the VGA Hardware. If you want to use high resolution modes (>= 1280x1024x16) you may need to increase the vga memory option. Since QEMU 2.9 the default VGA display type is std for all OS types besides some Windows versions (XP and older) which use cirrus. The qxl option enables the SPICE display server. For win* OS you can select how many independent displays you want, Linux guests can add displays them self. You can also run without any graphic card, using a serial device as terminal.
- clipboard=<vnc>
-
Enable a specific clipboard. If not set, depending on the display type the SPICE one will be added. Migration with VNC clipboard is not yet supported!
- memory=<integer> (4 - 512)
-
Sets the VGA memory (in MiB). Has no effect with serial display.
- type=<cirrus | none | qxl | qxl2 | qxl3 | qxl4 | serial0 | serial1 | serial2 | serial3 | std | virtio | virtio-gl | vmware> (default = std)
-
Select the VGA type.
- virtio[n]: [file=]<volume> [,aio=<native|threads|io_uring>] [,backup=<1|0>] [,bps=<bps>] [,bps_max_length=<seconds>] [,bps_rd=<bps>] [,bps_rd_max_length=<seconds>] [,bps_wr=<bps>] [,bps_wr_max_length=<seconds>] [,cache=<enum>] [,cyls=<integer>] [,detect_zeroes=<1|0>] [,discard=<ignore|on>] [,format=<enum>] [,heads=<integer>] [,iops=<iops>] [,iops_max=<iops>] [,iops_max_length=<seconds>] [,iops_rd=<iops>] [,iops_rd_max=<iops>] [,iops_rd_max_length=<seconds>] [,iops_wr=<iops>] [,iops_wr_max=<iops>] [,iops_wr_max_length=<seconds>] [,iothread=<1|0>] [,mbps=<mbps>] [,mbps_max=<mbps>] [,mbps_rd=<mbps>] [,mbps_rd_max=<mbps>] [,mbps_wr=<mbps>] [,mbps_wr_max=<mbps>] [,media=<cdrom|disk>] [,replicate=<1|0>] [,rerror=<ignore|report|stop>] [,ro=<1|0>] [,secs=<integer>] [,serial=<serial>] [,shared=<1|0>] [,size=<DiskSize>] [,snapshot=<1|0>] [,trans=<none|lba|auto>] [,werror=<enum>]
-
Use volume as VIRTIO hard disk (n is 0 to 15).
- aio=<io_uring | native | threads>
-
AIO type to use.
- backup=<boolean>
-
Whether the drive should be included when making backups.
- bps=<bps>
-
Maximum r/w speed in bytes per second.
- bps_max_length=<seconds>
-
Maximum length of I/O bursts in seconds.
- bps_rd=<bps>
-
Maximum read speed in bytes per second.
- bps_rd_max_length=<seconds>
-
Maximum length of read I/O bursts in seconds.
- bps_wr=<bps>
-
Maximum write speed in bytes per second.
- bps_wr_max_length=<seconds>
-
Maximum length of write I/O bursts in seconds.
- cache=<directsync | none | unsafe | writeback | writethrough>
-
The drive’s cache mode
- cyls=<integer>
-
Force the drive’s physical geometry to have a specific cylinder count.
- detect_zeroes=<boolean>
-
Controls whether to detect and try to optimize writes of zeroes.
- discard=<ignore | on>
-
Controls whether to pass discard/trim requests to the underlying storage.
- file=<volume>
-
The drive’s backing volume.
- format=<cloop | cow | qcow | qcow2 | qed | raw | vmdk>
-
The drive’s backing file’s data format.
- heads=<integer>
-
Force the drive’s physical geometry to have a specific head count.
- iops=<iops>
-
Maximum r/w I/O in operations per second.
- iops_max=<iops>
-
Maximum unthrottled r/w I/O pool in operations per second.
- iops_max_length=<seconds>
-
Maximum length of I/O bursts in seconds.
- iops_rd=<iops>
-
Maximum read I/O in operations per second.
- iops_rd_max=<iops>
-
Maximum unthrottled read I/O pool in operations per second.
- iops_rd_max_length=<seconds>
-
Maximum length of read I/O bursts in seconds.
- iops_wr=<iops>
-
Maximum write I/O in operations per second.
- iops_wr_max=<iops>
-
Maximum unthrottled write I/O pool in operations per second.
- iops_wr_max_length=<seconds>
-
Maximum length of write I/O bursts in seconds.
- iothread=<boolean>
-
Whether to use iothreads for this drive
- mbps=<mbps>
-
Maximum r/w speed in megabytes per second.
- mbps_max=<mbps>
-
Maximum unthrottled r/w pool in megabytes per second.
- mbps_rd=<mbps>
-
Maximum read speed in megabytes per second.
- mbps_rd_max=<mbps>
-
Maximum unthrottled read pool in megabytes per second.
- mbps_wr=<mbps>
-
Maximum write speed in megabytes per second.
- mbps_wr_max=<mbps>
-
Maximum unthrottled write pool in megabytes per second.
- media=<cdrom | disk> (default = disk)
-
The drive’s media type.
- replicate=<boolean> (default = 1)
-
Whether the drive should considered for replication jobs.
- rerror=<ignore | report | stop>
-
Read error action.
- ro=<boolean>
-
Whether the drive is read-only.
- secs=<integer>
-
Force the drive’s physical geometry to have a specific sector count.
- serial=<serial>
-
The drive’s reported serial number, url-encoded, up to 20 bytes long.
- shared=<boolean> (default = 0)
-
Mark this locally-managed volume as available on all nodes.
This option does not share the volume automatically, it assumes it is shared already! - size=<DiskSize>
-
Disk size. This is purely informational and has no effect.
- snapshot=<boolean>
-
Controls qemu’s snapshot mode feature. If activated, changes made to the disk are temporary and will be discarded when the VM is shutdown.
- trans=<auto | lba | none>
-
Force disk geometry bios translation mode.
- werror=<enospc | ignore | report | stop>
-
Write error action.
- vmgenid: <UUID> (default = 1 (autogenerated))
-
The VM generation ID (vmgenid) device exposes a 128-bit integer value identifier to the guest OS. This allows to notify the guest operating system when the virtual machine is executed with a different configuration (e.g. snapshot execution or creation from a template). The guest operating system notices the change, and is then able to react as appropriate by marking its copies of distributed databases as dirty, re-initializing its random number generator, etc. Note that auto-creation only works when done through API/CLI create or update methods, but not when manually editing the config file.
- vmstatestorage: <string>
-
Default storage for VM state volumes/files.
- watchdog: [[model=]<i6300esb|ib700>] [,action=<enum>]
-
Create a virtual hardware watchdog device. Once enabled (by a guest action), the watchdog must be periodically polled by an agent inside the guest or else the watchdog will reset the guest (or execute the respective action specified)
- action=<debug | none | pause | poweroff | reset | shutdown>
-
The action to perform if after activation the guest fails to poll the watchdog in time.
- model=<i6300esb | ib700> (default = i6300esb)
-
Watchdog type to emulate.
Locks
Online migrations, snapshots and backups (vzdump) set a lock to prevent incompatible concurrent actions on the affected VMs. Sometimes you need to remove such a lock manually (for example after a power failure).
# qm unlock <vmid>
|
|
Only do that if you are sure the action which set the lock is no longer running. |
See Also