SimpleInvoices Deployment Screenshots
Prerequisites
A working ProxMoxVE install (v1.4 used here but should work on 1.3 / 1.5 as well). No Intel-VT or AMD-V chip required as only OpenVZ will be used. Must be 64-bit machine, though will work on 32-bit machine with custom install discussed elsewhere.
Host Login
Let's first login to the ProxMox Virtual Environment by heading to the IP address of the ProxMoxVE Host.

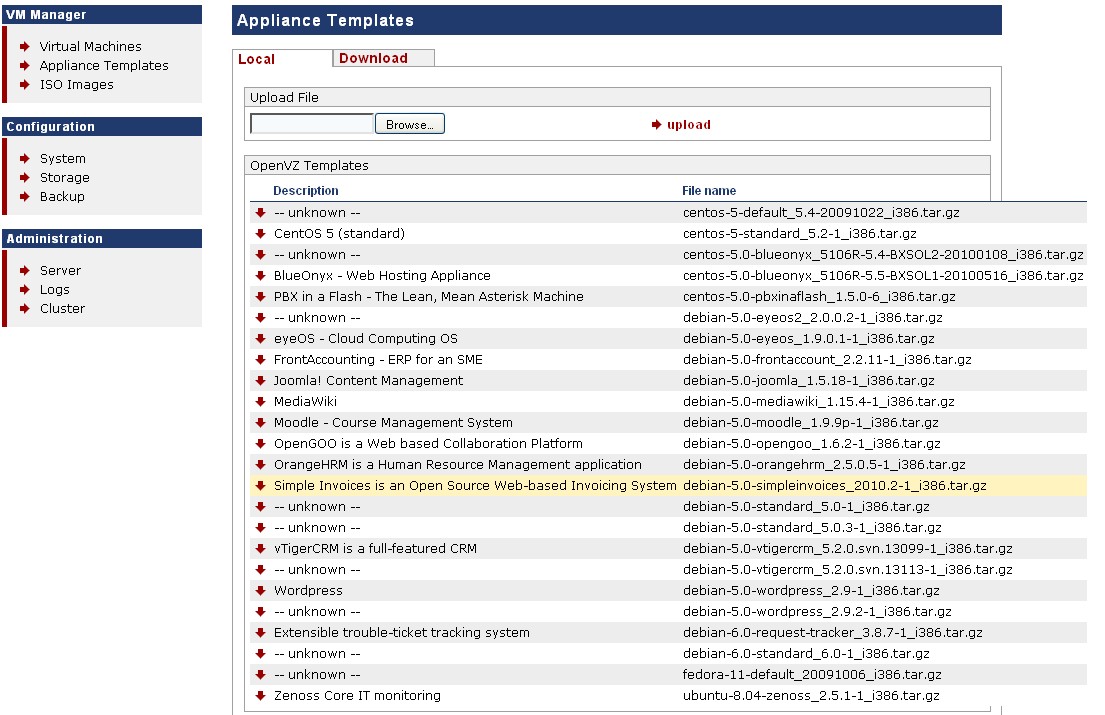
Appliance Templates
We then choose to list the Appliance Templates o that we can download the SimpleInvoices OpenVZ ProxMox Template into the Host system.

Download SI Appliance Template
Choose the Download tab on the right hand pane of the Appliance Templates page.

If the SimpleInvoices Template does not show up (normally under the www section), then you will either have to manually download it from the direct link shown in the SI Wiki page under Appliance Details -> Location into your /var/lib/vz/template/cache folder in the ProxMoxVE Host or append the contents of the this file to /var/lib/pve-manager/apl-available file in the ProxMoxVE Host and then refresh the page shown in this screenshot and then download from within this GUI. Please note that the said apl-available file will be overwritten each day and each re-boot as Headquarters controls the default display of downloadable templates.
On completing the template download, the Local tab in the Appliance Templates pane, will see that the SimpleInvoices Template is listed as available for deployment.
Creating the SI Virtual Machine
Selecting the Virtual Machines menu link on the left menu and choosing the Create tab on the right pane, we now select the SimpleInvoices Template.

We have assumed 192.168.150.75 as the ProxMoxVE Host machine's IP, the upline router / gateway IP as 192.168.150.1 and have decided to allot 192.168.150.11 as the IP for the SimpleInvoices Virtual machine (OpenVZ Guest VM - si.local.net). After filling in the details, we click the create link at the bottom and we're done.

Created SI Virtual Machine
On successful completion of SI VM creation we see the following:

Start the SI VM
We choose the List tab in the right pane of the Virtual Machines left menu link and choose to Start the SI Virtual machine.

On starting the SI Virtual Machine, we see the following options (clicking on the VM row will yield other useful info like startup logs and other menu choices):

Using the VM Console from within the Host (aka VNC)
By choosing the Console in the screenshot above, we get a SSH terminal where we can issue Linux console commands. This is the console of the SI Virtual Machine and has root access stepping in through VNC from the ProxMoxVE Host machine. The default admin folder is set to adminT99 - you can alter it to what you want from the console GUI thus:
mv /var/www/simpleinvoices/adminT99 /var/www/simpleinvoices/my_secret_admin_folder_name
It can also be renamed using an FTP client.
Any settings that need to be tweaked can be done by editing the files:
/var/www/simpleinvoices/config/config.ini
/var/www/simpleinvoices/config/define.php
If such tweaking is done for the define.php, it will gracefully make necessary changes in the original install itself. The config.ini is generated during the first startup of the VM and hence must be edited only afterwards and only if needed.

Accessing the SI VM Application
We can edit the windows file at c:\windows\system32\drivers\etc\hosts inserting an entry for our SI virtual machine and access it using the named URL or directly by it's IP address in a browser.
