Difference between revisions of "User Management"
| (48 intermediate revisions by 6 users not shown) | |||
| Line 1: | Line 1: | ||
| − | {{ | + | <!--PVE_IMPORT_START_MARKER--> |
| − | + | <!-- Do not edit - this is autogenerated content --> | |
| − | + | {{#pvedocs:pveum-plain.html}} | |
| − | + | [[Category:Reference Documentation]] | |
| − | + | <pvehide> | |
| − | + | Proxmox VE supports multiple authentication sources, for example Linux PAM, | |
| − | + | an integrated Proxmox VE authentication server, LDAP, Microsoft Active | |
| − | By using | + | Directory and OpenID Connect. |
| − | + | By using role-based user and permission management for all objects (VMs, | |
| − | + | Storage, nodes, etc.), granular access can be defined. | |
| − | + | Users | |
| − | Proxmox VE stores | + | Proxmox VE stores user attributes in /etc/pve/user.cfg. |
| − | + | Passwords are not stored here; users are instead associated with the | |
| − | + | authentication realms described below. | |
| − | + | Therefore, a user is often internally identified by their username and | |
| − | + | realm in the form <userid>@<realm>. | |
| − | + | Each user entry in this file contains the following information: | |
| − | + | First name | |
| − | + | Last name | |
| − | + | E-mail address | |
| − | + | Group memberships | |
| − | + | An optional expiration date | |
| − | + | A comment or note about this user | |
| − | + | Whether this user is enabled or disabled | |
| − | + | Optional two-factor authentication keys | |
| − | + | When you disable or delete a user, or if the expiry date set is | |
| − | + | in the past, this user will not be able to log in to new sessions or start new | |
| − | + | tasks. All tasks which have already been started by this user (for example, | |
| − | + | terminal sessions) will not be terminated automatically by any such event. | |
| − | + | System administrator | |
| − | + | The system’s root user can always log in via the Linux PAM realm and is an | |
| − | + | unconfined administrator. This user cannot be deleted, but attributes can | |
| − | + | still be changed. System mails will be sent to the email address | |
| − | + | assigned to this user. | |
| − | + | Groups | |
| − | + | Each user can be a member of several groups. Groups are the preferred | |
| − | + | way to organize access permissions. You should always grant permissions | |
| − | + | to groups instead of individual users. That way you will get a | |
| − | + | much more maintainable access control list. | |
| − | + | API Tokens | |
| − | The | + | API tokens allow stateless access to most parts of the REST API from another |
| − | + | system, software or API client. Tokens can be generated for individual users | |
| − | + | and can be given separate permissions and expiration dates to limit the scope | |
| − | + | and duration of the access. Should the API token get compromised, it can be | |
| − | + | revoked without disabling the user itself. | |
| − | + | API tokens come in two basic types: | |
| − | + | Separated privileges: The token needs to be given explicit access with ACLs. | |
| − | + | Its effective permissions are calculated by intersecting user and token | |
| − | + | permissions. | |
| − | + | Full privileges: The token’s permissions are identical to that of the | |
| − | + | associated user. | |
| − | + | The token value is only displayed/returned once when the token is | |
| − | + | generated. It cannot be retrieved again over the API at a later time! | |
| − | + | To use an API token, set the HTTP header Authorization to the displayed value | |
| − | + | of the form PVEAPIToken=USER@REALM!TOKENID=UUID when making API requests, or | |
| − | + | refer to your API client’s documentation. | |
| − | + | Resource Pools | |
| − | + | A resource pool is a set of virtual machines, containers, and storage | |
| − | + | devices. It is useful for permission handling in cases where certain users | |
| − | + | should have controlled access to a specific set of resources, as it allows for a | |
| − | + | single permission to be applied to a set of elements, rather than having to | |
| − | + | manage this on a per-resource basis. Resource pools are often used in tandem | |
| − | + | with groups, so that the members of a group have permissions on a set of | |
| − | + | machines and storage. | |
| − | + | Authentication Realms | |
| − | + | As Proxmox VE users are just counterparts for users existing on some external | |
| − | + | realm, the realms have to be configured in /etc/pve/domains.cfg. | |
| − | + | The following realms (authentication methods) are available: | |
| − | + | Linux PAM Standard Authentication | |
| − | + | Linux PAM is a framework for system-wide user authentication. These users are | |
| − | + | created on the host system with commands such as adduser. If PAM users exist | |
| − | + | on the Proxmox VE host system, corresponding entries can be added to Proxmox VE, to allow | |
| − | + | these users to log in via their system username and password. | |
| − | + | Proxmox VE Authentication Server | |
| − | + | This is a Unix-like password store, which stores hashed passwords in | |
| − | + | /etc/pve/priv/shadow.cfg. Passwords are hashed using the SHA-256 hashing | |
| − | + | algorithm. This is the most convenient realm for small-scale (or even | |
| − | + | mid-scale) installations, where users do not need access to anything outside of | |
| − | + | Proxmox VE. In this case, users are fully managed by Proxmox VE and are able to change | |
| − | + | their own passwords via the GUI. | |
| − | + | LDAP | |
| − | + | LDAP (Lightweight Directory Access Protocol) is an open, cross-platform protocol | |
| − | + | for authentication using directory services. OpenLDAP is a popular open-source | |
| − | + | implementations of the LDAP protocol. | |
| − | + | Microsoft Active Directory (AD) | |
| − | + | Microsoft Active Directory (AD) is a directory service for Windows domain | |
| − | + | networks and is supported as an authentication realm for Proxmox VE. It supports LDAP | |
| − | + | as an authentication protocol. | |
| − | + | OpenID Connect | |
| − | + | OpenID Connect is implemented as an identity layer on top of the OATH 2.0 | |
| − | + | protocol. It allows clients to verify the identity of the user, based on | |
| − | + | authentication performed by an external authorization server. | |
| − | + | Linux PAM Standard Authentication | |
| − | + | As Linux PAM corresponds to host system users, a system user must exist on each | |
| − | + | node which the user is allowed to log in on. The user authenticates with their | |
| − | + | usual system password. This realm is added by default and can’t be removed. In | |
| − | + | terms of configurability, an administrator can choose to require two-factor | |
| − | + | authentication with logins from the realm and to set the realm as the default | |
| − | + | authentication realm. | |
| − | + | Proxmox VE Authentication Server | |
| − | + | The Proxmox VE authentication server realm is a simple Unix-like password store. | |
| − | + | The realm is created by default, and as with Linux PAM, the only configuration | |
| − | + | items available are the ability to require two-factor authentication for users | |
| − | + | of the realm, and to set it as the default realm for login. | |
| − | + | Unlike the other Proxmox VE realm types, users are created and authenticated entirely | |
| − | + | through Proxmox VE, rather than authenticating against another system. Hence, you are | |
| − | + | required to set a password for this type of user upon creation. | |
| − | + | LDAP | |
| − | + | You can also use an external LDAP server for user authentication (for examle, | |
| − | + | OpenLDAP). In this realm type, users are searched under a Base Domain Name | |
| − | + | (base_dn), using the username attribute specified in the User Attribute Name | |
| − | + | (user_attr) field. | |
| − | + | A server and optional fallback server can be configured, and the connection can | |
| − | + | be encrypted via SSL. Furthermore, filters can be configured for directories and | |
| − | + | groups. Filters allow you to further limit the scope of the realm. | |
| − | + | For instance, if a user is represented via the following LDIF dataset: | |
| − | The | + | # user1 of People at ldap-test.com |
| − | + | dn: uid=user1,ou=People,dc=ldap-test,dc=com | |
| − | + | objectClass: top | |
| − | + | objectClass: person | |
| − | + | objectClass: organizationalPerson | |
| − | + | objectClass: inetOrgPerson | |
| − | + | uid: user1 | |
| − | + | cn: Test User 1 | |
| − | + | sn: Testers | |
| − | + | description: This is the first test user. | |
| − | + | The Base Domain Name would be ou=People,dc=ldap-test,dc=com and the user | |
| − | + | attribute would be uid. | |
| − | + | If Proxmox VE needs to authenticate (bind) to the LDAP server before being | |
| − | + | able to query and authenticate users, a bind domain name can be | |
| + | configured via the bind_dn property in /etc/pve/domains.cfg. Its | ||
| + | password then has to be stored in /etc/pve/priv/ldap/<realmname>.pw | ||
| + | (for example, /etc/pve/priv/ldap/my-ldap.pw). This file should contain a | ||
| + | single line with the raw password. | ||
| + | To verify certificates, you need to set capath. You can set it either | ||
| + | directly to the CA certificate of your LDAP server, or to the system path | ||
| + | containing all trusted CA certificates (/etc/ssl/certs). | ||
| + | Additionally, you need to set the verify option, which can also be done over | ||
| + | the web interface. | ||
| + | The main configuration options for an LDAP server realm are as follows: | ||
| + | Realm (realm): The realm identifier for Proxmox VE users | ||
| + | Base Domain Name (base_dn): The directory which users are searched under | ||
| + | User Attribute Name (user_attr): The LDAP attribute containing the | ||
| + | username that users will log in with | ||
| + | Server (server1): The server hosting the LDAP directory | ||
| + | Fallback Server (server2): An optional fallback server address, in case | ||
| + | the primary server is unreachable | ||
| + | Port (port): The port that the LDAP server listens on | ||
| + | In order to allow a particular user to authenticate using the LDAP server, | ||
| + | you must also add them as a user of that realm from the Proxmox VE server. This can | ||
| + | be carried out automatically with syncing. | ||
| + | Microsoft Active Directory (AD) | ||
| + | To set up Microsoft AD as a realm, a server address and authentication domain | ||
| + | need to be specified. Active Directory supports most of the same properties as | ||
| + | LDAP, such as an optional fallback server, port, and SSL encryption. | ||
| + | Furthermore, users can be added to Proxmox VE automatically via | ||
| + | sync operations, after configuration. | ||
| + | As with LDAP, if Proxmox VE needs to authenticate before it binds to the AD server, | ||
| + | you must configure the Bind User (bind_dn) property. This property is | ||
| + | typically required by default for Microsoft AD. | ||
| + | The main configuration settings for Microsoft Active Directory are: | ||
| + | Realm (realm): The realm identifier for Proxmox VE users | ||
| + | Domain (domain): The AD domain of the server | ||
| + | Server (server1): The FQDN or IP address of the server | ||
| + | Fallback Server (server2): An optional fallback server address, in case | ||
| + | the primary server is unreachable | ||
| + | Port (port): The port that the Microsoft AD server listens on | ||
| + | Syncing LDAP-Based Realms | ||
| + | It’s possible to automatically sync users and groups for LDAP-based realms (LDAP | ||
| + | & Microsoft Active Directory), rather than having to add them to Proxmox VE manually. | ||
| + | You can access the sync options from the Add/Edit window of the web interface’s | ||
| + | Authentication panel or via the pveum realm add/modify commands. You can | ||
| + | then carry out the sync operation from the Authentication panel of the GUI or | ||
| + | using the following command: | ||
| + | pveum realm sync <realm> | ||
| + | Users and groups are synced to the cluster-wide configuration file, | ||
| + | /etc/pve/user.cfg. | ||
| + | Attributes to Properties | ||
| + | If the sync response includes user attributes, they will be synced into the | ||
| + | matching user property in the user.cfg. For example: firstname or | ||
| + | lastname. | ||
| + | If the names of the attributes are not matching the Proxmox VE properties, you can | ||
| + | set a custom field-to-field map in the config by using the sync_attributes | ||
| + | option. | ||
| + | How such properties are handled if anything vanishes can be controlled via the | ||
| + | sync options, see below. | ||
| + | Sync Configuration | ||
| + | The configuration options for syncing LDAP-based realms can be found in the | ||
| + | Sync Options tab of the Add/Edit window. | ||
| + | The configuration options are as follows: | ||
| + | Bind User (bind_dn): Refers to the LDAP account used to query users | ||
| + | and groups. This account needs access to all desired entries. If it’s set, the | ||
| + | search will be carried out via binding; otherwise, the search will be carried | ||
| + | out anonymously. The user must be a complete LDAP formatted distinguished name | ||
| + | (DN), for example, cn=admin,dc=example,dc=com. | ||
| + | Groupname attr. (group_name_attr): Represents the | ||
| + | users' groups. Only entries which adhere to the usual character limitations of | ||
| + | the user.cfg are synced. Groups are synced with -$realm attached to the | ||
| + | name, in order to avoid naming conflicts. Please ensure that a sync does not | ||
| + | overwrite manually created groups. | ||
| + | User classes (user_classes): Objects classes associated with users. | ||
| + | Group classes (group_classes): Objects classes associated with groups. | ||
| + | E-Mail attribute: If the LDAP-based server specifies user email addresses, | ||
| + | these can also be included in the sync by setting the associated attribute | ||
| + | here. From the command line, this is achievable through the | ||
| + | --sync_attributes parameter. | ||
| + | User Filter (filter): For further filter options to target specific users. | ||
| + | Group Filter (group_filter): For further filter options to target specific | ||
| + | groups. | ||
| + | Filters allow you to create a set of additional match criteria, to narrow | ||
| + | down the scope of a sync. Information on available LDAP filter types and their | ||
| + | usage can be found at ldap.com. | ||
| + | Sync Options | ||
| + | In addition to the options specified in the previous section, you can also | ||
| + | configure further options that describe the behavior of the sync operation. | ||
| + | These options are either set as parameters before the sync, or as defaults via | ||
| + | the realm option sync-defaults-options. | ||
| + | The main options for syncing are: | ||
| + | Scope (scope): The scope of what to sync. It can be either users, | ||
| + | groups or both. | ||
| + | Enable new (enable-new): If set, the newly synced users are enabled and | ||
| + | can log in. The default is true. | ||
| + | Remove Vanished (remove-vanished): This is a list of options which, when | ||
| + | activated, determine if they are removed when they are not returned from | ||
| + | the sync response. The options are: | ||
| + | ACL (acl): Remove ACLs of users and groups which were not returned | ||
| + | returned in the sync response. This most often makes sense together with | ||
| + | Entry. | ||
| + | Entry (entry): Removes entries (i.e. users and groups) when they are | ||
| + | not returned in the sync response. | ||
| + | Properties (properties): Removes properties of entries where the user | ||
| + | in the sync response did not contain those attributes. This includes | ||
| + | all properties, even those never set by a sync. Exceptions are tokens | ||
| + | and the enable flag, these will be retained even with this option enabled. | ||
| + | Preview (dry-run): No data is written to the config. This is useful if you | ||
| + | want to see which users and groups would get synced to the user.cfg. | ||
| + | OpenID Connect | ||
| + | The main OpenID Connect configuration options are: | ||
| + | Issuer URL (issuer-url): This is the URL of the authorization server. | ||
| + | Proxmox uses the OpenID Connect Discovery protocol to automatically configure | ||
| + | further details. | ||
| + | While it is possible to use unencrypted http:// URLs, we strongly recommend to | ||
| + | use encrypted https:// connections. | ||
| + | Realm (realm): The realm identifier for Proxmox VE users | ||
| + | Client ID (client-id): OpenID Client ID. | ||
| + | Client Key (client-key): Optional OpenID Client Key. | ||
| + | Autocreate Users (autocreate): Automatically create users if they do not | ||
| + | exist. While authentication is done at the OpenID server, all users still need | ||
| + | an entry in the Proxmox VE user configuration. You can either add them manually, or | ||
| + | use the autocreate option to automatically add new users. | ||
| + | Username Claim (username-claim): OpenID claim used to generate the unique | ||
| + | username (subject, username or email). | ||
| + | Username mapping | ||
| + | The OpenID Connect specification defines a single unique attribute | ||
| + | (claim in OpenID terms) named subject. By default, we use the | ||
| + | value of this attribute to generate Proxmox VE usernames, by simple adding | ||
| + | @ and the realm name: ${subject}@${realm}. | ||
| + | Unfortunately, most OpenID servers use random strings for subject, like | ||
| + | DGH76OKH34BNG3245SB, so a typical username would look like | ||
| + | DGH76OKH34BNG3245SB@yourrealm. While unique, it is difficult for | ||
| + | humans to remember such random strings, making it quite impossible to | ||
| + | associate real users with this. | ||
| + | The username-claim setting allows you to use other attributes for | ||
| + | the username mapping. Setting it to username is preferred if the | ||
| + | OpenID Connect server provides that attribute and guarantees its | ||
| + | uniqueness. | ||
| + | Another option is to use email, which also yields human readable | ||
| + | usernames. Again, only use this setting if the server guarantees the | ||
| + | uniqueness of this attribute. | ||
| + | Examples | ||
| + | Here is an example of creating an OpenID realm using Google. You need to | ||
| + | replace --client-id and --client-key with the values | ||
| + | from your Google OpenID settings. | ||
| + | pveum realm add myrealm1 --type openid --issuer-url https://accounts.google.com --client-id XXXX --client-key YYYY --username-claim email | ||
| + | The above command uses --username-claim email, so that the usernames on the | ||
| + | Proxmox VE side look like example.user@google.com@myrealm1. | ||
| + | Keycloak (https://www.keycloak.org/) is a popular open source Identity | ||
| + | and Access Management tool, which supports OpenID Connect. In the following | ||
| + | example, you need to replace the --issuer-url and --client-id with | ||
| + | your information: | ||
| + | pveum realm add myrealm2 --type openid --issuer-url https://your.server:8080/auth/realms/your-realm --client-id XXX --username-claim username | ||
| + | Using --username-claim username enables simple usernames on the | ||
| + | Proxmox VE side, like example.user@myrealm2. | ||
| + | You need to ensure that the user is not allowed to edit | ||
| + | the username setting themselves (on the Keycloak server). | ||
| + | Two-Factor Authentication | ||
| + | There are two ways to use two-factor authentication: | ||
| + | It can be required by the authentication realm, either via TOTP | ||
| + | (Time-based One-Time Password) or YubiKey OTP. In this case, a newly | ||
| + | created user needs to have their keys added immediately, as there is no way to | ||
| + | log in without the second factor. In the case of TOTP, users can | ||
| + | also change the TOTP later on, provided they can log in first. | ||
| + | Alternatively, users can choose to opt-in to two-factor authentication | ||
| + | later on, even if the realm does not enforce it. | ||
| + | Available Second Factors | ||
| + | You can set up multiple second factors, in order to avoid a situation in | ||
| + | which losing your smartphone or security key locks you out of your | ||
| + | account permanently. | ||
| + | The following two-factor authentication methods are available in | ||
| + | addition to realm-enforced TOTP and YubiKey OTP: | ||
| + | User configured TOTP | ||
| + | (Time-based One-Time Password). | ||
| + | A short code derived from a shared secret and the current time, it changes | ||
| + | every 30 seconds. | ||
| + | WebAuthn (Web Authentication). | ||
| + | A general standard for authentication. It is implemented by various | ||
| + | security devices, like hardware keys or trusted platform modules (TPM) | ||
| + | from a computer or smart phone. | ||
| + | Single use Recovery Keys. A list of keys which should either be | ||
| + | printed out and locked in a secure place or saved digitally in an | ||
| + | electronic vault. Each key can be used only once. These are perfect for | ||
| + | ensuring that you are not locked out, even if all of your other second | ||
| + | factors are lost or corrupt. | ||
| + | Before WebAuthn was supported, U2F could be setup by the user. Existing | ||
| + | U2F factors can still be used, but it is recommended to switch to | ||
| + | WebAuthn, once it is configured on the server. | ||
| + | Realm Enforced Two-Factor Authentication | ||
| + | This can be done by selecting one of the available methods via the | ||
| + | TFA dropdown box when adding or editing an Authentication Realm. | ||
| + | When a realm has TFA enabled, it becomes a requirement, and only users | ||
| + | with configured TFA will be able to log in. | ||
| + | Currently there are two methods available: | ||
| + | Time-based OATH (TOTP) | ||
| + | This uses the standard HMAC-SHA1 algorithm, | ||
| + | where the current time is hashed with the user’s configured key. The | ||
| + | time step and password length parameters are configurable. | ||
| + | A user can have multiple keys configured (separated by spaces), and the keys | ||
| + | can be specified in Base32 (RFC3548) or hexadecimal notation. | ||
| + | Proxmox VE provides a key generation tool (oathkeygen) which prints out a random | ||
| + | key in Base32 notation, that can be used directly with various OTP tools, such | ||
| + | as the oathtool command line tool, or on Android Google Authenticator, | ||
| + | FreeOTP, andOTP or similar applications. | ||
| + | YubiKey OTP | ||
| + | For authenticating via a YubiKey a Yubico API ID, API KEY and validation | ||
| + | server URL must be configured, and users must have a YubiKey available. In | ||
| + | order to get the key ID from a YubiKey, you can trigger the YubiKey once | ||
| + | after connecting it via USB, and copy the first 12 characters of the typed | ||
| + | password into the user’s Key IDs field. | ||
| + | Please refer to the YubiKey OTP | ||
| + | documentation for how to use the | ||
| + | YubiCloud or | ||
| + | host your own verification server. | ||
| + | User Configured TOTP Authentication | ||
| + | Users can choose to enable TOTP or WebAuthn as a second factor on login, via | ||
| + | the TFA button in the user list (unless the realm enforces YubiKey OTP). | ||
| + | Users can always add and use one time Recovery Keys. | ||
| + | After opening the TFA window, the user is presented with a dialog to set up | ||
| + | TOTP authentication. The Secret field contains the key, which can be | ||
| + | randomly generated via the Randomize button. An optional Issuer Name can be | ||
| + | added to provide information to the TOTP app about what the key belongs to. | ||
| + | Most TOTP apps will show the issuer name together with the corresponding | ||
| + | OTP values. The username is also included in the QR code for the TOTP app. | ||
| + | After generating a key, a QR code will be displayed, which can be used with most | ||
| + | OTP apps such as FreeOTP. The user then needs to verify the current user | ||
| + | password (unless logged in as root), as well as the ability to correctly use | ||
| + | the TOTP key, by typing the current OTP value into the Verification Code | ||
| + | field and pressing the Apply button. | ||
| + | TOTP | ||
| + | There is no server setup required. Simply install a TOTP app on your | ||
| + | smartphone (for example, FreeOTP) and use | ||
| + | the Proxmox Backup Server web-interface to add a TOTP factor. | ||
| + | WebAuthn | ||
| + | For WebAuthn to work, you need to have two things: | ||
| + | A trusted HTTPS certificate (for example, by using | ||
| + | Let’s Encrypt). | ||
| + | While it probably works with an untrusted certificate, some browsers may | ||
| + | warn or refuse WebAuthn operations if it is not trusted. | ||
| + | Setup the WebAuthn configuration (see Datacenter → Options → | ||
| + | WebAuthn Settings in the Proxmox VE web interface). This can be | ||
| + | auto-filled in most setups. | ||
| + | Once you have fulfilled both of these requirements, you can add a WebAuthn | ||
| + | configuration in the Two Factor panel under Datacenter → Permissions → Two | ||
| + | Factor. | ||
| + | Recovery Keys | ||
| + | Recovery key codes do not need any preparation; you can simply create a | ||
| + | set of recovery keys in the Two Factor panel under Datacenter → Permissions | ||
| + | → Two Factor. | ||
| + | There can only be one set of single-use recovery keys per user at any | ||
| + | time. | ||
| + | Server Side Webauthn Configuration | ||
| + | To allow users to use WebAuthn authentication, it is necessaary to use a valid | ||
| + | domain with a valid SSL certificate, otherwise some browsers may warn or refuse | ||
| + | to authenticate altogether. | ||
| + | Changing the WebAuthn configuration may render all existing WebAuthn | ||
| + | registrations unusable! | ||
| + | This is done via /etc/pve/datacenter.cfg. For instance: | ||
| + | webauthn: rp=mypve.example.com,origin=https://mypve.example.com:8006,id=mypve.example.com | ||
| + | Server Side U2F Configuration | ||
| + | It is recommended to use WebAuthn instead. | ||
| + | To allow users to use U2F authentication, it may be necessary to use a valid | ||
| + | domain with a valid SSL certificate, otherwise, some browsers may print | ||
| + | a warning or reject U2F usage altogether. Initially, an AppId | ||
| + | [AppId https://developers.yubico.com/U2F/App_ID.html] | ||
| + | needs to be configured. | ||
| + | Changing the AppId will render all existing U2F registrations | ||
| + | unusable! | ||
| + | This is done via /etc/pve/datacenter.cfg. For instance: | ||
| + | u2f: appid=https://mypve.example.com:8006 | ||
| + | For a single node, the AppId can simply be the address of the web-interface, | ||
| + | exactly as it is used in the browser, including the https:// and the port, as | ||
| + | shown above. Please note that some browsers may be more strict than others when | ||
| + | matching AppIds. | ||
| + | When using multiple nodes, it is best to have a separate https server | ||
| + | providing an appid.json | ||
| + | [Multi-facet apps: https://developers.yubico.com/U2F/App_ID.html] | ||
| + | file, as it seems to be compatible with most | ||
| + | browsers. If all nodes use subdomains of the same top level domain, it may be | ||
| + | enough to use the TLD as AppId. It should however be noted that some browsers | ||
| + | may not accept this. | ||
| + | A bad AppId will usually produce an error, but we have encountered | ||
| + | situations when this does not happen, particularly when using a top level domain | ||
| + | AppId for a node that is accessed via a subdomain in Chromium. For this reason | ||
| + | it is recommended to test the configuration with multiple browsers, as changing | ||
| + | the AppId later will render existing U2F registrations unusable. | ||
| + | Activating U2F as a User | ||
| + | To enable U2F authentication, open the TFA window’s U2F tab, type in the | ||
| + | current password (unless logged in as root), and press the Register button. | ||
| + | If the server is set up correctly and the browser accepts the server’s provided | ||
| + | AppId, a message will appear prompting the user to press the button on the | ||
| + | U2F device (if it is a YubiKey, the button light should be toggling on and | ||
| + | off steadily, roughly twice per second). | ||
| + | Firefox users may need to enable security.webauth.u2f via about:config | ||
| + | before they can use a U2F token. | ||
| + | Permission Management | ||
| + | In order for a user to perform an action (such as listing, modifying or | ||
| + | deleting parts of a VM’s configuration), the user needs to have the | ||
| + | appropriate permissions. | ||
| + | Proxmox VE uses a role and path based permission management system. An entry in | ||
| + | the permissions table allows a user, group or token to take on a specific role | ||
| + | when accessing an object or path. This means that such an access rule can | ||
| + | be represented as a triple of (path, user, role), (path, group, | ||
| + | role) or (path, token, role), with the role containing a set of allowed | ||
| + | actions, and the path representing the target of these actions. | ||
| + | Roles | ||
| + | A role is simply a list of privileges. Proxmox VE comes with a number | ||
| + | of predefined roles, which satisfy most requirements. | ||
| + | Administrator: has full privileges | ||
| + | NoAccess: has no privileges (used to forbid access) | ||
| + | PVEAdmin: can do most tasks, but has no rights to modify system settings (Sys.PowerMgmt, Sys.Modify, Realm.Allocate) | ||
| + | PVEAuditor: has read only access | ||
| + | PVEDatastoreAdmin: create and allocate backup space and templates | ||
| + | PVEDatastoreUser: allocate backup space and view storage | ||
| + | PVEPoolAdmin: allocate pools | ||
| + | PVESysAdmin: User ACLs, audit, system console and system logs | ||
| + | PVETemplateUser: view and clone templates | ||
| + | PVEUserAdmin: manage users | ||
| + | PVEVMAdmin: fully administer VMs | ||
| + | PVEVMUser: view, backup, configure CD-ROM, VM console, VM power management | ||
| + | You can see the whole set of predefined roles in the GUI. | ||
| + | You can add new roles via the GUI or the command line. | ||
| + | From the GUI, navigate to the Permissions → Roles tab from Datacenter and | ||
| + | click on the Create button. There you can set a role name and select any | ||
| + | desired privileges from the Privileges drop-down menu. | ||
| + | To add a role through the command line, you can use the pveum CLI tool, for | ||
| + | example: | ||
| + | pveum role add PVE_Power-only --privs "VM.PowerMgmt VM.Console" | ||
| + | pveum role add Sys_Power-only --privs "Sys.PowerMgmt Sys.Console" | ||
| + | Privileges | ||
| + | A privilege is the right to perform a specific action. To simplify | ||
| + | management, lists of privileges are grouped into roles, which can then | ||
| + | be used in the permission table. Note that privileges cannot be directly | ||
| + | assigned to users and paths without being part of a role. | ||
| + | We currently support the following privileges: | ||
| + | Node / System related privileges | ||
| + | Permissions.Modify: modify access permissions | ||
| + | Sys.PowerMgmt: node power management (start, stop, reset, shutdown, …) | ||
| + | Sys.Console: console access to node | ||
| + | Sys.Syslog: view syslog | ||
| + | Sys.Audit: view node status/config, Corosync cluster config, and HA config | ||
| + | Sys.Modify: create/modify/remove node network parameters | ||
| + | Sys.Incoming: allow incoming data streams from other clusters (experimental) | ||
| + | Group.Allocate: create/modify/remove groups | ||
| + | Pool.Allocate: create/modify/remove a pool | ||
| + | Pool.Audit: view a pool | ||
| + | Realm.Allocate: create/modify/remove authentication realms | ||
| + | Realm.AllocateUser: assign user to a realm | ||
| + | User.Modify: create/modify/remove user access and details. | ||
| + | Virtual machine related privileges | ||
| + | VM.Allocate: create/remove VM on a server | ||
| + | VM.Migrate: migrate VM to alternate server on cluster | ||
| + | VM.PowerMgmt: power management (start, stop, reset, shutdown, …) | ||
| + | VM.Console: console access to VM | ||
| + | VM.Monitor: access to VM monitor (kvm) | ||
| + | VM.Backup: backup/restore VMs | ||
| + | VM.Audit: view VM config | ||
| + | VM.Clone: clone/copy a VM | ||
| + | VM.Config.Disk: add/modify/remove disks | ||
| + | VM.Config.CDROM: eject/change CD-ROM | ||
| + | VM.Config.CPU: modify CPU settings | ||
| + | VM.Config.Memory: modify memory settings | ||
| + | VM.Config.Network: add/modify/remove network devices | ||
| + | VM.Config.HWType: modify emulated hardware types | ||
| + | VM.Config.Options: modify any other VM configuration | ||
| + | VM.Config.Cloudinit: modify Cloud-init parameters | ||
| + | VM.Snapshot: create/delete VM snapshots | ||
| + | Storage related privileges | ||
| + | Datastore.Allocate: create/modify/remove a datastore and delete volumes | ||
| + | Datastore.AllocateSpace: allocate space on a datastore | ||
| + | Datastore.AllocateTemplate: allocate/upload templates and ISO images | ||
| + | Datastore.Audit: view/browse a datastore | ||
| + | Objects and Paths | ||
| + | Access permissions are assigned to objects, such as virtual machines, | ||
| + | storages or resource pools. | ||
| + | We use file system like paths to address these objects. These paths form a | ||
| + | natural tree, and permissions of higher levels (shorter paths) can | ||
| + | optionally be propagated down within this hierarchy. | ||
| + | Paths can be templated. When an API call requires permissions on a | ||
| + | templated path, the path may contain references to parameters of the API | ||
| + | call. These references are specified in curly braces. Some parameters are | ||
| + | implicitly taken from the API call’s URI. For instance, the permission path | ||
| + | /nodes/{node} when calling /nodes/mynode/status requires permissions on | ||
| + | /nodes/mynode, while the path {path} in a PUT request to /access/acl | ||
| + | refers to the method’s path parameter. | ||
| + | Some examples are: | ||
| + | /nodes/{node}: Access to Proxmox VE server machines | ||
| + | /vms: Covers all VMs | ||
| + | /vms/{vmid}: Access to specific VMs | ||
| + | /storage/{storeid}: Access to a specific storage | ||
| + | /pool/{poolname}: Access to resources contained in a specific pool | ||
| + | /access/groups: Group administration | ||
| + | /access/realms/{realmid}: Administrative access to realms | ||
| + | Inheritance | ||
| + | As mentioned earlier, object paths form a file system like tree, and | ||
| + | permissions can be inherited by objects down that tree (the propagate flag is | ||
| + | set by default). We use the following inheritance rules: | ||
| + | Permissions for individual users always replace group permissions. | ||
| + | Permissions for groups apply when the user is member of that group. | ||
| + | Permissions on deeper levels replace those inherited from an upper level. | ||
| + | Additionally, privilege separated tokens can never have permissions on any | ||
| + | given path that their associated user does not have. | ||
| + | Pools | ||
| + | Pools can be used to group a set of virtual machines and datastores. You can | ||
| + | then simply set permissions on pools (/pool/{poolid}), which are inherited by | ||
| + | all pool members. This is a great way to simplify access control. | ||
| + | Which Permissions Do I Need? | ||
| + | The required API permissions are documented for each individual | ||
| + | method, and can be found at https://pve.proxmox.com/pve-docs/api-viewer/. | ||
| + | The permissions are specified as a list, which can be interpreted as a | ||
| + | tree of logic and access-check functions: | ||
| + | ["and", <subtests>...] and ["or", <subtests>...] | ||
| + | Each(and) or any(or) further element in the current list has to be true. | ||
| + | ["perm", <path>, [ <privileges>... ], <options>...] | ||
| + | The path is a templated parameter (see | ||
| + | Objects and Paths). All (or, if the any | ||
| + | option is used, any) of the listed | ||
| + | privileges must be allowed on the specified path. If a require-param | ||
| + | option is specified, then its specified parameter is required even if the | ||
| + | API call’s schema otherwise lists it as being optional. | ||
| + | ["userid-group", [ <privileges>... ], <options>...] | ||
| + | The caller must have any of the listed privileges on /access/groups. In | ||
| + | addition, there are two possible checks, depending on whether the | ||
| + | groups_param option is set: | ||
| + | groups_param is set: The API call has a non-optional groups parameter | ||
| + | and the caller must have any of the listed privileges on all of the listed | ||
| + | groups. | ||
| + | groups_param is not set: The user passed via the userid parameter | ||
| + | must exist and be part of a group on which the caller has any of the listed | ||
| + | privileges (via the /access/groups/<group> path). | ||
| + | ["userid-param", "self"] | ||
| + | The value provided for the API call’s userid parameter must refer to the | ||
| + | user performing the action (usually in conjunction with or, to allow | ||
| + | users to perform an action on themselves, even if they don’t have elevated | ||
| + | privileges). | ||
| + | ["userid-param", "Realm.AllocateUser"] | ||
| + | The user needs Realm.AllocateUser access to /access/realm/<realm>, with | ||
| + | <realm> referring to the realm of the user passed via the userid | ||
| + | parameter. Note that the user does not need to exist in order to be | ||
| + | associated with a realm, since user IDs are passed in the form of | ||
| + | <username>@<realm>. | ||
| + | ["perm-modify", <path>] | ||
| + | The path is a templated parameter (see | ||
| + | Objects and Paths). The user needs either the | ||
| + | Permissions.Modify privilege or, | ||
| + | depending on the path, the following privileges as a possible substitute: | ||
| + | /storage/...: additionally requires 'Datastore.Allocate` | ||
| + | /vms/...: additionally requires 'VM.Allocate` | ||
| + | /pool/...: additionally requires 'Pool.Allocate` | ||
| + | If the path is empty, Permission.Modify on /access is required. | ||
| + | Command Line Tool | ||
| + | Most users will simply use the GUI to manage users. But there is also | ||
| + | a fully featured command line tool called pveum (short for “Proxmox | ||
| + | VE User Manager”). Please note that all Proxmox VE command | ||
| + | line tools are wrappers around the API, so you can also access those | ||
| + | functions through the REST API. | ||
| + | Here are some simple usage examples. To show help, type: | ||
| + | pveum | ||
or (to show detailed help about a specific command) | or (to show detailed help about a specific command) | ||
| − | + | pveum help user add | |
| − | |||
| − | |||
Create a new user: | Create a new user: | ||
| − | + | pveum user add testuser@pve -comment "Just a test" | |
| − | + | Set or change the password (not all realms support this): | |
| − | + | pveum passwd testuser@pve | |
| − | Set or | ||
| − | |||
| − | |||
| − | |||
Disable a user: | Disable a user: | ||
| − | + | pveum user modify testuser@pve -enable 0 | |
| − | |||
| − | |||
Create a new group: | Create a new group: | ||
| + | pveum group add testgroup | ||
| + | Create a new role: | ||
| + | pveum role add PVE_Power-only -privs "VM.PowerMgmt VM.Console" | ||
| + | Real World Examples | ||
| + | Administrator Group | ||
| + | It is possible that an administrator would want to create a group of users with | ||
| + | full administrator rights (without using the root account). | ||
| + | To do this, first define the group: | ||
| + | pveum group add admin -comment "System Administrators" | ||
| + | Then assign the role: | ||
| + | pveum acl modify / -group admin -role Administrator | ||
| + | Finally, you can add users to the new admin group: | ||
| + | pveum user modify testuser@pve -group admin | ||
| + | Auditors | ||
| + | You can give read only access to users by assigning the PVEAuditor | ||
| + | role to users or groups. | ||
| + | Example 1: Allow user joe@pve to see everything | ||
| + | pveum acl modify / -user joe@pve -role PVEAuditor | ||
| + | Example 2: Allow user joe@pve to see all virtual machines | ||
| + | pveum acl modify /vms -user joe@pve -role PVEAuditor | ||
| + | Delegate User Management | ||
| + | If you want to delegate user management to user joe@pve, you can do | ||
| + | that with: | ||
| + | pveum acl modify /access -user joe@pve -role PVEUserAdmin | ||
| + | User joe@pve can now add and remove users, and change other user attributes, | ||
| + | such as passwords. This is a very powerful role, and you most | ||
| + | likely want to limit it to selected realms and groups. The following | ||
| + | example allows joe@pve to modify users within the realm pve, if they | ||
| + | are members of group customers: | ||
| + | pveum acl modify /access/realm/pve -user joe@pve -role PVEUserAdmin | ||
| + | pveum acl modify /access/groups/customers -user joe@pve -role PVEUserAdmin | ||
| + | The user is able to add other users, but only if they are | ||
| + | members of the group customers and within the realm pve. | ||
| + | Limited API Token for Monitoring | ||
| + | Permissions on API tokens are always a subset of those of their corresponding | ||
| + | user, meaning that an API token can’t be used to carry out a task that the | ||
| + | backing user has no permission to do. This section will demonstrate how you can | ||
| + | use an API token with separate privileges, to limit the token owner’s | ||
| + | permissions further. | ||
| + | Give the user joe@pve the role PVEVMAdmin on all VMs: | ||
| + | pveum acl modify /vms -user joe@pve -role PVEVMAdmin | ||
| + | Add a new API token with separate privileges, which is only allowed to view VM | ||
| + | information (for example, for monitoring purposes): | ||
| + | pveum user token add joe@pve monitoring -privsep 1 | ||
| + | pveum acl modify /vms -token 'joe@pve!monitoring' -role PVEAuditor | ||
| + | Verify the permissions of the user and token: | ||
| + | pveum user permissions joe@pve | ||
| + | pveum user token permissions joe@pve monitoring | ||
| + | Resource Pools | ||
| + | An enterprise is usually structured into several smaller departments, and it is | ||
| + | common that you want to assign resources and delegate management tasks to each | ||
| + | of these. Let’s assume that you want to set up a pool for a software development | ||
| + | department. First, create a group: | ||
| + | pveum group add developers -comment "Our software developers" | ||
| + | Now we create a new user which is a member of that group: | ||
| + | pveum user add developer1@pve -group developers -password | ||
| + | The "-password" parameter will prompt you for a password | ||
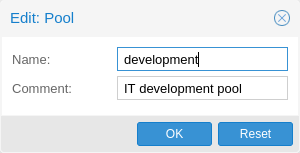
| + | Then we create a resource pool for our development department to use: | ||
| + | pveum pool add dev-pool --comment "IT development pool" | ||
| + | Finally, we can assign permissions to that pool: | ||
| + | pveum acl modify /pool/dev-pool/ -group developers -role PVEAdmin | ||
| + | Our software developers can now administer the resources assigned to | ||
| + | that pool. | ||
| + | </pvehide> | ||
| + | <!--PVE_IMPORT_END_MARKER--> | ||
| − | |||
| − | |||
| − | |||
| − | |||
| − | |||
| − | |||
| − | |||
| − | |||
| − | |||
| − | |||
| − | |||
| − | |||
| − | |||
| − | |||
| − | |||
| − | |||
| − | |||
| − | |||
| − | |||
| − | |||
| − | |||
| − | |||
| − | |||
| − | |||
| − | |||
| − | |||
| − | |||
| − | |||
| − | |||
| − | |||
| − | |||
| − | |||
| − | |||
| − | [[Category: | + | [[Category: HOWTO]] |
Revision as of 12:46, 22 November 2022
Proxmox VE supports multiple authentication sources, for example Linux PAM, an integrated Proxmox VE authentication server, LDAP, Microsoft Active Directory and OpenID Connect.
By using role-based user and permission management for all objects (VMs, Storage, nodes, etc.), granular access can be defined.
Users
Proxmox VE stores user attributes in /etc/pve/user.cfg. Passwords are not stored here; users are instead associated with the authentication realms described below. Therefore, a user is often internally identified by their username and realm in the form <userid>@<realm>.
Each user entry in this file contains the following information:
-
First name
-
Last name
-
E-mail address
-
Group memberships
-
An optional expiration date
-
A comment or note about this user
-
Whether this user is enabled or disabled
-
Optional two-factor authentication keys

|
When you disable or delete a user, or if the expiry date set is in the past, this user will not be able to log in to new sessions or start new tasks. All tasks which have already been started by this user (for example, terminal sessions) will not be terminated automatically by any such event. |
System administrator
The system’s root user can always log in via the Linux PAM realm and is an unconfined administrator. This user cannot be deleted, but attributes can still be changed. System mails will be sent to the email address assigned to this user.
Groups
Each user can be a member of several groups. Groups are the preferred way to organize access permissions. You should always grant permissions to groups instead of individual users. That way you will get a much more maintainable access control list.
API Tokens
API tokens allow stateless access to most parts of the REST API from another system, software or API client. Tokens can be generated for individual users and can be given separate permissions and expiration dates to limit the scope and duration of the access. Should the API token get compromised, it can be revoked without disabling the user itself.
API tokens come in two basic types:
-
Separated privileges: The token needs to be given explicit access with ACLs. Its effective permissions are calculated by intersecting user and token permissions.
-
Full privileges: The token’s permissions are identical to that of the associated user.
|
|
The token value is only displayed/returned once when the token is generated. It cannot be retrieved again over the API at a later time! |
To use an API token, set the HTTP header Authorization to the displayed value of the form PVEAPIToken=USER@REALM!TOKENID=UUID when making API requests, or refer to your API client’s documentation.
Resource Pools
A resource pool is a set of virtual machines, containers, and storage devices. It is useful for permission handling in cases where certain users should have controlled access to a specific set of resources, as it allows for a single permission to be applied to a set of elements, rather than having to manage this on a per-resource basis. Resource pools are often used in tandem with groups, so that the members of a group have permissions on a set of machines and storage.
Authentication Realms
As Proxmox VE users are just counterparts for users existing on some external realm, the realms have to be configured in /etc/pve/domains.cfg. The following realms (authentication methods) are available:
- Linux PAM Standard Authentication
-
Linux PAM is a framework for system-wide user authentication. These users are created on the host system with commands such as adduser. If PAM users exist on the Proxmox VE host system, corresponding entries can be added to Proxmox VE, to allow these users to log in via their system username and password.
- Proxmox VE Authentication Server
-
This is a Unix-like password store, which stores hashed passwords in /etc/pve/priv/shadow.cfg. Passwords are hashed using the SHA-256 hashing algorithm. This is the most convenient realm for small-scale (or even mid-scale) installations, where users do not need access to anything outside of Proxmox VE. In this case, users are fully managed by Proxmox VE and are able to change their own passwords via the GUI.
- LDAP
-
LDAP (Lightweight Directory Access Protocol) is an open, cross-platform protocol for authentication using directory services. OpenLDAP is a popular open-source implementations of the LDAP protocol.
- Microsoft Active Directory (AD)
-
Microsoft Active Directory (AD) is a directory service for Windows domain networks and is supported as an authentication realm for Proxmox VE. It supports LDAP as an authentication protocol.
- OpenID Connect
-
OpenID Connect is implemented as an identity layer on top of the OATH 2.0 protocol. It allows clients to verify the identity of the user, based on authentication performed by an external authorization server.
Linux PAM Standard Authentication
As Linux PAM corresponds to host system users, a system user must exist on each node which the user is allowed to log in on. The user authenticates with their usual system password. This realm is added by default and can’t be removed. In terms of configurability, an administrator can choose to require two-factor authentication with logins from the realm and to set the realm as the default authentication realm.
Proxmox VE Authentication Server
The Proxmox VE authentication server realm is a simple Unix-like password store. The realm is created by default, and as with Linux PAM, the only configuration items available are the ability to require two-factor authentication for users of the realm, and to set it as the default realm for login.
Unlike the other Proxmox VE realm types, users are created and authenticated entirely through Proxmox VE, rather than authenticating against another system. Hence, you are required to set a password for this type of user upon creation.
LDAP
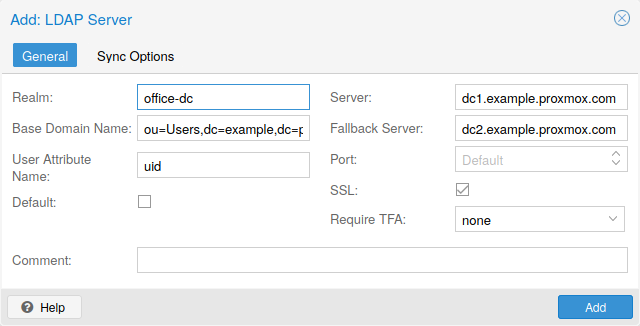
You can also use an external LDAP server for user authentication (for examle, OpenLDAP). In this realm type, users are searched under a Base Domain Name (base_dn), using the username attribute specified in the User Attribute Name (user_attr) field.
A server and optional fallback server can be configured, and the connection can be encrypted via SSL. Furthermore, filters can be configured for directories and groups. Filters allow you to further limit the scope of the realm.
For instance, if a user is represented via the following LDIF dataset:
# user1 of People at ldap-test.com
dn: uid=user1,ou=People,dc=ldap-test,dc=com
objectClass: top
objectClass: person
objectClass: organizationalPerson
objectClass: inetOrgPerson
uid: user1
cn: Test User 1
sn: Testers
description: This is the first test user.
The Base Domain Name would be ou=People,dc=ldap-test,dc=com and the user attribute would be uid.
If Proxmox VE needs to authenticate (bind) to the LDAP server before being able to query and authenticate users, a bind domain name can be configured via the bind_dn property in /etc/pve/domains.cfg. Its password then has to be stored in /etc/pve/priv/ldap/<realmname>.pw (for example, /etc/pve/priv/ldap/my-ldap.pw). This file should contain a single line with the raw password.
To verify certificates, you need to set capath. You can set it either directly to the CA certificate of your LDAP server, or to the system path containing all trusted CA certificates (/etc/ssl/certs). Additionally, you need to set the verify option, which can also be done over the web interface.
The main configuration options for an LDAP server realm are as follows:
-
Realm (realm): The realm identifier for Proxmox VE users
-
Base Domain Name (base_dn): The directory which users are searched under
-
User Attribute Name (user_attr): The LDAP attribute containing the username that users will log in with
-
Server (server1): The server hosting the LDAP directory
-
Fallback Server (server2): An optional fallback server address, in case the primary server is unreachable
-
Port (port): The port that the LDAP server listens on

|
In order to allow a particular user to authenticate using the LDAP server, you must also add them as a user of that realm from the Proxmox VE server. This can be carried out automatically with syncing. |
Microsoft Active Directory (AD)
To set up Microsoft AD as a realm, a server address and authentication domain need to be specified. Active Directory supports most of the same properties as LDAP, such as an optional fallback server, port, and SSL encryption. Furthermore, users can be added to Proxmox VE automatically via sync operations, after configuration.
As with LDAP, if Proxmox VE needs to authenticate before it binds to the AD server, you must configure the Bind User (bind_dn) property. This property is typically required by default for Microsoft AD.
The main configuration settings for Microsoft Active Directory are:
-
Realm (realm): The realm identifier for Proxmox VE users
-
Domain (domain): The AD domain of the server
-
Server (server1): The FQDN or IP address of the server
-
Fallback Server (server2): An optional fallback server address, in case the primary server is unreachable
-
Port (port): The port that the Microsoft AD server listens on
|
|
Microsoft AD normally checks values like usernames without case sensitivity. To make Proxmox VE do the same, you can disable the default case-sensitive option by editing the realm in the web UI, or using the CLI (change the ID with the realm ID): pveum realm modify ID --case-sensitive 0 |
Syncing LDAP-Based Realms
It’s possible to automatically sync users and groups for LDAP-based realms (LDAP & Microsoft Active Directory), rather than having to add them to Proxmox VE manually. You can access the sync options from the Add/Edit window of the web interface’s Authentication panel or via the pveum realm add/modify commands. You can then carry out the sync operation from the Authentication panel of the GUI or using the following command:
pveum realm sync <realm>
Users and groups are synced to the cluster-wide configuration file, /etc/pve/user.cfg.
Attributes to Properties
If the sync response includes user attributes, they will be synced into the matching user property in the user.cfg. For example: firstname or lastname.
If the names of the attributes are not matching the Proxmox VE properties, you can set a custom field-to-field map in the config by using the sync_attributes option.
How such properties are handled if anything vanishes can be controlled via the sync options, see below.
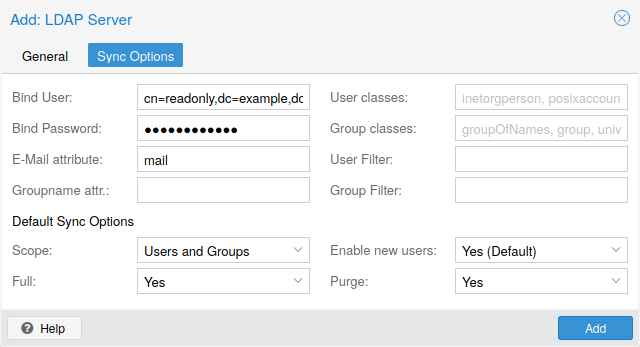
Sync Configuration
The configuration options for syncing LDAP-based realms can be found in the Sync Options tab of the Add/Edit window.
The configuration options are as follows:
-
Bind User (bind_dn): Refers to the LDAP account used to query users and groups. This account needs access to all desired entries. If it’s set, the search will be carried out via binding; otherwise, the search will be carried out anonymously. The user must be a complete LDAP formatted distinguished name (DN), for example, cn=admin,dc=example,dc=com.
-
Groupname attr. (group_name_attr): Represents the users' groups. Only entries which adhere to the usual character limitations of the user.cfg are synced. Groups are synced with -$realm attached to the name, in order to avoid naming conflicts. Please ensure that a sync does not overwrite manually created groups.
-
User classes (user_classes): Objects classes associated with users.
-
Group classes (group_classes): Objects classes associated with groups.
-
E-Mail attribute: If the LDAP-based server specifies user email addresses, these can also be included in the sync by setting the associated attribute here. From the command line, this is achievable through the --sync_attributes parameter.
-
User Filter (filter): For further filter options to target specific users.
-
Group Filter (group_filter): For further filter options to target specific groups.
|
|
Filters allow you to create a set of additional match criteria, to narrow down the scope of a sync. Information on available LDAP filter types and their usage can be found at ldap.com. |
Sync Options
In addition to the options specified in the previous section, you can also configure further options that describe the behavior of the sync operation.
These options are either set as parameters before the sync, or as defaults via the realm option sync-defaults-options.
The main options for syncing are:
-
Scope (scope): The scope of what to sync. It can be either users, groups or both.
-
Enable new (enable-new): If set, the newly synced users are enabled and can log in. The default is true.
-
Remove Vanished (remove-vanished): This is a list of options which, when activated, determine if they are removed when they are not returned from the sync response. The options are:
-
ACL (acl): Remove ACLs of users and groups which were not returned returned in the sync response. This most often makes sense together with Entry.
-
Entry (entry): Removes entries (i.e. users and groups) when they are not returned in the sync response.
-
Properties (properties): Removes properties of entries where the user in the sync response did not contain those attributes. This includes all properties, even those never set by a sync. Exceptions are tokens and the enable flag, these will be retained even with this option enabled.
-
-
Preview (dry-run): No data is written to the config. This is useful if you want to see which users and groups would get synced to the user.cfg.
Reserved characters
Certain characters are reserved (see RFC2253) and cannot be easily used in attribute values in DNs without being escaped properly.
Following characters need escaping:
-
Space ( ) at the beginning or end
-
Number sign (#) at the beginning
-
Comma (,)
-
Plus sign (+)
-
Double quote (")
-
Forward slashes (/)
-
Angle brackets (<>)
-
Semicolon (;)
-
Equals sign (=)
To use such characters in DNs, surround the attribute value in double quotes. For example, to bind with a user with the CN (Common Name) Example, User, use CN="Example, User",OU=people,DC=example,DC=com as value for bind_dn.
This applies to the base_dn, bind_dn, and group_dn attributes.
|
|
Users with colons and forward slashes cannot be synced since these are reserved characters in usernames. |
OpenID Connect
The main OpenID Connect configuration options are:
-
Issuer URL (issuer-url): This is the URL of the authorization server. Proxmox uses the OpenID Connect Discovery protocol to automatically configure further details.
While it is possible to use unencrypted http:// URLs, we strongly recommend to use encrypted https:// connections.
-
Realm (realm): The realm identifier for Proxmox VE users
-
Client ID (client-id): OpenID Client ID.
-
Client Key (client-key): Optional OpenID Client Key.
-
Autocreate Users (autocreate): Automatically create users if they do not exist. While authentication is done at the OpenID server, all users still need an entry in the Proxmox VE user configuration. You can either add them manually, or use the autocreate option to automatically add new users.
-
Username Claim (username-claim): OpenID claim used to generate the unique username (subject, username or email).
Username mapping
The OpenID Connect specification defines a single unique attribute (claim in OpenID terms) named subject. By default, we use the value of this attribute to generate Proxmox VE usernames, by simple adding @ and the realm name: ${subject}@${realm}.
Unfortunately, most OpenID servers use random strings for subject, like DGH76OKH34BNG3245SB, so a typical username would look like DGH76OKH34BNG3245SB@yourrealm. While unique, it is difficult for humans to remember such random strings, making it quite impossible to associate real users with this.
The username-claim setting allows you to use other attributes for the username mapping. Setting it to username is preferred if the OpenID Connect server provides that attribute and guarantees its uniqueness.
Another option is to use email, which also yields human readable usernames. Again, only use this setting if the server guarantees the uniqueness of this attribute.
Examples
Here is an example of creating an OpenID realm using Google. You need to replace --client-id and --client-key with the values from your Google OpenID settings.
pveum realm add myrealm1 --type openid --issuer-url https://accounts.google.com --client-id XXXX --client-key YYYY --username-claim email
The above command uses --username-claim email, so that the usernames on the Proxmox VE side look like example.user@google.com@myrealm1.
Keycloak (https://www.keycloak.org/) is a popular open source Identity and Access Management tool, which supports OpenID Connect. In the following example, you need to replace the --issuer-url and --client-id with your information:
pveum realm add myrealm2 --type openid --issuer-url https://your.server:8080/realms/your-realm --client-id XXX --username-claim username
Using --username-claim username enables simple usernames on the Proxmox VE side, like example.user@myrealm2.

|
You need to ensure that the user is not allowed to edit the username setting themselves (on the Keycloak server). |
Two-Factor Authentication
There are two ways to use two-factor authentication:
It can be required by the authentication realm, either via TOTP (Time-based One-Time Password) or YubiKey OTP. In this case, a newly created user needs to have their keys added immediately, as there is no way to log in without the second factor. In the case of TOTP, users can also change the TOTP later on, provided they can log in first.
Alternatively, users can choose to opt-in to two-factor authentication later on, even if the realm does not enforce it.
Available Second Factors
You can set up multiple second factors, in order to avoid a situation in which losing your smartphone or security key locks you out of your account permanently.
The following two-factor authentication methods are available in addition to realm-enforced TOTP and YubiKey OTP:
-
User configured TOTP (Time-based One-Time Password). A short code derived from a shared secret and the current time, it changes every 30 seconds.
-
WebAuthn (Web Authentication). A general standard for authentication. It is implemented by various security devices, like hardware keys or trusted platform modules (TPM) from a computer or smart phone.
-
Single use Recovery Keys. A list of keys which should either be printed out and locked in a secure place or saved digitally in an electronic vault. Each key can be used only once. These are perfect for ensuring that you are not locked out, even if all of your other second factors are lost or corrupt.
Before WebAuthn was supported, U2F could be setup by the user. Existing U2F factors can still be used, but it is recommended to switch to WebAuthn, once it is configured on the server.
Realm Enforced Two-Factor Authentication
This can be done by selecting one of the available methods via the TFA dropdown box when adding or editing an Authentication Realm. When a realm has TFA enabled, it becomes a requirement, and only users with configured TFA will be able to log in.
Currently there are two methods available:
- Time-based OATH (TOTP)
-
This uses the standard HMAC-SHA1 algorithm, where the current time is hashed with the user’s configured key. The time step and password length parameters are configurable.
A user can have multiple keys configured (separated by spaces), and the keys can be specified in Base32 (RFC3548) or hexadecimal notation.
Proxmox VE provides a key generation tool (oathkeygen) which prints out a random key in Base32 notation, that can be used directly with various OTP tools, such as the oathtool command-line tool, or on Android Google Authenticator, FreeOTP, andOTP or similar applications.
- YubiKey OTP
-
For authenticating via a YubiKey a Yubico API ID, API KEY and validation server URL must be configured, and users must have a YubiKey available. In order to get the key ID from a YubiKey, you can trigger the YubiKey once after connecting it via USB, and copy the first 12 characters of the typed password into the user’s Key IDs field.
Please refer to the YubiKey OTP documentation for how to use the YubiCloud or host your own verification server.
Limits and Lockout of Two-Factor Authentication
A second factor is meant to protect users if their password is somehow leaked or guessed. However, some factors could still be broken by brute force. For this reason, users will be locked out after too many failed 2nd factor login attempts.
For TOTP, 8 failed attempts will disable the user’s TOTP factors. They are unlocked when logging in with a recovery key. If TOTP was the only available factor, admin intervention is required, and it is highly recommended to require the user to change their password immediately.
Since FIDO2/Webauthn and recovery keys are less susceptible to brute force attacks, the limit there is higher (100 tries), but all second factors are blocked for an hour when exceeded.
An admin can unlock a user’s Two-Factor Authentication at any time via the user list in the UI or the command line:
pveum user tfa unlock joe@pve
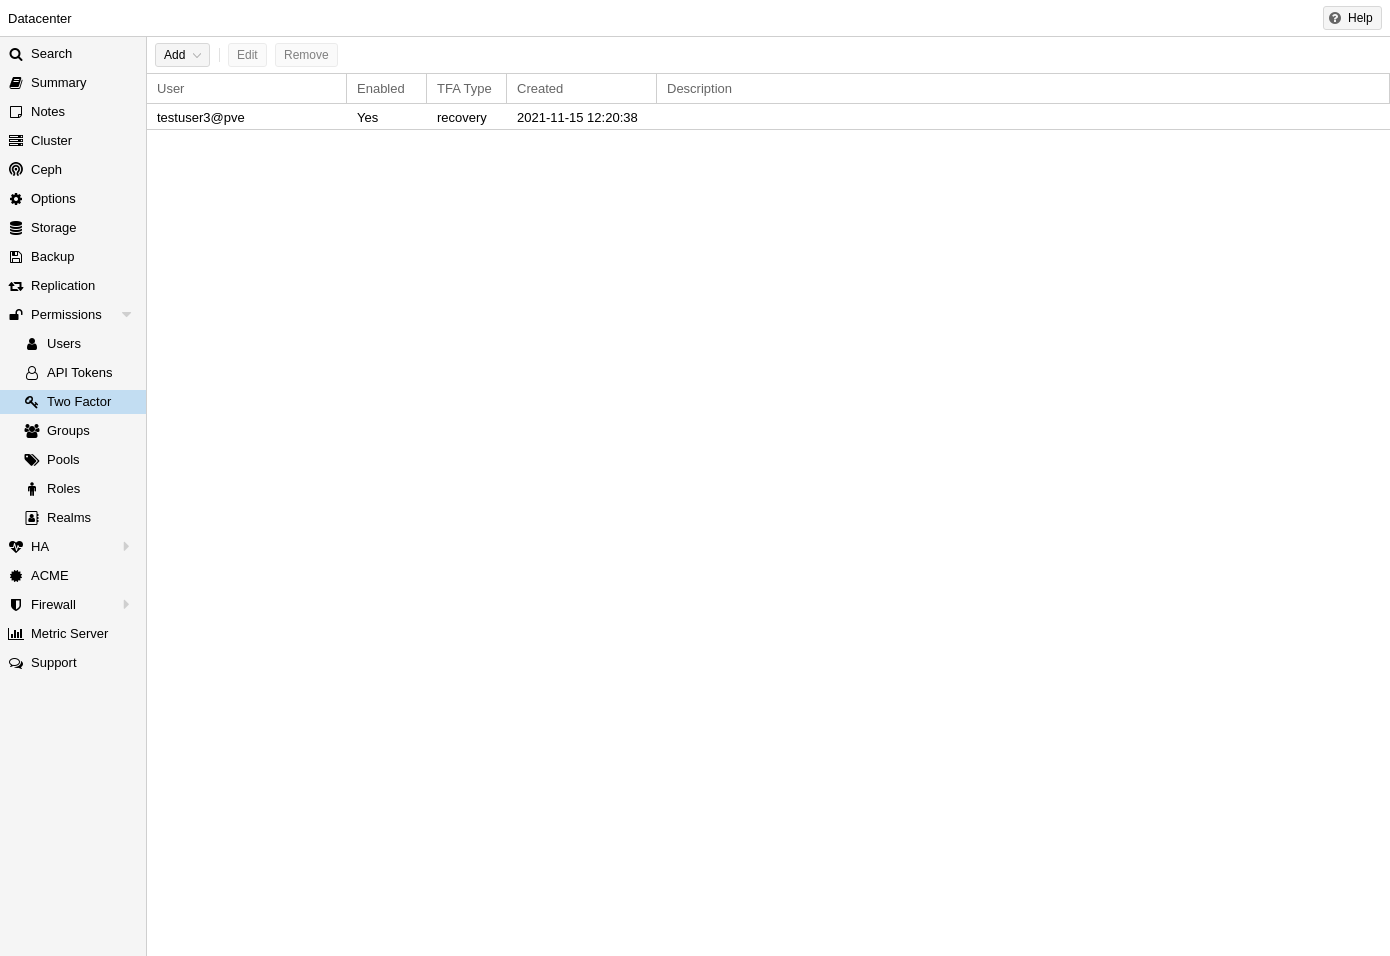
User Configured TOTP Authentication
Users can choose to enable TOTP or WebAuthn as a second factor on login, via the TFA button in the user list (unless the realm enforces YubiKey OTP).
Users can always add and use one time Recovery Keys.
After opening the TFA window, the user is presented with a dialog to set up TOTP authentication. The Secret field contains the key, which can be randomly generated via the Randomize button. An optional Issuer Name can be added to provide information to the TOTP app about what the key belongs to. Most TOTP apps will show the issuer name together with the corresponding OTP values. The username is also included in the QR code for the TOTP app.
After generating a key, a QR code will be displayed, which can be used with most OTP apps such as FreeOTP. The user then needs to verify the current user password (unless logged in as root), as well as the ability to correctly use the TOTP key, by typing the current OTP value into the Verification Code field and pressing the Apply button.
TOTP

There is no server setup required. Simply install a TOTP app on your smartphone (for example, FreeOTP) and use the Proxmox Backup Server web interface to add a TOTP factor.
WebAuthn
For WebAuthn to work, you need to have two things:
-
A trusted HTTPS certificate (for example, by using Let’s Encrypt). While it probably works with an untrusted certificate, some browsers may warn or refuse WebAuthn operations if it is not trusted.
-
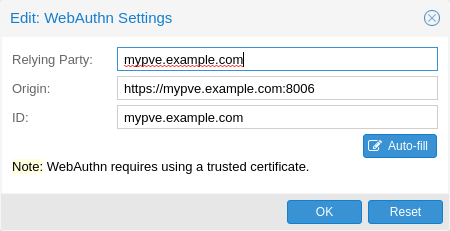
Setup the WebAuthn configuration (see Datacenter → Options → WebAuthn Settings in the Proxmox VE web interface). This can be auto-filled in most setups.
Once you have fulfilled both of these requirements, you can add a WebAuthn configuration in the Two Factor panel under Datacenter → Permissions → Two Factor.
Recovery Keys
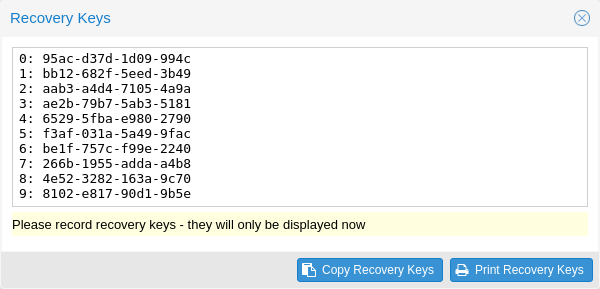
Recovery key codes do not need any preparation; you can simply create a set of recovery keys in the Two Factor panel under Datacenter → Permissions → Two Factor.
|
|
There can only be one set of single-use recovery keys per user at any time. |
Server Side Webauthn Configuration
To allow users to use WebAuthn authentication, it is necessaary to use a valid domain with a valid SSL certificate, otherwise some browsers may warn or refuse to authenticate altogether.
|
|
Changing the WebAuthn configuration may render all existing WebAuthn registrations unusable! |
This is done via /etc/pve/datacenter.cfg. For instance:
webauthn: rp=mypve.example.com,origin=https://mypve.example.com:8006,id=mypve.example.com
Server Side U2F Configuration
|
|
It is recommended to use WebAuthn instead. |
To allow users to use U2F authentication, it may be necessary to use a valid
domain with a valid SSL certificate, otherwise, some browsers may print
a warning or reject U2F usage altogether. Initially, an AppId
[AppId https://developers.yubico.com/U2F/App_ID.html]
needs to be configured.
|
|
Changing the AppId will render all existing U2F registrations unusable! |
This is done via /etc/pve/datacenter.cfg. For instance:
u2f: appid=https://mypve.example.com:8006
For a single node, the AppId can simply be the address of the web interface, exactly as it is used in the browser, including the https:// and the port, as shown above. Please note that some browsers may be more strict than others when matching AppIds.
When using multiple nodes, it is best to have a separate https server
providing an appid.json
[Multi-facet apps: https://developers.yubico.com/U2F/App_ID.html]
file, as it seems to be compatible with most
browsers. If all nodes use subdomains of the same top level domain, it may be
enough to use the TLD as AppId. It should however be noted that some browsers
may not accept this.
|
|
A bad AppId will usually produce an error, but we have encountered situations when this does not happen, particularly when using a top level domain AppId for a node that is accessed via a subdomain in Chromium. For this reason it is recommended to test the configuration with multiple browsers, as changing the AppId later will render existing U2F registrations unusable. |
Activating U2F as a User
To enable U2F authentication, open the TFA window’s U2F tab, type in the current password (unless logged in as root), and press the Register button. If the server is set up correctly and the browser accepts the server’s provided AppId, a message will appear prompting the user to press the button on the U2F device (if it is a YubiKey, the button light should be toggling on and off steadily, roughly twice per second).
Firefox users may need to enable security.webauth.u2f via about:config before they can use a U2F token.
Permission Management
In order for a user to perform an action (such as listing, modifying or deleting parts of a VM’s configuration), the user needs to have the appropriate permissions.
Proxmox VE uses a role and path based permission management system. An entry in the permissions table allows a user, group or token to take on a specific role when accessing an object or path. This means that such an access rule can be represented as a triple of (path, user, role), (path, group, role) or (path, token, role), with the role containing a set of allowed actions, and the path representing the target of these actions.
Roles
A role is simply a list of privileges. Proxmox VE comes with a number of predefined roles, which satisfy most requirements.
-
Administrator: has full privileges
-
NoAccess: has no privileges (used to forbid access)
-
PVEAdmin: can do most tasks, but has no rights to modify system settings (Sys.PowerMgmt, Sys.Modify, Realm.Allocate) or permissions (Permissions.Modify)
-
PVEAuditor: has read only access
-
PVEDatastoreAdmin: create and allocate backup space and templates
-
PVEDatastoreUser: allocate backup space and view storage
-
PVEMappingAdmin: manage resource mappings
-
PVEMappingUser: view and use resource mappings
-
PVEPoolAdmin: allocate pools
-
PVEPoolUser: view pools
-
PVESDNAdmin: manage SDN configuration
-
PVESDNUser: access to bridges/vnets
-
PVESysAdmin: audit, system console and system logs
-
PVETemplateUser: view and clone templates
-
PVEUserAdmin: manage users
-
PVEVMAdmin: fully administer VMs
-
PVEVMUser: view, backup, configure CD-ROM, VM console, VM power management
You can see the whole set of predefined roles in the GUI.
You can add new roles via the GUI or the command line.
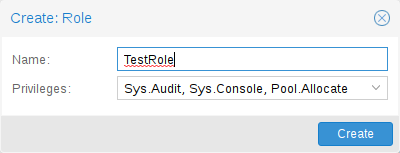
From the GUI, navigate to the Permissions → Roles tab from Datacenter and click on the Create button. There you can set a role name and select any desired privileges from the Privileges drop-down menu.
To add a role through the command line, you can use the pveum CLI tool, for example:
pveum role add VM_Power-only --privs "VM.PowerMgmt VM.Console"
pveum role add Sys_Power-only --privs "Sys.PowerMgmt Sys.Console"
|
|
Roles starting with PVE are always builtin, custom roles are not allowed use this reserved prefix. |
Privileges
A privilege is the right to perform a specific action. To simplify management, lists of privileges are grouped into roles, which can then be used in the permission table. Note that privileges cannot be directly assigned to users and paths without being part of a role.
We currently support the following privileges:
- Node / System related privileges
-
-
Group.Allocate: create/modify/remove groups
-
Mapping.Audit: view resource mappings
-
Mapping.Modify: manage resource mappings
-
Mapping.Use: use resource mappings
-
Permissions.Modify: modify access permissions
-
Pool.Allocate: create/modify/remove a pool
-
Pool.Audit: view a pool
-
Realm.AllocateUser: assign user to a realm
-
Realm.Allocate: create/modify/remove authentication realms
-
SDN.Allocate: manage SDN configuration
-
SDN.Audit: view SDN configuration
-
Sys.Audit: view node status/config, Corosync cluster config, and HA config
-
Sys.Console: console access to node
-
Sys.Incoming: allow incoming data streams from other clusters (experimental)
-
Sys.Modify: create/modify/remove node network parameters
-
Sys.PowerMgmt: node power management (start, stop, reset, shutdown, …)
-
Sys.Syslog: view syslog
-
User.Modify: create/modify/remove user access and details.
-
- Virtual machine related privileges
-
-
SDN.Use: access SDN vnets and local network bridges
-
VM.Allocate: create/remove VM on a server
-
VM.Audit: view VM config
-
VM.Backup: backup/restore VMs
-
VM.Clone: clone/copy a VM
-
VM.Config.CDROM: eject/change CD-ROM
-
VM.Config.CPU: modify CPU settings
-
VM.Config.Cloudinit: modify Cloud-init parameters
-
VM.Config.Disk: add/modify/remove disks
-
VM.Config.HWType: modify emulated hardware types
-
VM.Config.Memory: modify memory settings
-
VM.Config.Network: add/modify/remove network devices
-
VM.Config.Options: modify any other VM configuration
-
VM.Console: console access to VM
-
VM.Migrate: migrate VM to alternate server on cluster
-
VM.Monitor: access to VM monitor (kvm)
-
VM.PowerMgmt: power management (start, stop, reset, shutdown, …)
-
VM.Snapshot.Rollback: rollback VM to one of its snapshots
-
VM.Snapshot: create/delete VM snapshots
-
- Storage related privileges
-
-
Datastore.Allocate: create/modify/remove a datastore and delete volumes
-
Datastore.AllocateSpace: allocate space on a datastore
-
Datastore.AllocateTemplate: allocate/upload templates and ISO images
-
Datastore.Audit: view/browse a datastore
-
|
|
Both Permissions.Modify and Sys.Modify should be handled with care, as they allow modifying aspects of the system and its configuration that are dangerous or sensitive. |
|
|
Carefully read the section about inheritance below to understand how assigned roles (and their privileges) are propagated along the ACL tree. |
Objects and Paths
Access permissions are assigned to objects, such as virtual machines, storages or resource pools. We use file system like paths to address these objects. These paths form a natural tree, and permissions of higher levels (shorter paths) can optionally be propagated down within this hierarchy.
Paths can be templated. When an API call requires permissions on a templated path, the path may contain references to parameters of the API call. These references are specified in curly braces. Some parameters are implicitly taken from the API call’s URI. For instance, the permission path /nodes/{node} when calling /nodes/mynode/status requires permissions on /nodes/mynode, while the path {path} in a PUT request to /access/acl refers to the method’s path parameter.
Some examples are:
-
/nodes/{node}: Access to Proxmox VE server machines
-
/vms: Covers all VMs
-
/vms/{vmid}: Access to specific VMs
-
/storage/{storeid}: Access to a specific storage
-
/pool/{poolname}: Access to resources contained in a specific pool
-
/access/groups: Group administration
-
/access/realms/{realmid}: Administrative access to realms
Inheritance
As mentioned earlier, object paths form a file system like tree, and permissions can be inherited by objects down that tree (the propagate flag is set by default). We use the following inheritance rules:
-
Permissions for individual users always replace group permissions.
-
Permissions for groups apply when the user is member of that group.
-
Permissions on deeper levels replace those inherited from an upper level.
-
NoAccess cancels all other roles on a given path.
Additionally, privilege separated tokens can never have permissions on any given path that their associated user does not have.
Pools
Pools can be used to group a set of virtual machines and datastores. You can then simply set permissions on pools (/pool/{poolid}), which are inherited by all pool members. This is a great way to simplify access control.
Which Permissions Do I Need?
The required API permissions are documented for each individual method, and can be found at https://pve.proxmox.com/pve-docs/api-viewer/.
The permissions are specified as a list, which can be interpreted as a tree of logic and access-check functions:
- ["and", <subtests>...] and ["or", <subtests>...]
-
Each(and) or any(or) further element in the current list has to be true.
- ["perm", <path>, [ <privileges>... ], <options>...]
-
The path is a templated parameter (see Objects and Paths). All (or, if the any option is used, any) of the listed privileges must be allowed on the specified path. If a require-param option is specified, then its specified parameter is required even if the API call’s schema otherwise lists it as being optional.
- ["userid-group", [ <privileges>... ], <options>...]
-
The caller must have any of the listed privileges on /access/groups. In addition, there are two possible checks, depending on whether the groups_param option is set:
-
groups_param is set: The API call has a non-optional groups parameter and the caller must have any of the listed privileges on all of the listed groups.
-
groups_param is not set: The user passed via the userid parameter must exist and be part of a group on which the caller has any of the listed privileges (via the /access/groups/<group> path).
-
- ["userid-param", "self"]
-
The value provided for the API call’s userid parameter must refer to the user performing the action (usually in conjunction with or, to allow users to perform an action on themselves, even if they don’t have elevated privileges).
- ["userid-param", "Realm.AllocateUser"]
-
The user needs Realm.AllocateUser access to /access/realm/<realm>, with <realm> referring to the realm of the user passed via the userid parameter. Note that the user does not need to exist in order to be associated with a realm, since user IDs are passed in the form of <username>@<realm>.
- ["perm-modify", <path>]
-
The path is a templated parameter (see Objects and Paths). The user needs either the Permissions.Modify privilege or, depending on the path, the following privileges as a possible substitute:
-
/storage/...: requires 'Datastore.Allocate`
-
/vms/...: requires 'VM.Allocate`
-
/pool/...: requires 'Pool.Allocate`
If the path is empty, Permissions.Modify on /access is required.
If the user does not have the Permissions.Modify privilege, they can only delegate subsets of their own privileges on the given path (e.g., a user with PVEVMAdmin could assign PVEVMUser, but not PVEAdmin).
-
Command-line Tool
Most users will simply use the GUI to manage users. But there is also a fully featured command-line tool called pveum (short for “Proxmox VE User Manager”). Please note that all Proxmox VE command-line tools are wrappers around the API, so you can also access those functions through the REST API.
Here are some simple usage examples. To show help, type:
pveum
or (to show detailed help about a specific command)
pveum help user addCreate a new user:
pveum user add testuser@pve -comment "Just a test"Set or change the password (not all realms support this):
pveum passwd testuser@pve
Disable a user:
pveum user modify testuser@pve -enable 0Create a new group:
pveum group add testgroup
Create a new role:
pveum role add PVE_Power-only -privs "VM.PowerMgmt VM.Console"Real World Examples
Administrator Group
It is possible that an administrator would want to create a group of users with full administrator rights (without using the root account).
To do this, first define the group:
pveum group add admin -comment "System Administrators"Then assign the role:
pveum acl modify / -group admin -role AdministratorFinally, you can add users to the new admin group:
pveum user modify testuser@pve -group admin
Auditors
You can give read only access to users by assigning the PVEAuditor role to users or groups.
Example 1: Allow user joe@pve to see everything
pveum acl modify / -user joe@pve -role PVEAuditorExample 2: Allow user joe@pve to see all virtual machines
pveum acl modify /vms -user joe@pve -role PVEAuditor
Delegate User Management
If you want to delegate user management to user joe@pve, you can do that with:
pveum acl modify /access -user joe@pve -role PVEUserAdmin
User joe@pve can now add and remove users, and change other user attributes, such as passwords. This is a very powerful role, and you most likely want to limit it to selected realms and groups. The following example allows joe@pve to modify users within the realm pve, if they are members of group customers:
 pveum acl modify /access/realm/pve -user joe@pve -role PVEUserAdmin
 pveum acl modify /access/groups/customers -user joe@pve -role PVEUserAdmin
|
|
The user is able to add other users, but only if they are members of the group customers and within the realm pve. |
Limited API Token for Monitoring
Permissions on API tokens are always a subset of those of their corresponding user, meaning that an API token can’t be used to carry out a task that the backing user has no permission to do. This section will demonstrate how you can use an API token with separate privileges, to limit the token owner’s permissions further.
Give the user joe@pve the role PVEVMAdmin on all VMs:
pveum acl modify /vms -user joe@pve -role PVEVMAdmin
Add a new API token with separate privileges, which is only allowed to view VM information (for example, for monitoring purposes):
 pveum user token add joe@pve monitoring -privsep 1
 pveum acl modify /vms -token 'joe@pve!monitoring' -role PVEAuditor
Verify the permissions of the user and token:
 pveum user permissions joe@pve
 pveum user token permissions joe@pve monitoring
Resource Pools
An enterprise is usually structured into several smaller departments, and it is common that you want to assign resources and delegate management tasks to each of these. Let’s assume that you want to set up a pool for a software development department. First, create a group:
pveum group add developers -comment "Our software developers"Now we create a new user which is a member of that group:
pveum user add developer1@pve -group developers -password
|
|
The "-password" parameter will prompt you for a password |
Then we create a resource pool for our development department to use:
pveum pool add dev-pool --comment "IT development pool"Finally, we can assign permissions to that pool:
pveum acl modify /pool/dev-pool/ -group developers -role PVEAdminOur software developers can now administer the resources assigned to that pool.