Proxmox VE is based on Debian. This is why the install disk images (ISO files) provided by Proxmox include a complete Debian system (Debian 10 Buster for Proxmox VE version 6.x) as well as all necessary Proxmox VE packages.
The installer will guide through the setup, allowing you to partition the local disk(s), apply basic system configurations (for example, timezone, language, network) and install all required packages. This process should not take more than a few minutes. Installing with the provided ISO is the recommended method for new and existing users.
Alternatively, Proxmox VE can be installed on top of an existing Debian system. This option is only recommended for advanced users because detailed knowledge about Proxmox VE is required.
System Requirements
We recommend using high quality server hardware, when running Proxmox VE in production. To further decrease the impact of a failed host, you can run Proxmox VE in a cluster with highly available (HA) virtual machines and containers.
Proxmox VE can use local storage (DAS), SAN, NAS, and distributed storage like Ceph RBD. For details see chapter storage.
Minimum Requirements, for Evaluation
These minimum requirements are for evaluation purposes only and should not be used in production.
-
CPU: 64bit (Intel EMT64 or AMD64)
-
Intel VT/AMD-V capable CPU/Mainboard for KVM full virtualization support
-
RAM: 1 GB RAM, plus additional RAM needed for guests
-
Hard drive
-
One network card (NIC)
Recommended System Requirements
-
Intel EMT64 or AMD64 with Intel VT/AMD-V CPU flag.
-
Memory: Minimum 2 GB for the OS and Proxmox VE services, plus designated memory for guests. For Ceph and ZFS, additional memory is required; approximately 1GB of memory for every TB of used storage.
-
Fast and redundant storage, best results are achieved with SSDs.
-
OS storage: Use a hardware RAID with battery protected write cache (“BBU”) or non-RAID with ZFS (optional SSD for ZIL).
-
VM storage:
-
For local storage, use either a hardware RAID with battery backed write cache (BBU) or non-RAID for ZFS and Ceph. Neither ZFS nor Ceph are compatible with a hardware RAID controller.
-
Shared and distributed storage is possible.
-
-
Redundant (Multi-)Gbit NICs, with additional NICs depending on the preferred storage technology and cluster setup.
-
For PCI(e) passthrough the CPU needs to support the VT-d/AMD-d flag.
Simple Performance Overview
To get an overview of the CPU and hard disk performance on an installed Proxmox VE system, run the included pveperf tool.

|
This is just a very quick and general benchmark. More detailed tests are recommended, especially regarding the I/O performance of your system. |
Supported Web Browsers for Accessing the Web Interface
To access the web-based user interface, we recommend using one of the following browsers:
-
Firefox, a release from the current year, or the latest Extended Support Release
-
Chrome, a release from the current year
-
Microsoft’s currently supported version of Edge
-
Safari, a release from the current year
When accessed from a mobile device, Proxmox VE will show a lightweight, touch-based interface.
Prepare Installation Media
Download the installer ISO image from: https://www.proxmox.com/en/downloads/category/iso-images-pve
The Proxmox VE installation media is a hybrid ISO image. It works in two ways:
-
An ISO image file ready to burn to a CD or DVD.
-
A raw sector (IMG) image file ready to copy to a USB flash drive (USB stick).
Using a USB flash drive to install Proxmox VE is the recommended way because it is the faster option.
Prepare a USB Flash Drive as Installation Medium
The flash drive needs to have at least 1 GB of storage available.
|
|
Do not use UNetbootin. It does not work with the Proxmox VE installation image. |

|
Make sure that the USB flash drive is not mounted and does not contain any important data. |
Instructions for GNU/Linux
On Unix-like operating system use the dd command to copy the ISO image to the USB flash drive. First find the correct device name of the USB flash drive (see below). Then run the dd command.
# dd bs=1M conv=fdatasync if=./proxmox-ve_*.iso of=/dev/XYZ
|
|
Be sure to replace /dev/XYZ with the correct device name and adapt the input filename (if) path. |

|
Be very careful, and do not overwrite the wrong disk! |
Find the Correct USB Device Name
There are two ways to find out the name of the USB flash drive. The first one is to compare the last lines of the dmesg command output before and after plugging in the flash drive. The second way is to compare the output of the lsblk command. Open a terminal and run:
# lsblk
Then plug in your USB flash drive and run the command again:
# lsblk
A new device will appear. This is the one you want to use. To be on the extra safe side check if the reported size matches your USB flash drive.
Instructions for macOS
Open the terminal (query Terminal in Spotlight).
Convert the .iso file to .img using the convert option of hdiutil for example.
# hdiutil convert -format UDRW -o proxmox-ve_*.dmg proxmox-ve_*.iso

|
macOS tends to automatically add .dmg to the output file name. |
To get the current list of devices run the command:
# diskutil list
Now insert the USB flash drive and run this command again to determine which device node has been assigned to it. (e.g., /dev/diskX).
# diskutil list
# diskutil unmountDisk /dev/diskX
|
|
replace X with the disk number from the last command. |
# sudo dd if=proxmox-ve_*.dmg of=/dev/rdiskX bs=1m
|
|
rdiskX, instead of diskX, in the last command is intended. It will increase the write speed. |
Instructions for Windows
Using Etcher
Etcher works out of the box. Download Etcher from https://etcher.io. It will guide you through the process of selecting the ISO and your USB Drive.
Using Rufus
Rufus is a more lightweight alternative, but you need to use the DD mode to make it work. Download Rufus from https://rufus.ie/. Either install it or use the portable version. Select the destination drive and the Proxmox VE ISO file.
|
|
Once you Start you have to click No on the dialog asking to download a different version of GRUB. In the next dialog select the DD mode. |
Using the Proxmox VE Installer
The installer ISO image includes the following:
-
Complete operating system (Debian Linux, 64-bit)
-
The Proxmox VE installer, which partitions the local disk(s) with ext4, xfs or ZFS and installs the operating system.
-
Proxmox VE Linux kernel with KVM and LXC support
-
Complete toolset for administering virtual machines, containers, the host system, clusters and all necessary resources
-
Web-based management interface
|
|
All existing data on the for installation selected drives will be removed during the installation process. The installer does not add boot menu entries for other operating systems. |
Please insert the prepared installation media (for example, USB flash drive or CD-ROM) and boot from it.
|
|
Make sure that booting from the installation medium (for example, USB) is enabled in your servers firmware settings. |
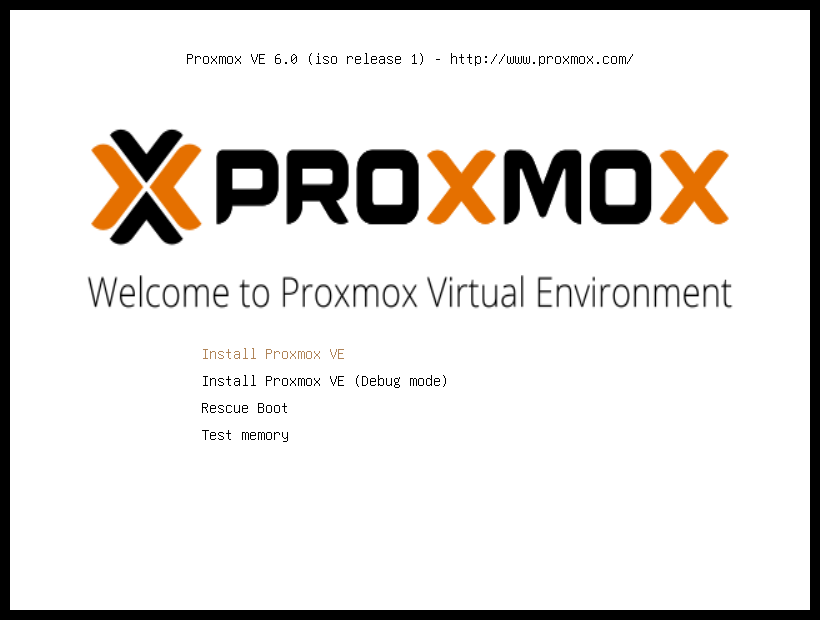
After choosing the correct entry (e.g. Boot from USB) the Proxmox VE menu will be displayed and one of the following options can be selected:
- Install Proxmox VE
-
Starts the normal installation.
|
|
It’s possible to use the installation wizard with a keyboard only. Buttons can be clicked by pressing the ALT key combined with the underlined character from the respective button. For example, ALT + N to press a Next button. |
- Install Proxmox VE (Debug mode)
-
Starts the installation in debug mode. A console will be opened at several installation steps. This helps to debug the situation if something goes wrong. To exit a debug console, press CTRL-D. This option can be used to boot a live system with all basic tools available. You can use it, for example, to repair a degraded ZFS rpool or fix the bootloader for an existing Proxmox VE setup.
- Rescue Boot
-
With this option you can boot an existing installation. It searches all attached hard disks. If it finds an existing installation, it boots directly into that disk using the Linux kernel from the ISO. This can be useful if there are problems with the boot block (grub) or the BIOS is unable to read the boot block from the disk.
- Test Memory
-
Runs memtest86+. This is useful to check if the memory is functional and free of errors.
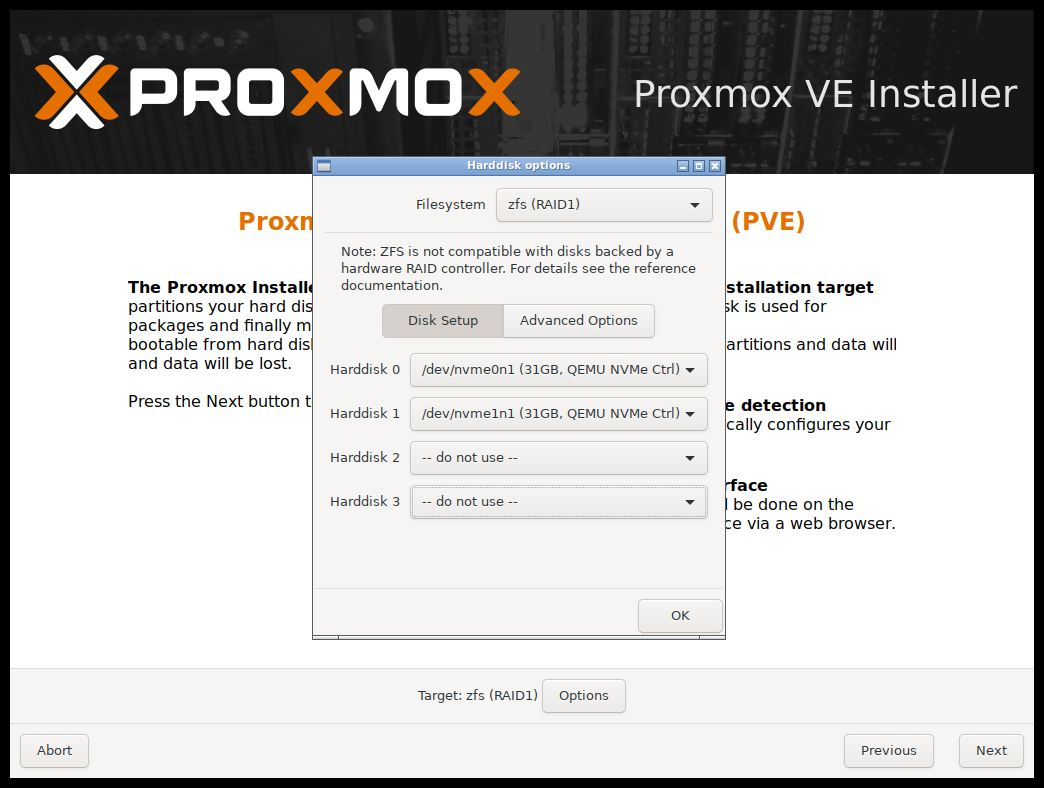
After selecting Install Proxmox VE and accepting the EULA, the prompt to select the target hard disk(s) will appear. The Options button opens the dialog to select the target file system.
The default file system is ext4. The Logical Volume Manager (LVM) is used when ext4 or xfs is selected. Additional options to restrict LVM space can also be set (see below).
Proxmox VE can be installed on ZFS. As ZFS offers several software RAID levels, this is an option for systems that don’t have a hardware RAID controller. The target disks must be selected in the Options dialog. More ZFS specific settings can be changed under Advanced Options (see below).

|
ZFS on top of any hardware RAID is not supported and can result in data loss. |
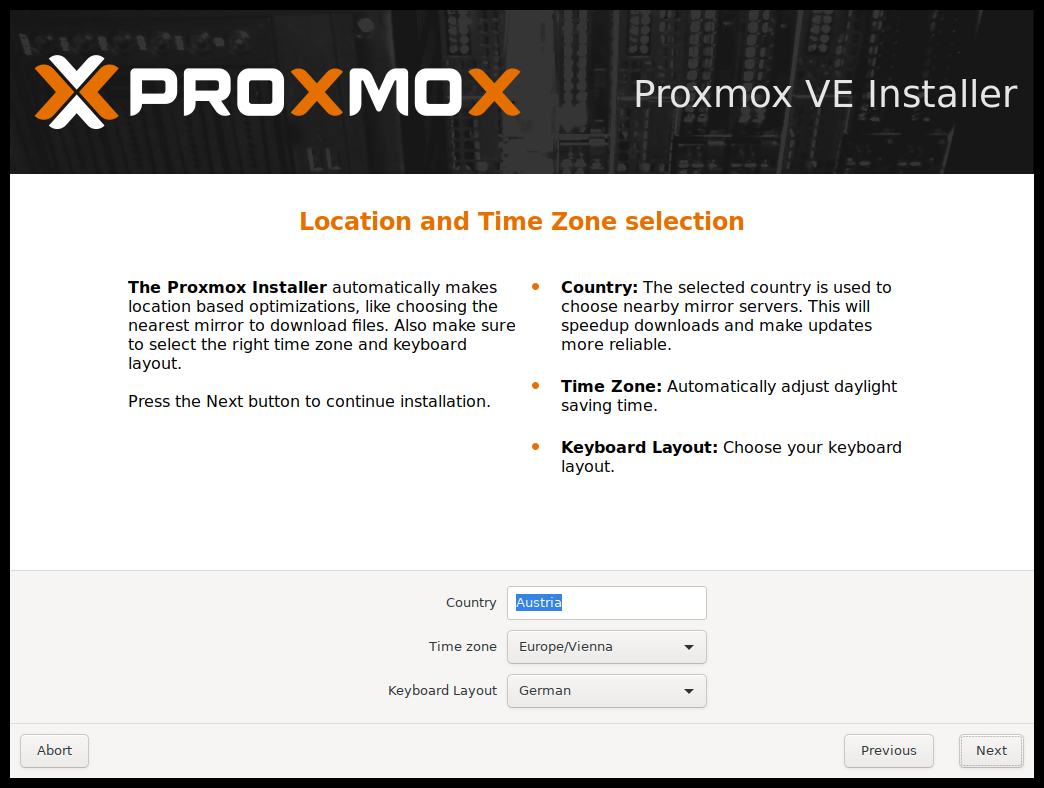
The next page asks for basic configuration options like the location, the time zone, and keyboard layout. The location is used to select a download server close by to speed up updates. The installer usually auto-detects these settings. They only need to be changed in the rare case that auto detection fails or a different keyboard layout should be used.

Next the password of the superuser (root) and an email address needs to be specified. The password must consist of at least 5 characters. It’s highly recommended to use a stronger password. Some guidelines are:
-
Use a minimum password length of 12 to 14 characters.
-
Include lowercase and uppercase alphabetic characters, numbers, and symbols.
-
Avoid character repetition, keyboard patterns, common dictionary words, letter or number sequences, usernames, relative or pet names, romantic links (current or past), and biographical information (for example ID numbers, ancestors' names or dates).
The email address is used to send notifications to the system administrator. For example:
-
Information about available package updates.
-
Error messages from periodic CRON jobs.
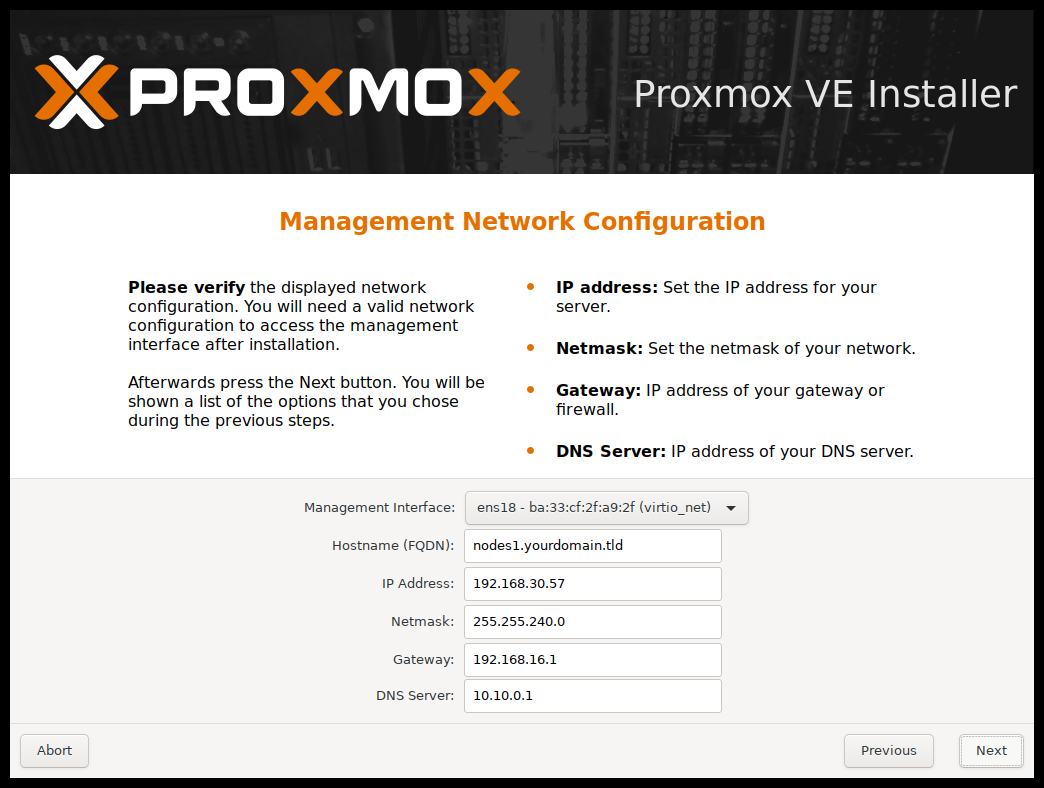
The last step is the network configuration. Please note that during installation you can either use an IPv4 or IPv6 address, but not both. To configure a dual stack node, add additional IP addresses after the installation.
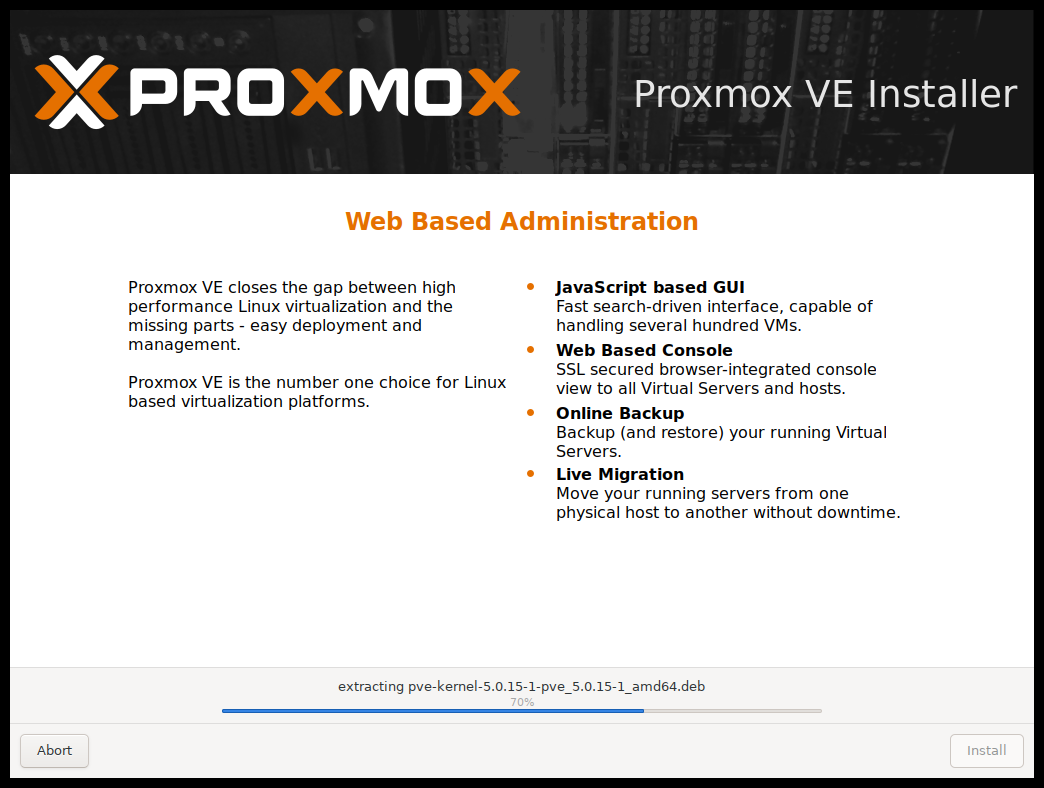
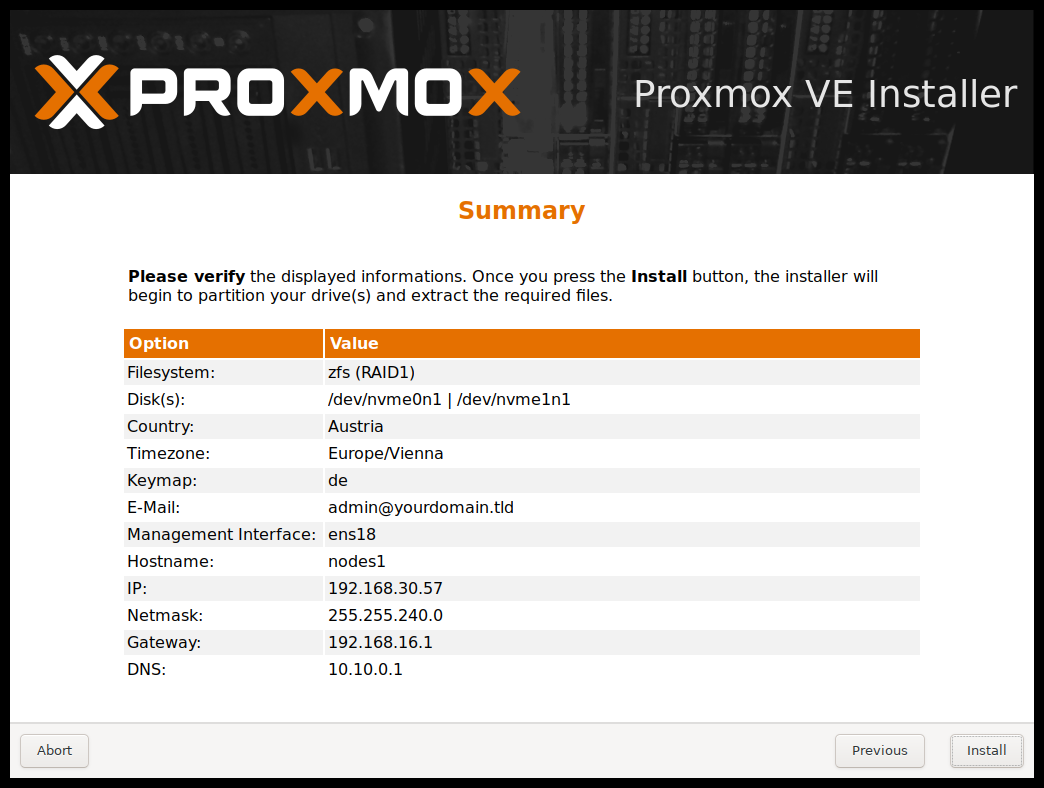
The next step shows a summary of the previously selected options. Re-check every setting and use the Previous button if a setting needs to be changed. To accept, press Install. The installation starts to format disks and copies packages to the target. Please wait until this step has finished; then remove the installation medium and restart your system.
If the installation failed check out specific errors on the second TTY (‘CTRL + ALT + F2’), ensure that the systems meets the minimum requirements. If the installation is still not working look at the how to get help chapter.
Further configuration is done via the Proxmox web interface. Point your browser to the IP address given during installation (https://youripaddress:8006).
|
|
Default login is "root" (realm PAM) and the root password is defined during the installation process. |
Advanced LVM Configuration Options
The installer creates a Volume Group (VG) called pve, and additional Logical Volumes (LVs) called root, data, and swap. To control the size of these volumes use:
- hdsize
-
Defines the total hard disk size to be used. This way you can reserve free space on the hard disk for further partitioning (for example for an additional PV and VG on the same hard disk that can be used for LVM storage).
- swapsize
-
Defines the size of the swap volume. The default is the size of the installed memory, minimum 4 GB and maximum 8 GB. The resulting value cannot be greater than hdsize/8.
If set to 0, no swap volume will be created. - maxroot
-
Defines the maximum size of the root volume, which stores the operation system. The maximum limit of the root volume size is hdsize/4.
- maxvz
-
Defines the maximum size of the data volume. The actual size of the data volume is:
datasize = hdsize - rootsize - swapsize - minfree
Where datasize cannot be bigger than maxvz.
In case of LVM thin, the data pool will only be created if datasize is bigger than 4GB.
If set to 0, no data volume will be created and the storage configuration will be adapted accordingly. - minfree
-
Defines the amount of free space left in the LVM volume group pve. With more than 128GB storage available the default is 16GB, else hdsize/8 will be used.
LVM requires free space in the VG for snapshot creation (not required for lvmthin snapshots).
Advanced ZFS Configuration Options
The installer creates the ZFS pool rpool. No swap space is created but you can reserve some unpartitioned space on the install disks for swap. You can also create a swap zvol after the installation, although this can lead to problems. (see ZFS swap notes).
- ashift
-
Defines the ashift value for the created pool. The ashift needs to be set at least to the sector-size of the underlying disks (2 to the power of ashift is the sector-size), or any disk which might be put in the pool (for example the replacement of a defective disk).
- compress
-
Defines whether compression is enabled for rpool.
- checksum
-
Defines which checksumming algorithm should be used for rpool.
- copies
-
Defines the copies parameter for rpool. Check the zfs(8) manpage for the semantics, and why this does not replace redundancy on disk-level.
- hdsize
-
Defines the total hard disk size to be used. This is useful to save free space on the hard disk(s) for further partitioning (for example to create a swap-partition). hdsize is only honored for bootable disks, that is only the first disk or mirror for RAID0, RAID1 or RAID10, and all disks in RAID-Z[123].
ZFS Performance Tips
ZFS works best with a lot of memory. If you intend to use ZFS make sure to have enough RAM available for it. A good calculation is 4GB plus 1GB RAM for each TB RAW disk space.
ZFS can use a dedicated drive as write cache, called the ZFS Intent Log (ZIL). Use a fast drive (SSD) for it. It can be added after installation with the following command:
# zpool add <pool-name> log </dev/path_to_fast_ssd>
Install Proxmox VE on Debian
Proxmox VE ships as a set of Debian packages and can be installed on to of a standard Debian installation. After configuring the repositories you need to run the following commands:
# apt-get update
# apt-get install proxmox-ve
Installing on top of an existing Debian installation looks easy, but it presumes that the base system has been installed correctly and that you know how you want to configure and use the local storage. You also need to configure the network manually.
In general, this is not trivial, especially when LVM or ZFS is used.
A detailed step by step how-to can be found on the wiki.